Building an MVC Site with Kentico Cloud – Part 3
In the previous blogs in this series, I showed you how to create a .NET Core MVC site and add content from Kentico Draft. I then showed you how to expand on the content types, nest modular content, and leverage the Deliver API to display multiple types of data. In this final post, I’ll show you how to easily add Kentico Engage to your site for activity tracking, add a contact form, and deploy the application to Azure Web Apps.
UPDATE
Since this article was published, we have released a Kentico Cloud .NET Core boilerplate project. This new project contains a number of services and features to help you implement your Kentico Cloud projects more efficiently. I recommend checking out this new boilerplate for your projects.
You can find out more about the boilerplate project here.
ORIGINAL
OK, so we’ve made it to Part 3! The first two blogs on the series were focused on setting up content and displaying it within an MVC site. With all of that in place, my next thought was to start tracking user activity while deploying my site to Azure Web Apps. Don’t worry, it’s an easy process. Take a look…
If you missed the previous posts, be sure to check out Part 1 and Part 2 of the series.
Adding Kentico Engage
Kentico Engage is the final piece of the Kentico Cloud platform I wanted to add to my site. This product provides the ability to track user activity within a site with a simple line of JavaScript. Similar to Google Analytics or other activity trackers, Kentico Engage is often placed in a master page or shared layout view so it gets included on every page. Unlike other trackers, Kentico Engage has some great auto-contact creating and mapping features, as well as the ability to manage contact information from within Kentico Cloud. Lastly, Engage includes a public API that allows you to leverage contact information and activity within your site to personalize the experience for your users.
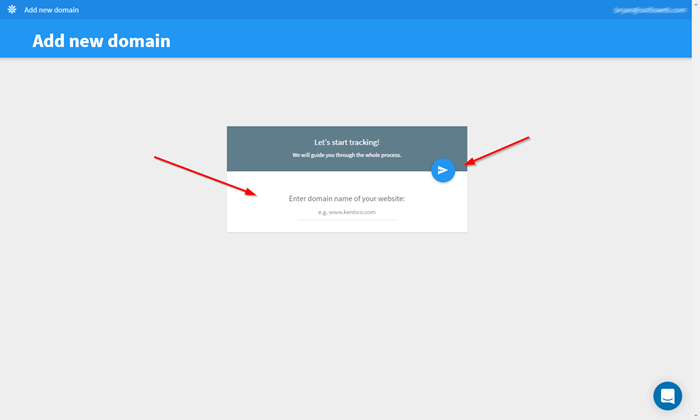
To get started with Engage, I registered my domain within the site. This produced a unique JavaScript script that I could include in my layout.
You can also access the code in your Settings section under your Kentico Cloud account.
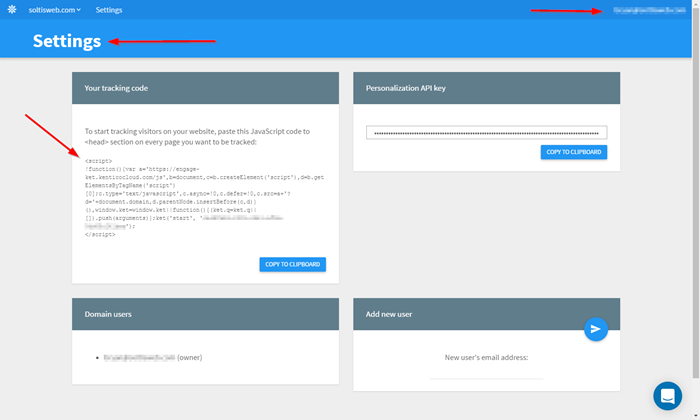
For my site, I selected to use the shared layout view as this is used by all the views within the application. I added the script in the HEAD tag.
<head>
    <meta charset="utf-8" />
    <meta name="viewport" content="width=device-width, initial-scale=1.0" />
    <meta name="description" content="Soltisweb is a space for my technical work in the .NET, Kentico, and Azure communities.">
    <title>@ViewData["Title"] - Soltisweb</title>
    <script> !function () { var a = 'https://engage-ket.kenticocloud.com/js', b = document, c = b.createElement('script'), d = b.getElementsByTagName('script')[0]; c.type = 'text/javascript', c.async = !0, c.defer = !0, c.src = a + '?d=' + document.domain, d.parentNode.insertBefore(c, d) }(), window.ket = window.ket || function () { (ket.q = ket.q || []).push(arguments) }; ket('start', 'XXXXXXXX-XXXX-XXXX-XXXX-XXXXXXXXXXXX'); </script>
</head>
Adding a Contact Form
Adding the tracking code is the first step, and allows you to get some very basic reporting on your users’ activities within the site. Mainly, you will see how many users are hitting your site, but not much else. This is because Engage doesn’t have context for who the user is. Luckily, you can quickly add this context by adding a form to the site. As long as the form captures the contact information, Kentico Engage is clever enough to pull that data and create a content.
In order to accomplish this, I added a basic form to my About page.

In my controller, I added a new Action to handle the posting of the form.
[HttpPost]
[ResponseCache(Duration = 3600)]
public async Task<ActionResult> Index(Contact contact)
{
    if (ModelState.IsValid)
    {
        try
        {
            if (await SoltiswebMVC.Helpers.HTTPHelpers.RecaptchaIsValid(Request))
            {

                StringBuilder sbMessage = new StringBuilder();

                sbMessage.Append("<strong>Name</strong><br />" + contact.Name + "<br /><br />");
                sbMessage.Append("<strong>Email</strong><br />" + contact.Email + "<br /><br />");
                sbMessage.Append("<strong>Message</strong><br />");
                sbMessage.Append(contact.Message);

                MailMessage msg = new MailMessage();
                msg.To.Add(new MailAddress("XXXXX", "XXXX"));
                msg.From = new MailAddress("XXXX", "XXX");
                msg.Subject = contact.Subject;
                msg.Body = sbMessage.ToString();
                msg.IsBodyHtml = true;

                SmtpClient mailclient = new SmtpClient();
                mailclient.UseDefaultCredentials = false;
                mailclient.Credentials = new System.Net.NetworkCredential(Configuration.GetValue<string>("AppSettings:OutlookLogin"), Configuration.GetValue<string>("AppSettings:OutlookPassword"));
                mailclient.Port = 587;
                mailclient.Host = "smtp.office365.com";
                mailclient.DeliveryMethod = SmtpDeliveryMethod.Network;
                mailclient.EnableSsl = true;
                mailclient.Send(msg);

                ModelState.Clear();
                ViewData["ContactMessageType"] = "alert-success";
                ViewData["ContactMessage"] = $" Message sent!";
            }
            else
            {
                ViewData["ContactMessageType"] = "alert-warning";
                ViewData["ContactMessage"] = $" There was a problem with the field values.";
            }
        }
        catch (Exception ex)
        {
            ViewData["ContactMessageType"] = "alert-danger";
            ViewData["ContactMessage"] = $" There was a problem! {ex.Message}";
        }
    }
In my case, I’m using Office 365 to relay the message to myself. I’m sure I will get flooded with design requests and compliments on my awesome front-end skills, so I wanted to make sure I captured all the necessary information. Because the tracking JavaScript will be included when someone access the About page, any submission they make will automatically create an account within Engage.
Note: Kentico Engage requires a “real” domain to function properly (rather than localhost). Because of this, I needed to deploy my site to Azure before I could fully test the tracking. To Azure Web Apps!
Deploying to Azure
One of my favorites parts of Azure is how easy it is work with. Just about everything is simple to do, and the site guides you through every step of the way.
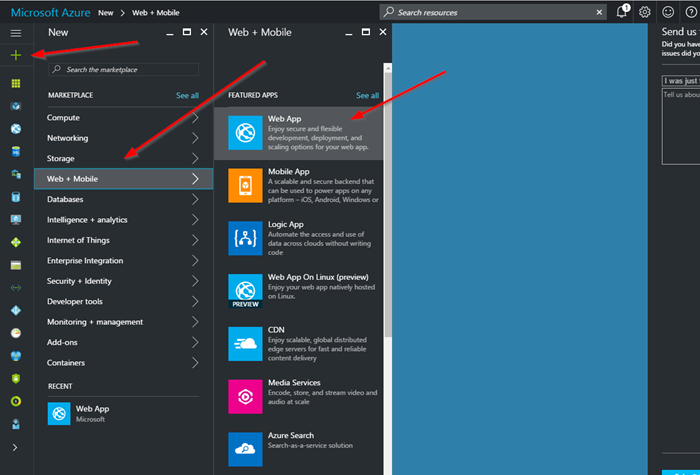
To start my deployment, I first created a new Web App inside the Azure portal.
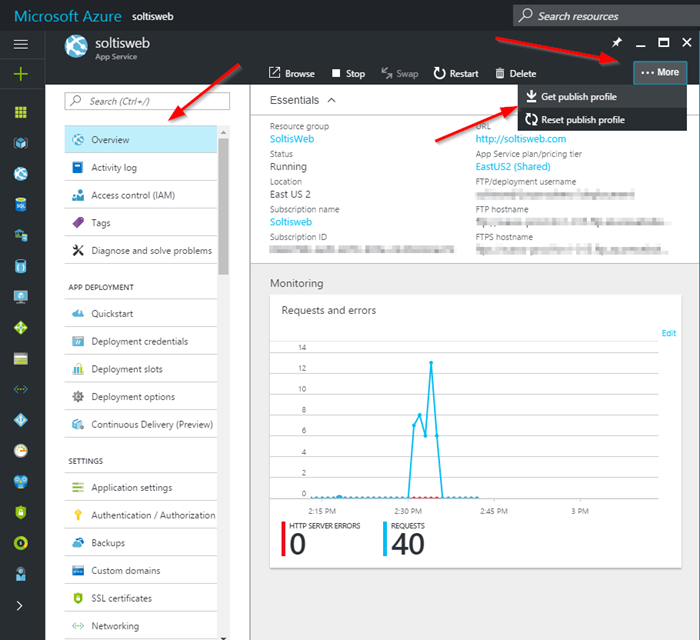
After creating my app, I downloaded the publish profile, which contains all of the credentials needed to connect to the Web App directly from Visual Studio.
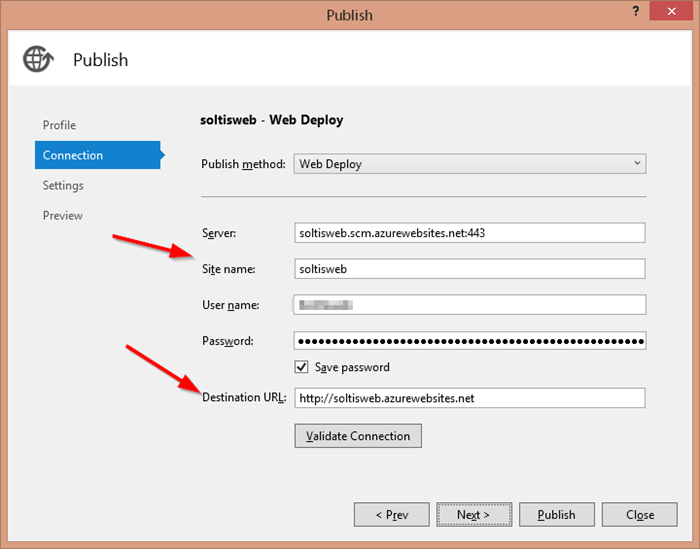
With the profile in hand, I was able to configure Visual Studio. On my project, I right clicked and selected Publish. I then selected the Import option to import my downloaded profile.

On the Connection tab, you can see all of the Azure information has been pre-filled, making integration a breeze.
I set the rest of my options and deployed my site. In Visual Studio, I tracked the deployment process in the Web Publish Activity window.
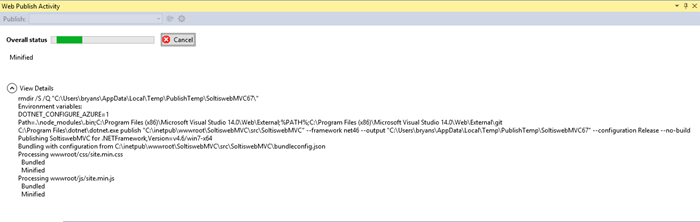
Once the publish process completed, the site opened in a new tab in my browser. I know the anticipation is intense!
Testing
With the site successfully deployed to Azure, I was ready to finally test all of my custom code. After updating my DNS for my domain, I accessed the site and confirmed the pages were displaying correctly. I browsed through the various areas of the site and everything looked good.
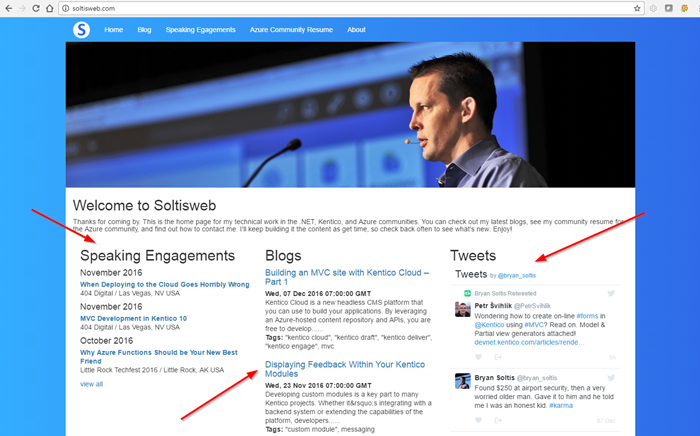
In case you didn’t notice, I added some additional CSS and layout along the way to spruce up the joint. Check out that background gradient! Yeah, I know... pretty epic!
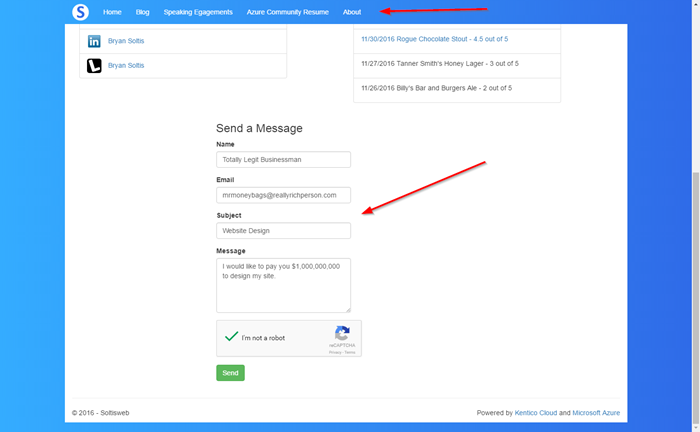
I headed over to the About page to make sure my contact form worked. I entered some info and received the email.
After completing and submitting the form, I checked Kentico Engage to see if the contact had been created. Under the Contact management analytics section, I could see a new contact had been added.
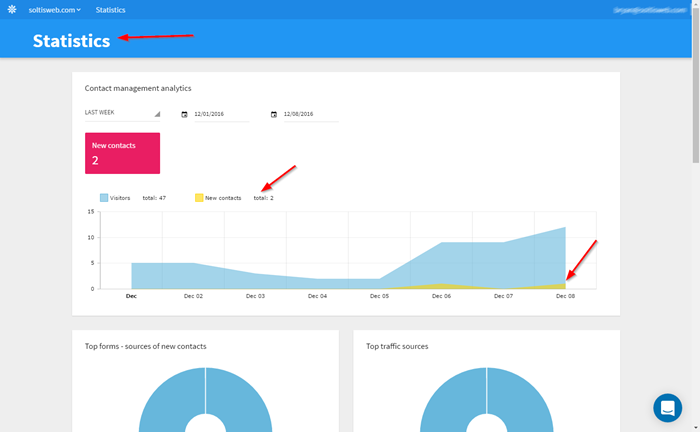
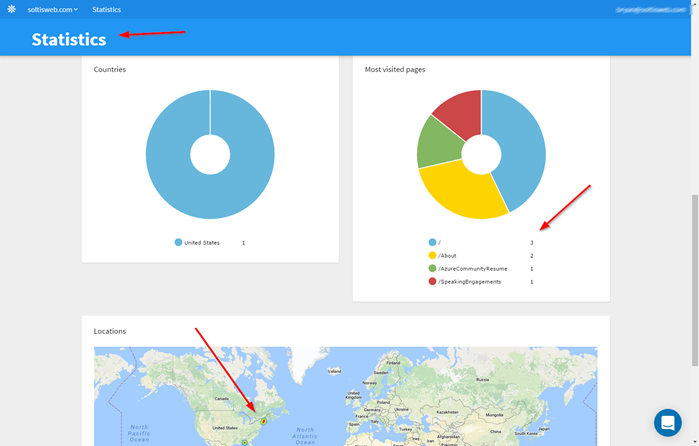
Because Kentico Engage understood the context of the contact, it also tracked other activity like pages viewed and location.
Lastly, I confirmed the new contact had been created in the Contacts section.
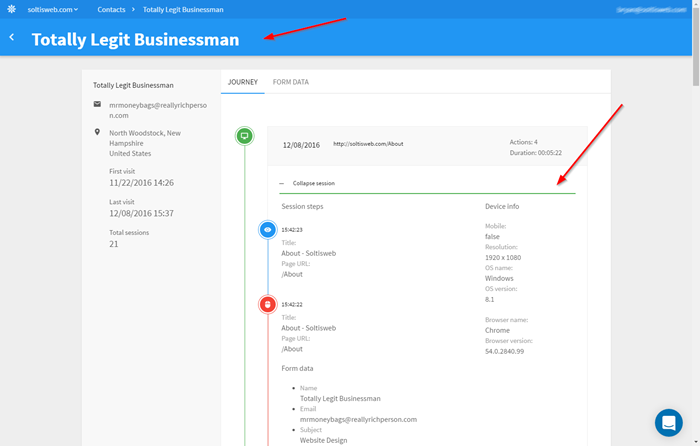
Kentico Engage auto-tracks all of the user’s activity and gives you a detailed report of their actions.
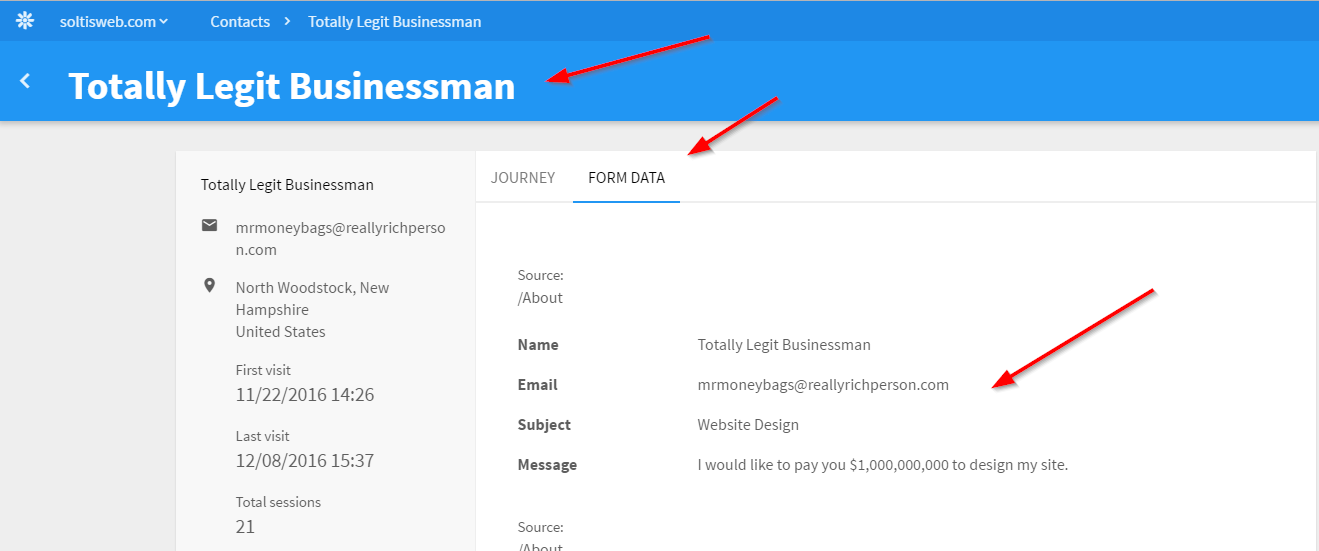
On the Form tab, you can view the actual information they submitted.
Moving Forward
As this blog series demonstrated, it’s super easy to edit your content in Draft and display it within your site. Whether that’s a .NET Core MVC site like mine, or an open-source application you created, using the Deliver API is a straight forward process and allows your build out your applications quickly. With Kentico Engage, you can track user activity and create contacts based on their data. Kentico Cloud is designed to work with many types of architectures and platforms, so feel free to choose the language that fits you best.
In the future, I plan to use the Engage API to start customizing my users’ experiences. Because I’m capturing their contact information and activity, I can easily display customized content or other personalization techniques to ensure that everyone who comes to the site has the best experience possible.
I hope this blog series showed you a little of what’s possible with Kentico Cloud (and showed off my amazing design skills). If you haven’t checked it out yet, you should! It’s a very powerful platform and I can’t wait to see what you build with it. Good luck!
This blog is intended for informational purposes only and provides an example of one of the many ways to accomplish the described task. Always consult Kentico Documentation for the best practices and additional examples that may be more effective in your specific situation.