Building an MVC site with Kentico Cloud – Part 2
In Part 1 of this blog series, I showed you how to create content types in Kentico Draft, add content via the tool, and display it within an MVC site using Kentico Deliver. Part 2 will include expanding on the content types, adding more dynamic content, and updating the site to display the new data. It’s a good bit of code, but a simple process to get your site running with Kentico Cloud.
UPDATE
Since this article was published, we have released a Kentico Cloud .NET Core boilerplate project. This new project contains a number of services and features to help you implement your Kentico Cloud projects more efficiently. I recommend checking out this new boilerplate for your projects.
You can find out more about the boilerplate project here.
ORIGINAL
If you haven’t been following this blog series, you should know it’s all about building an MVC site with Kentico Cloud, a new cloud-based content management tool. Through the use of Kentico Deliver developers easily host all of their content in the cloud and develop nearly any application to display their data to their users. It’s a big change from the “let’s install a CMS and run everything from there” model and opens up a ton of new avenues for companies looking to simplify their content management, but still develop in the languages and tools that fit their needs.
In Part 1, I walked you through the following:
- Defining content types in Kentico Draft
- Entering content in Kentico Draft
- Creating a very awesome MVC site
- Adding the Kentico Deliver API
- Displaying Kentico Draft content within the site
Building on my previous work, I wanted to show more of my experience as I transitioned my own site (http://soltisweb.com) over to use Kentico Cloud and MVC. So, what’s in Part 2?
Adding More Content Types
Once I had the site running and pulling content from Draft, I immediately want to add more. In order to do that, I need to define a few more content types. These would be “logical” definitions for different types of information. In my case, it included a few new types:
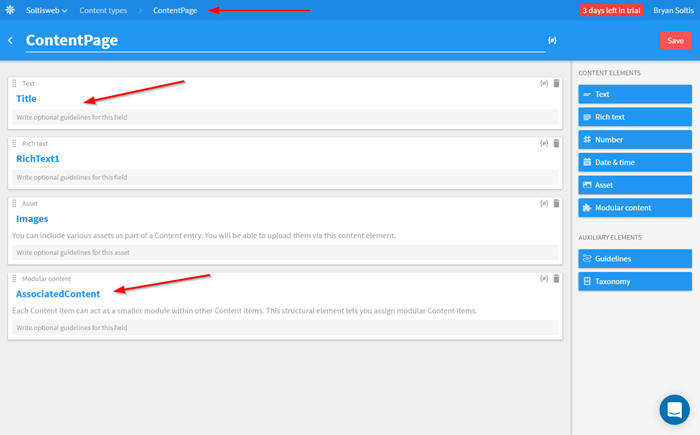
ContentPage
This content type is a generic container for pages of the site. Think of it as a template for any page within the application. Because of that, I added a few standard elements that I knew I would want on each page. Note the use of the Modular content element. This allowed me to associate nested items for the page if needed.
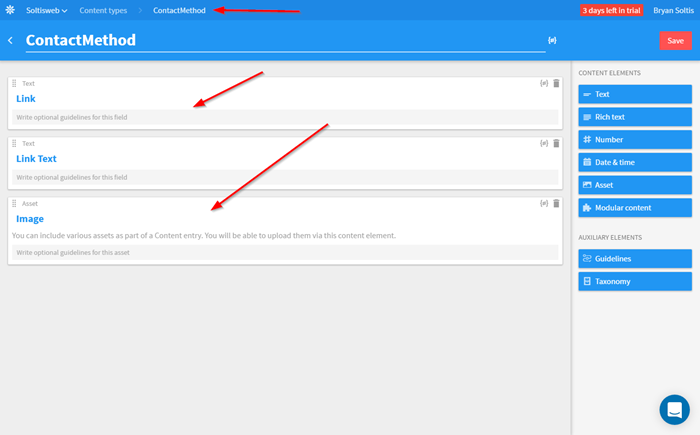
ContactMethod
In an effort to make as many parts as dynamic as possible, I opted to create this content type specifically for the different types of contact methods I displayed. These include fields for a link, link text, and asset element to hold the icon.
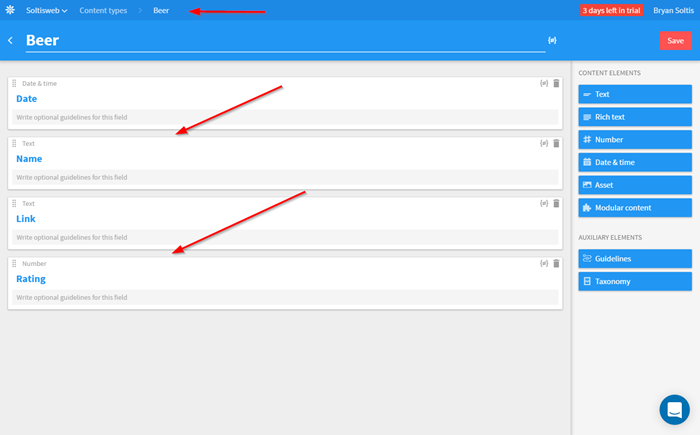
Beer
Because this is my real site, I figured “Why not have some content that’s really important—Beer!” For this content, I wanted to store a name, link, date tested, and a rating.
Adding New Content
With the new content types in place, I added my new content.
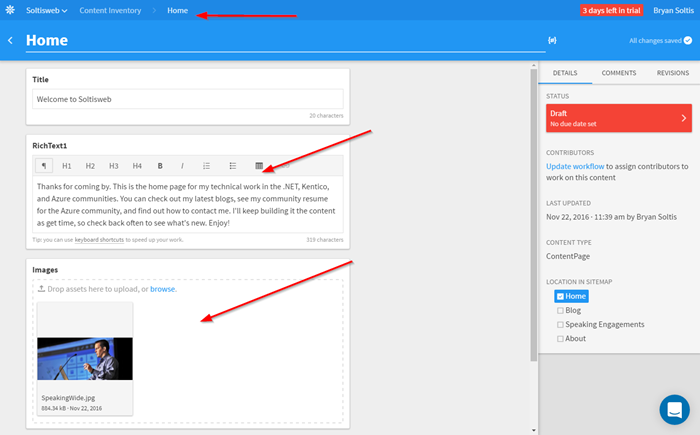
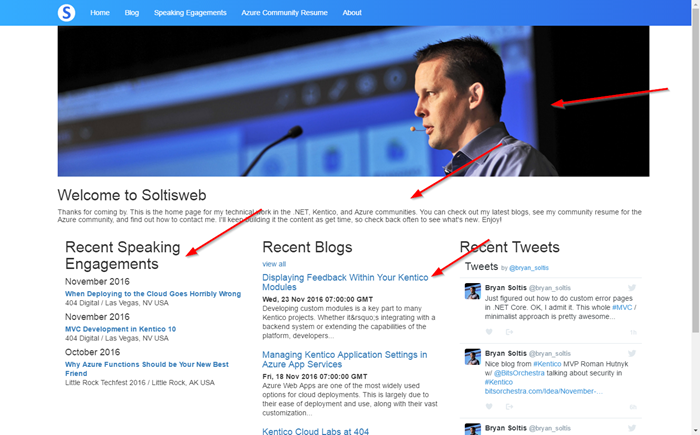
Here is the Home page with my amazing header image.
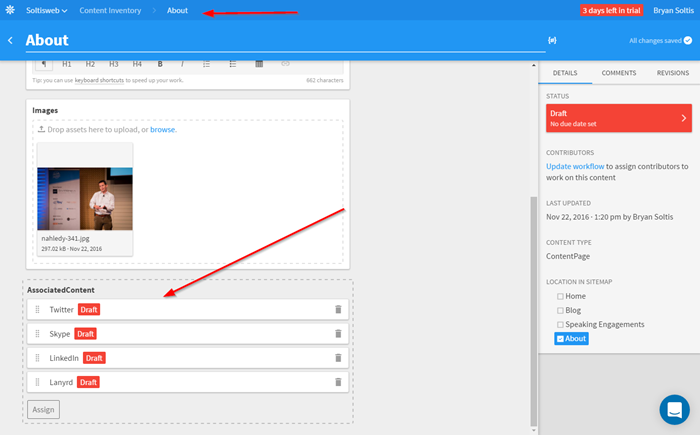
Here is the About page. This page utilizes the Modular content element to reference the Contact method items.
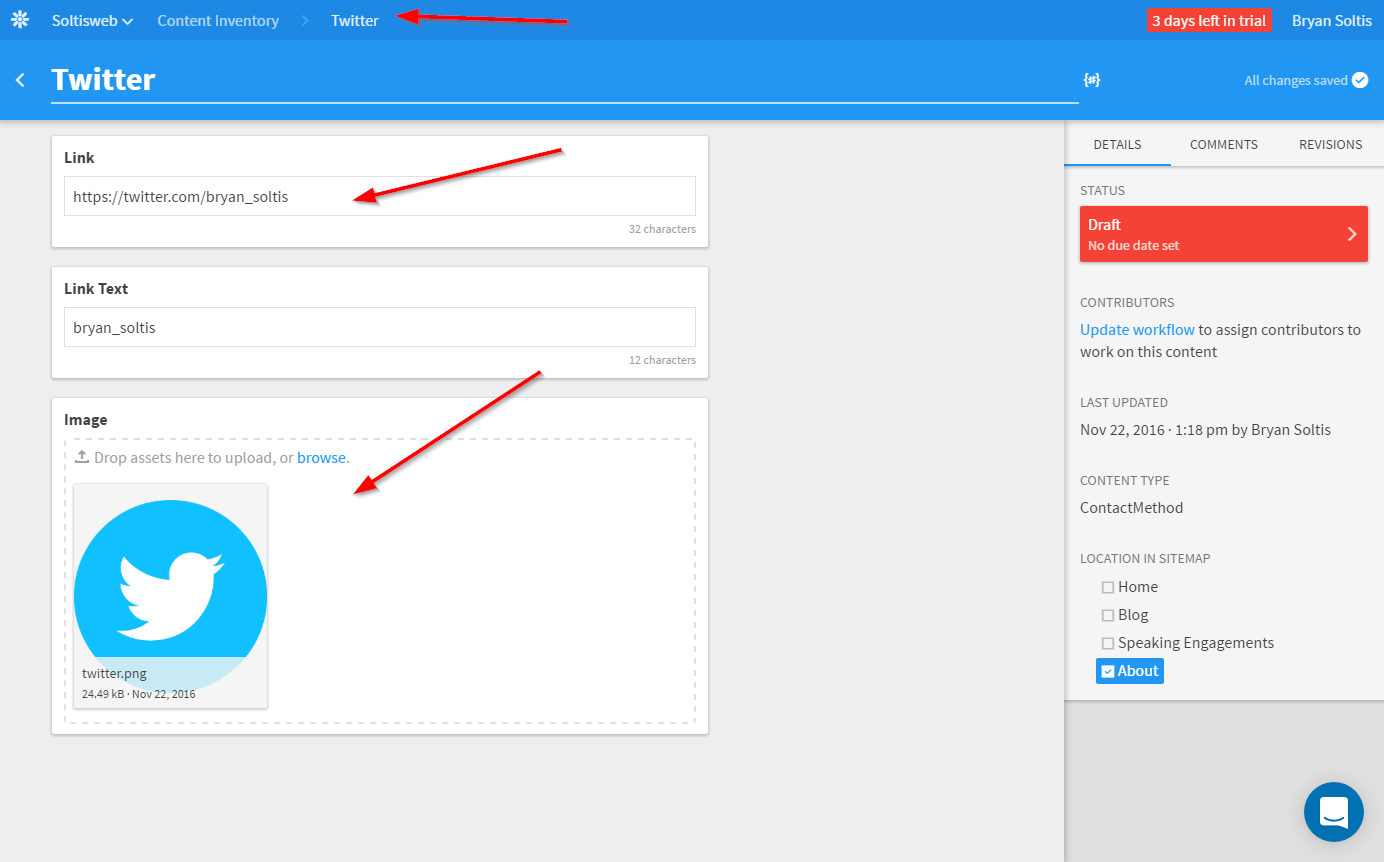
And here is one of the Contact method items.
Adding Dynamic Content
With all of my content entered, I was ready to update the site to display it. I quickly found that some of my pages would be easier to program than others, due to what I wanted to display on the page. In the Kentico Cloud documentation, you can learn how to pull a content item and display it as the model for the view. While this is good for simple pages, some of my pages would often need two or more types of content. For this reason, I elected to create some new “master” classes to store the multiple collections of data for each page.
Let’s take a look at the Blog page as an example. For this page, I knew I wanted to display my page content from Kentico Draft, but also a collection of blogs from an RSS feed. To accomplish this, I created a new BlogData.cs class, consisting of a KenticoCloud.Deliver.ContentItem object and collection of BlogPost objects.
public class BlogData
{
    public ContentItem Content { get; set; }
    public IEnumerable<BlogPost> Blogs { get; set; }
}
In my BlogController, I populate a BlogData object with the necessary values so they are passed as one big model to the View. Note how I leverage the KenticoDeliver API to query Kentico Draft and retrieve the desired page content.
Note: My blogs are not hosted in Kentico Cloud, but rather on DevNet. For this reason, I'm using consuming an RSS feed in my controller to get thata from the site.
BlogData blogdata = new BlogData();

DeliveryClient client = new DeliveryClient(Configuration.GetValue<string>("AppSettings:KenticoDeliverProjectID"), Configuration.GetValue<string>("AppSettings:KenticoDeliverPreviewAPI"));

// Get blog page data
var responsebl = await client.GetItemAsync("blog");

blogdata.Content = responsebl.Item;

// Set the page title
ViewData["Title"] = responsebl.Item.GetString("title");

// Get blog posts
var blogs = XDocument.Load("http://devnet.kentico.com/rss/authors/439927");

var blogsOut = from item in blogs.Descendants("item")
               select new BlogPost
               {
               PubDate = item.Element("pubDate").Value,
               Title = item.Element("title").Value,
               Link = item.Element("link").Value,
               Description = (item.Element("description") != null) ? Regex.Replace(Regex.Match(item.Element("description").Value, @"^.{1,180}\b(?<!\s)").Value, "<.*?>", string.Empty) : ""
               };

blogdata.Blogs = blogsOut;

return View(blogdata);
In my view, I register the new model.
@{
    ViewData["Title"] = "Blog";
    @using SoltiswebMVC.Models;
    @model BlogData
}
With that in place, I can access my model and display the page content as well as the blog posts.
<div class="container">
    <div class="row">
        <h2 class="banner-heading">@Model.Content.GetString("title")</h2>
        @if (Model != null && Model.Content.GetAssets("images").Count() > 0)
            {
            <img src="@Model.Content.GetAssets("images").First().Url" style="height:200px;float: left; margin: 0px 15px 15px 0px;" alt="Soltisweb" />
        }
        @Html.Raw(@Model.Content.GetString("richtext1"))
    </div>
    <div class="row">
        <div class="list-group">
            @foreach (var blog in @Model.Blogs)
            {
                <div>
                    <h4 class="list-group-item-heading">
                        <a href="@blog.Link" target="_blank">@blog.Title</a>
                    </h4>
                    <p class="list-group-item-text" style="padding-bottom:20px;">
                        <strong>@blog.PubDate</strong>
                        <br />
                        @blog.Description...
                    </p>
                </div>
            }
        </div>
    </div>
</div>
I used this same concept in several areas of the site, creating “master” classes for the collection of objects and passing them to the view. For example, the HomeController uses one of these “master” classes, as well. It uses the AzureCommunityResumeData class as one of its properties, which allowed me to nest my speaking engagements and blog data within the object.
Note: This may not be the most elegant solution, but I thought it was a decent solution for my site. I would recommend you check out other options in case your requirements are more complex.
Caching Content
Anytime you’re creating a data-driven site, you have to take into consideration how the amount of traffic will affect performance. Because I know people will flock to see the magnificent design and functionality I have within my five-page site, I thought it would be a good idea to implement caching where I could. To accomplish this, I leveraged the ResponseCache attribute on my actions to prevent the site from having to pull the content from Kentico Cloud every time.
[ResponseCache(Duration = 3600)]
public async Task<ActionResult> Index()
{
This attribute adds the necessary headers to tell the browser the content is valid for the defined amount of time. Because my content wasn’t going to change all that often, I opted for a 60-minute timeout to prevent unnecessary calls.
You can find out more about the ResponseCache attribute here.
Testing
With my new content types and content in place, I was ready to test the site. I accessed the Home page to ensure the multiple types of content were being displayed properly.
On the Blog page, I ensured the Kentico Draft content was displayed correctly, along with the blog posts.

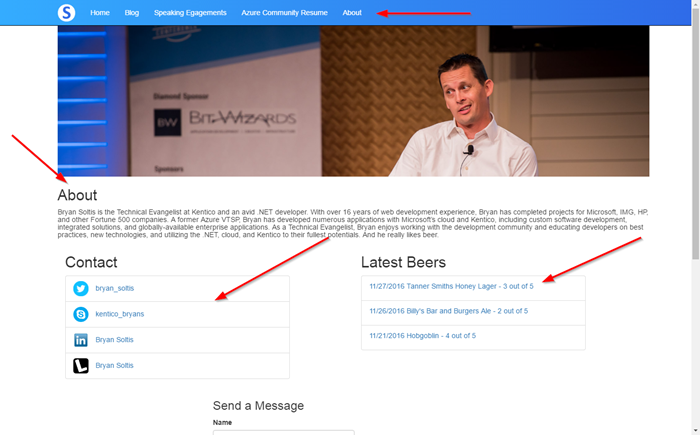
Finally, I checked the About page to ensure my Contact methods displayed properly.
Moving Forward
In this blog, I showed you how to expand your use of Kentico Cloud to hold multiple types of content. I demonstrated how to use different aspects of the Kentico Deliver API to extract your content and display it within your site. With Kentico Cloud, it’s as simple as defining your design, and managing all of your content in the cloud.
Coming in Part 3 of the series, I will be adding Kentico Engage to track activity within the site. With Engage, I’ll be able to track where users are coming from and capture their information in a contact form. Lastly, I’ll show you how to deploy to Azure Web Apps with a few clicks and be up and running in no time. Until next time!
You can read Part 3 of the series here.
This blog is intended for informational purposes only and provides an example of one of the many ways to accomplish the described task. Always consult Kentico Documentation for the best practices and additional examples that may be more effective in your specific situation.