Building an MVC site with Kentico Cloud – Part 1
Kentico Cloud is a new headless CMS platform that you can use to build your applications. By leveraging an Azure-hosted content repository and APIs, you are free to develop nearly any application you want and populate it with your managed content in Kentico Draft. In this blog series, I’ll show you how I migrated my own site to MVC and Azure, while leveraging Kentico Cloud for my content and activity tracking.
UPDATE
Since this article was published, we have released a Kentico Cloud .NET Core boilerplate project. This new project contains a number of services and features to help you implement your Kentico Cloud projects more efficiently. I recommend checking out this new boilerplate for your projects.
You can find out more about the boilerplate project here.
ORIGINAL
Kentico Cloud opens a ton of new doors for developers and companies. While many CMS platforms are restricted to a particular technology or language, Kentico Cloud allows developers to create sites and mobile applications using their preferred languages and frameworks. By hosting content in the cloud, you can easily manage your site information in Kentico Draft’s sleek, intuitive interface. Kentico Deliver provides a universal interface to display the Draft content in the application of your choice.
Combine Kentico Cloud with the vast resources of the Azure platform, and you have one amazing solution for your projects. To demonstrate just how easy the process can be, I recently re-designed my own site (http://soltisweb.com) into MVC and migrated all of my content to Kentico Cloud. In this blog series, I‘ll walk you through the steps I took and show you how powerful this combination of tools and platforms can be.
While my site is not very exciting, I decided to make a new online resume for my Azure activities as part of this demo. The idea is that this page could be a one-stop shop to see all of the activity in the Azure community.
So let’s get to it!
Set up a Kentico Cloud Project
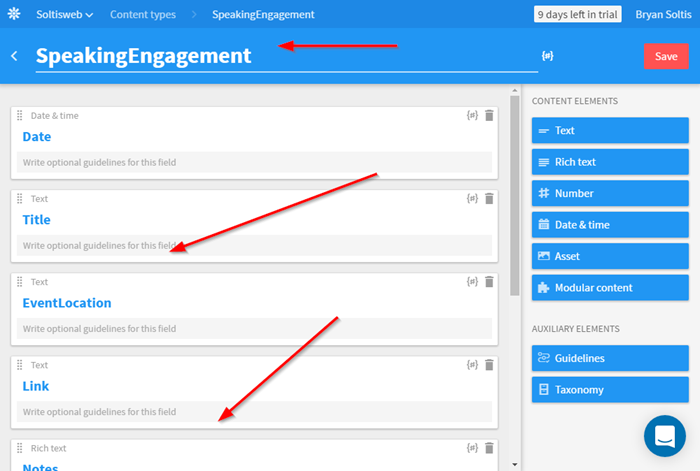
To get started, I created a new Kentico Draft project in my account. I planned on using Draft to store as much of the dynamic content as possible, so I created a number of Content Types for my data. Primarily, I intended on using the site to display my speaking engagements, so I created a new content type with the fields I would need.
I created a basic sitemap, to help me keep my content in order. Because Kentico Draft will list everything in your inventory by default, I knew it would be important to be able to filter the list for a specific section of the site.

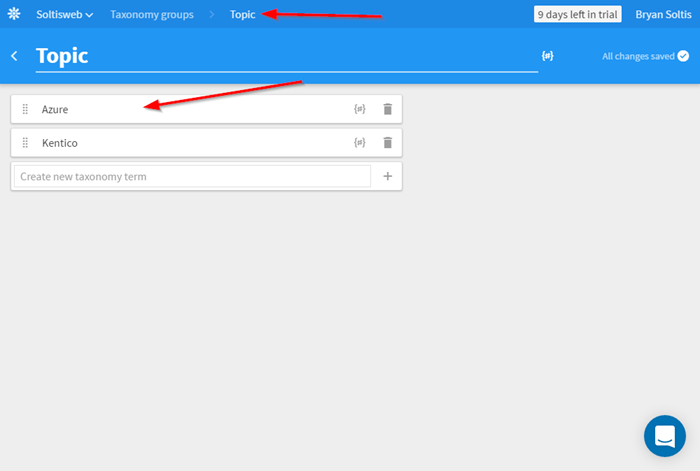
Lastly, I created a basic Taxonomy to categorize my speaking engagements. Because I would be using the site to highlight my Azure-related activities, I created a few terms that I could assign to my items.
Create Content
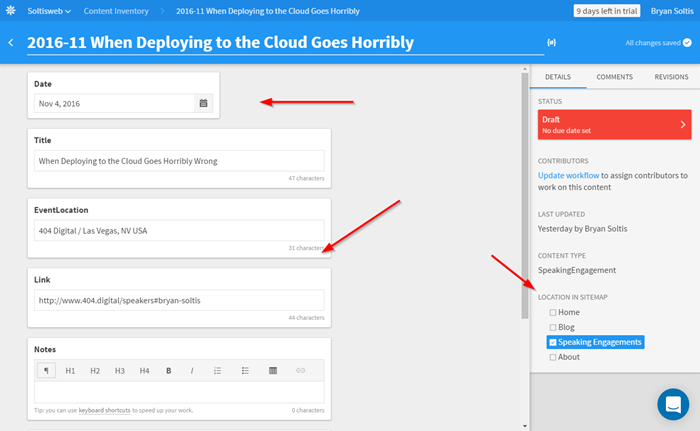
The next step was to populate the content. I created a new item for each speaking engagement, populating the fields with the appropriate values. All of the speaking engagements would be assigned to the Speaking Engagements section, so I made sure to check that option for each item. Additionally, I assigned the appropriate taxonomy for each talk.
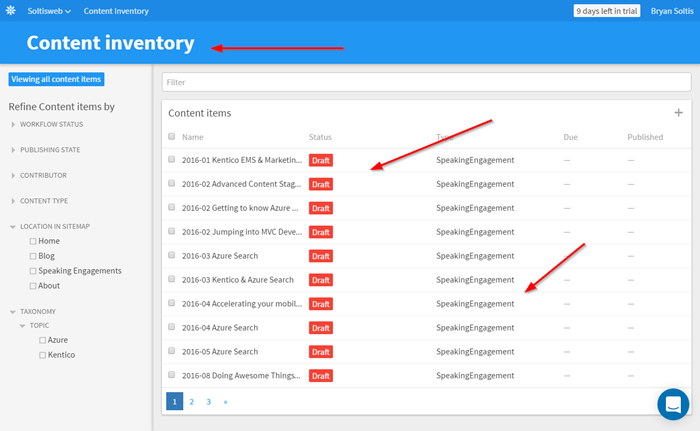
Here is the list of the speaking engagements after I was finished.
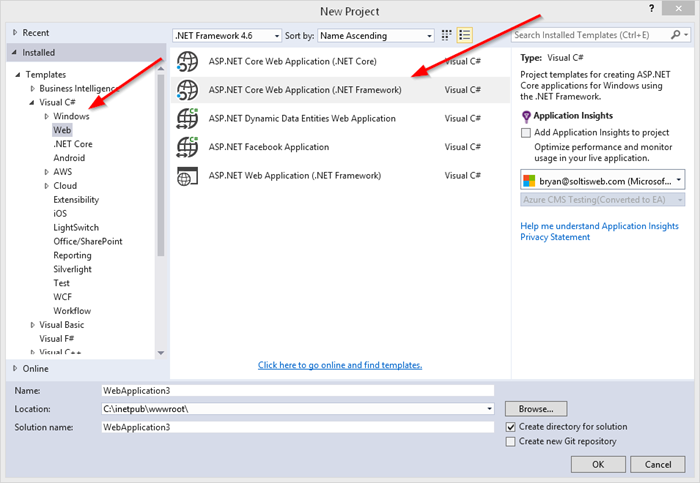
Create an MVC site
The next step was to create my new MVC site. Because I’m such an awesome designer, I chose the basic ASP.NET Core Web Application (.NET Framework) template. This gave me a decent base for the site, and I could try out some ASP.NET Core programming in the process.
I left the built-in controllers and views in place for the time being.
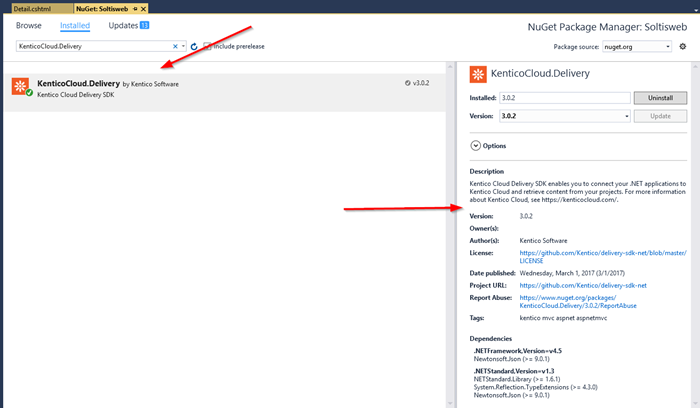
Add Kentico Deliver
With my site ready to go, I added the KenticoCloud.Delivery Nuget package to the site. This package contains all of the necessary APIs I need to interact with Kentico Deliver and retrieve my Draft content.
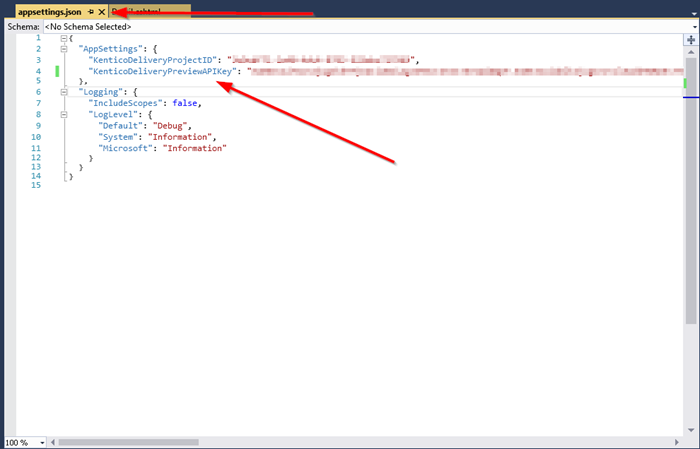
Next, I added a new AppSettings section to my appsettings.json file to hold the Kentico Delivery Project ID and Kentico Delivery Preview API values. These are required in order to make calls to the Kentico Deliver API.
Note
In MVC 6, it is recommended to use the appsettings.json file to store your project settings, rather than the deprecated web.config file. This is because the appsettings.json file allows you to retrieve the values more easily from within your code.
I also added the IConfiguration class to the project, to allow me to store values in config files. You can find more about the the IConfiguration class here.
I then added the following to StartUp.cs in the ConfigureServices method to enable accessing the IConfiguration services within the application:
// Register the neccessary services to access generic IConfiguration
services.AddSingleton<IConfiguration>(Configuration);
Displaying Content - Controller
The final step was to add the controller and view to display the Draft content within the site. Because these speaking engagements would be used for my Azure Community Resume page, I created a new controller to retrieve the data.
First, I added the following to allow my appsettings.json values to be retrievable within the controller:
private IConfiguration Configuration { get; set; }

public AzureCommunityResumeController(IConfiguration configuration)
{
    Configuration = configuration;
}
After creating and registering the IConfiguration class, I added the following to the Index action to create a connection to Kentico Deliver:
DeliveryClient client = new DeliveryClient(Configuration.GetValue<string>("AppSettings:KenticoDeliverProjectID"), Configuration.GetValue<string>("AppSettings:KenticoDeliverPreviewAPIKey"));
Note how the code uses the AppSettings values from appsettings.json to populate the Project ID and API key.Paste
Because the Kentico Deliver call will be asynchronous, I updated the Index action to return a Task.
public async Task<ActionResult> Index()
Next, I added the following code to retrieve the speaking engagements from Draft:
            var responseSpeakingEngagements = await client.GetItemsAsync(
                new EqualsFilter("system.type", "speakingengagement"),
                new ElementsParameter("date", "title", "eventlocation", "link"), // We need just certain elements
                new OrderParameter("elements.date", SortOrder.Descending),
                new ContainsFilter("elements.topic","azure"),
                new GreaterThanFilter("elements.date", DateTime.Now.AddDays(-365).ToString())
            );
Note how I used different filters to specify which records I retrieved. Because this content was for the Azure Community Resume page, I only selected content items associated with the Azure taxonomy. I also only selected items that occurred within the last 12 months.
I then updated the Index action to return the data to the view.
return View(response.Items);
Displaying Content - View
The final piece was to create a new view and add the code to display the content. I added the following code to the top of the view to register the model:
@model IEnumerable<KenticoCloud.Delivery.ContentItem>
I then added the following layout code to display the speaking engagements:
<h4>Recent Speaking Engagements</h4>
            <div class="list-group">
                @foreach (var speakingengagement in @Model)
                {
                    <div>
                        <h4 class="list-group-item-heading">
                            @speakingengagement.GetDateTime("date").ToString("Y")
                        </h4>
                        <p class="list-group-item-text" style="padding-bottom:10px">
                            <a href="@speakingengagement.GetString("link")" target="_blank">
                                <strong>@speakingengagement.GetString("title")</strong>
                            </a>
                            <br />
                            @speakingengagement.GetString("eventlocation")
                        </p>
                    </div>
                }
            </div>
Lastly, I updated the \Views\Shared\_Layout.cshtml file to contain a link for the Azure Community Resume page.
<div class="navbar-collapse collapse">
    <ul class="nav navbar-nav">
        <li><a asp-area="" asp-controller="Home" asp-action="Index">Home</a></li>
        <li><a asp-area="" asp-controller="Home" asp-action="About">About</a></li>
        <li><a asp-area="" asp-controller="Home" asp-action="Contact">Contact</a></li>
        <li><a asp-area="" asp-controller="AzureCommunityResume" asp-action="Index">Azure Community Resume</a></li>
    </ul>
</div>
Testing
With all of the pieces in place, I was ready to test my code. I accessed the site and confirmed the navigation contained a link for my new page.
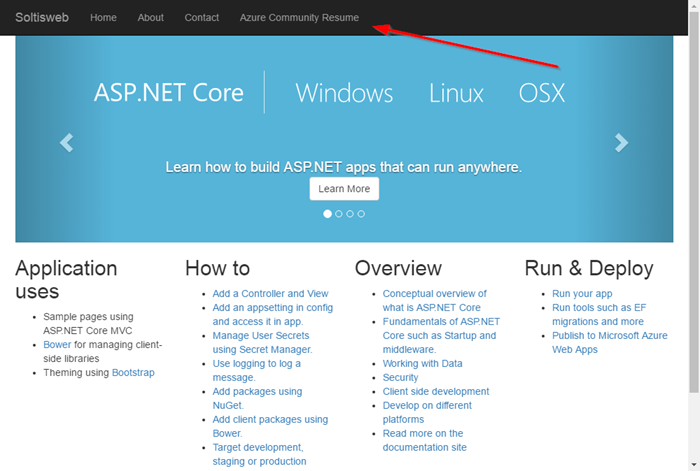
I confirmed that the Azure Community Page loaded correctly.
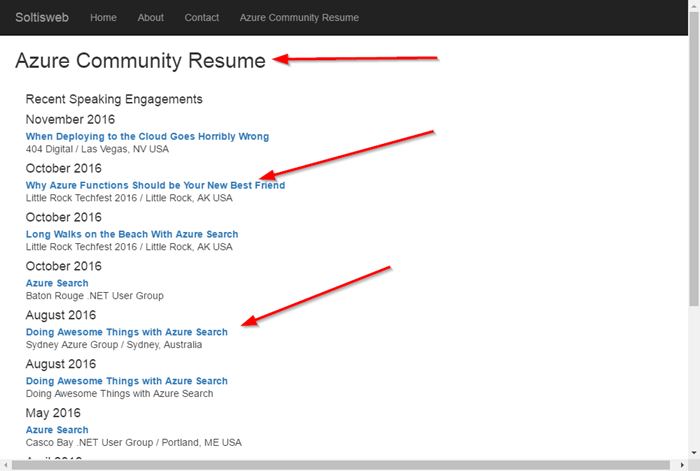
Note how only Azure-related speaking engagements are displayed. This is due to the filters used when retrieving the data.
Moving Forward
In this blog, I showed you how to easily enter content in Draft and use Deliver to display the information within your application. Within Draft, you can leverage the Sitemap and Taxonomy to categorize and organize your content. Through the use of filters, you can easily define the exact information you want to retrieve from Draft.
In the following blogs in this series, I will show you how to add more dynamic functionality including multiple models for a view, more content types, and how to leverage Kentico Engage to track site traffic, all while deploying to Azure Web Apps. See you next time!
You can read Part 2 of the series here.
This blog is intended for informational purposes only and provides an example of one of the many ways to accomplish the described task. Always consult Kentico Documentation for the best practices and additional examples that may be more effective in your specific situation.