Best Practices for Implementing Site Navigation in Kentico
In this article, we’ll show you the current best practices for implementing a website menu when building a site in Kentico.
Our focus is on giving developers working with Kentico full control over the generated HTML markup. If you’re deciding how to approach building your website menu, keep the following simple rule in mind:
Flat menu structure – use the Repeater/Basic repeater web parts
Menu with multiple sublevels – use the Hierarchical viewer web part
Unless your scenario is a very simple one, in which case you’ll do well with the built-in CSS List Menu web part. The web part is easier to set up, but comes with a trade-off in how you’re able to customize the final markup.
Let’s go into how you can build both flat and hierarchical menu in more details.
Flat structure menu
We recommend using the Repeater or Basic Repeater web parts for creating site menus with structure that‘s just one level deep. In general, this gives you great flexibility when compared to CSS List menu – you can adjust the rendered HTML markup according your needs in a transformation.
Going this direction, however, requires a little more work as you‘ll need to replicate the special properties and behavior of the CSS List Menu web part.
The main properties, such as Path, Page types and other “page content” related properties are shared. However, you will need to handle a couple things which the CSS List Menu does out of the box.
Example
The following HTML markup is actually rendered by the CSS List Menu web part. Let’s use that for further reference.
<ul class="CMSListMenuUL" id="menuElem">
       <li class="CMSListMenuHighlightedLI">
             <a href="<url>" class="CMSListMenuLinkHighlighted" title="Home">Home</a>
       </li>
       <li class="CMSListMenuLI">
             <a href="<url>" class="CMSListMenuLink" title="Store">Store</a>
       </li>
       <li class="CMSListMenuLI">
             <a href="<url>" class="CMSListMenuLink" title="About us">About us</a>
       </li>
</ul>
In order to have all the CSS classes, links and titles in place, make sure you have enabled these properties in the web part:
- Display highlighted item as link
- Render CSS classes
- Render link title
Repeater
The above HTML markup can be replicated easily by the Repeater web part like this:
Content before:
<ul class="CMSListMenuUL">
Content after:
</ul>
Then, just use the following Text/XML transformation and it will create the required HTML markup:
<li class="{% if (IsCurrentDocument()) { return"CMSListMenuHighlightedLI" } else { return "CMSListMenuLI" } %}">
  <a href="{% GetDocumentUrl() %}" class="{% if (IsCurrentDocument()) { return"CMSListMenuLinkHighlighted" } else { return "CMSListMenuLink" } %}" title="{% HTMLEncode(DocumentName) %}">{% HTMLEncode(DocumentName) %}</a>
</li>
This was just a simple scenario example. To see some further hints, just scroll down to Replicating additional navigation properties.
Hierarchical structure menu
Hierarchical transformations are the way to go when displaying structured content on a page.
Hierarchical transformations overview
Hierarchical transformations actually consist of multiple classic transformations which can be of any type. We recommend that you combine these two: ASCX and Text/XML.
If you are uncertain, see the following article where they are described with some best practices: Best Practices for Working with Transformations in Kentico.
If you need more general information on how to work with hierarchical transformations in Kentico, make sure you refer to our documentation: Using hierarchical transformations
Hierarchical transformations are used by Kentico’s listing web parts such as the Hierarchical Viewer, Universal Viewer and Universal Viewer with custom query. Basically, if there is a way too complex structure to be displayed on your live site, use one of the web parts utilizing hierarchical transformations. We recommend using the Hierarchical viewer web part where you can define what should be displayed on each level and you can control wrappers around each level and many more things. Compared to, e.g., “nested Repeaters” they are tuned up to be faster (they use just one query for all the hierarchy levels) and it is way easier to work with multiple page types and wrappers for each level.
Hierarchical menu
Speaking about structured content in menus, we strongly recommend using Hierarchical Viewer web part. Actually, it is based on Universal Viewer and is optimized for displaying hierarchical data.
What I find most exciting about the Hierarchical Viewer web part is its full control over all levels and page types which are to be displayed. Moreover, you can specify individual header, footer, separator, first and last item transformations and more.
Again, you can see more details in the documentation as mentioned above. There is also an example on our sample Corporate Site site, where you can see a full implementation in action. So I recommend installing a local instance of Kentico or use our hosted trial for your reference. It is always better to have a test drive to try and see all the functions.
Example
Having the Repeater’s example in mind, let’s add a new level to the CSS List Menu web part markup:
<ul class="CMSListMenuUL" id="menuElem">
       <li class="CMSListMenuLI">
             <a href="<url>" class="CMSListMenuLink" title="Home">Home</a>
       </li>
       <li class="CMSListMenuLI">
             <a href="<url>" class="CMSListMenuLink" title="Store">Store</a>
             <ul class="CMSListMenuUL">
                    <li class="CMSListMenuLI">
                           <a href="<url>" class="CMSListMenuLink" title="Coffee">Coffee</a>
                    </li>
                    <li class="CMSListMenuLI">
                           <a href="<url>" class="CMSListMenuLink" title="Brewers">Brewers</a>
                    </li>
             </ul>
       </li>
       <li class="CMSListMenuLI">
             <a href="<url>" class="CMSListMenuLink" title="About us">About us</a>
       </li>
</ul>
Hierarchical viewer
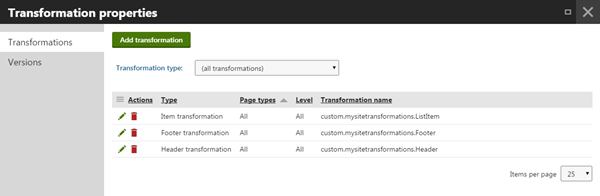
In this example, the whole hierarchical magic can be done by 3 transformations. They will be used for header, item and footer.
Practical note: the transformations are stored in a custom page type which is just a container for purposes like this.
Header:
<ul class="CMSListMenuUL">
Item:
<li class="{% if (IsCurrentDocument()) { return "CMSListMenuHighlightedLI" } else { return "CMSListMenuLI" } %}">
  <a href="{% GetDocumentUrl() %}" class="{% if (IsCurrentDocument()) { return "CMSListMenuLinkHighlighted" } else { return "CMSListMenuLink" } %}" title="{% HTMLEncode(DocumentName) %}">{% HTMLEncode(DocumentName) %}</a>
  {^SubLevelPlaceHolder^}
</li>
Footer:
</ul>
One new important thing (introduced in Kentico 8) to be mention here is a placeholder control for hierarchical transformations. It basically defines an entry point for nested transformations. The code looks like this:
{^SubLevelPlaceHolder^}
As the next step, I recommend trying to create your own menu. You can see great step by step instructions on how to build a Mega Menu using the Hierarchical Viewer in the following KB article:
Implementing multi level responsive navigation using ahierarchical transformation
Should you need a more sophisticated menu, you may find the following tips for replicating the properties that are built in in our navigation web parts useful. Again, we believe that giving you free hands over pre-built solution is the way to go, so feel free to use just what you need in your particular case.
Replicating additional navigation properties
In the above text, you can see how to replicate the HTML structure which is generated by our navigation web parts. You’re likely to still need to create some special HTML markup, however. The following list should be helpful when developing your advanced menu using listing web parts (Repeater or Hierarchical Viewer).
Preserve show in navigation flag
This can be replicated by adding the following where condition in the listing web part properties:
DocumentMenuItemHideInNavigation = 0
Select Current page
Special CSS class can be added to the current document using this method within a transformation:
{% IsCurrentDocument() %}
Well, you will probably use it in some sophisticated condition similar to the following:
{% if (IsCurrentDocument()) { return "item-current" } %}
Highlight selected path
If you need your menu to show the actual page you are in, you will need the following expression.
{% IsDocumentOnSelectedPath() %}
This code will add the selected classes to all the items in the selected path:
{% if (IsDocumentOnSelectedPath()) { return "item-selected-path" } %}
Custom menu caption
You can define custom caption for each page which is listed in the menu – the new caption can be entered in: Pages -> Properties -> Navigation -> Menu caption
{% HTMLEncode(String.IsNullOrEmpty(DocumentMenuCaption) ? DocumentName : DocumentMenuCaption) %}
Custom menu CSS class
Custom CSS class can be defined in the same location as the above menu caption. Then, just use:
{% HTMLEncode(DocumentMenuClass) %}
Subitems check
You might need to display some sub-level indicator for items which have another level underneath - use the NodeHasChildren value for that.
{% if (NodeHasChildren) { return "has-subitems" } %}
In case you are using a workflow on your site, you’ll need to handle displaying of the sub-level flag by checking the Children.Count from the current item. This is because NodeHasChildren counts non-published pages as well. Note that this comes at a performance cost, so make sure you really need it before you use it for your menu.
An alternative would be to create a jQuery transformation and check sub-items on the fly.
Items order the same as in Content tree
This trick is actually the same for all listing web parts. Just use the following Order By condition:
NodeLevel, NodeOrder, NodeName
Show page on specific menus within one web site
In case you need to show a page within a specific menu only and not in the other menus on the site, you can take advantage of the page type fields. By that, I mean defining a new field in your page type which will be dropdown or checkbox stating in which menu the page should appear.
For instance, you can define a dropdown field (name it, say, MenuItemGroup) with the following values:
;
top;Top
footer;Footer
Once you save your page on the Form tab with one of the following values, you can write a Where condition in the Repeater’s properties:
MenuItemGroup='footer'
Performance
You can increase the performance using the Columns property. Put simply, all listing web parts grab the whole items collection which is taken from an SQL view and includes a whole bunch of columns which may not be needed in your particular menu. You can easily improve that by specifying only the necessary values in the Columns property in the Repeater‘s web part properties. You will specify just the columns which are used in your transformations, e.g., NodeAliasPath, NodeOrder, DocumentURL.
Wrap up
We’ve learned that there is another way for creating menus apart from the very popular CSS List Menu web part. Hopefully, this caught your interest and you’ll use Hierarchical Viewer for your menus in your next project. This should prevent having to make any customizations to the CSS List Menu and your development process will be much smoother in return.