Searching Files with Azure Search
Over the past few years, I have spoken on Azure Search several times at user groups and conferences around the world. While many developers are familiar with Microsoft Azure and other cloud platforms, I’ve found many people still haven’t used Azure Search. In previous blogs, I’ve demonstrated how to integrate this service with Kentico. In this article, I’ll show some new functionality Microsoft added to the Azure Search SDK to index and search blobs (files) in Azure Storage.
Background
Azure has always been one of my favorites platforms to develop with. Whether it’s the unique hosting capabilities or the ability to integrate systems, Microsoft’s cloud platform has something to benefit nearly any application. With search being such an important part of any site, Azure Search is one of the most usable and configurable services offered.
In my previous blog post, I demonstrated how to integrate Azure Search with a Kentico application. In my example, I showed how to use REST service calls to create indexes, populate the data, and perform searches against the service.
Since that time, Microsoft has released an SDK for .NET. This SDK is actually a wrapper for the underlying REST service for Search. Microsoft is continually updating the REST API, but the SDK tends to lag a little behind as they have to build the functionality into the service first. Prior to last December, this SDK allowed developers to create and index data from a variety of sources, all by using .NET code to interact with the service.
In my previous demo, I used a Kentico 9 site to hold my Azure Search functionality, as well as retrieve data from my Kentico EMS database. I have since rewritten the integration using an MVC site, while still pulling from the Kentico 9 EMS database. For this blog, I’ll be adding functionality to this new code. If you want to learn more about the original code, check out the blog here.
There are several features Microsoft has continued to add and improve within Search, including the ability to search blobs (files) in Azure Storage. This was accomplished by making straight REST service calls and I demoed it frequently during my presentations. In December, Microsoft added this functionality to the SDK to simplify the process. So let me show you how it works!
Before we get started, a few notes:
- I am building on top of my previous code so there are some pieces that may be mentioned in the article.
- My previous blog was targeted at Web Forms developing using Kentico Web Parts. My new implementation is done with an MVC application and using the SDK.
- For my MVC application, I have a “helper” class named AzureSearchHelper.cs that contains all of my code. I’ve added functions to this class for the demo.
- All of the existing functionality in my AzureSearchHelper class is identical to the REST API code in the previous article, however, has been updated to use the SDK.
Updating the Azure Search SDK
Because the functionality to index blobs was recently introduced, my first step was to update the SDK within my application. In the NuGet Package Manager, I updated my package to latest version (3.0.2 at the time of this article).
Connecting to Azure Search
In my AzureSearchHelper class, I created a SearchServiceClient object in my constructor. This object is used to connect to Azure Search in all of my functions.
string searchServiceName = ValidationHelper.GetString(ConfigurationManager.AppSettings["AzureSearchName"], "");
string apiKey = ValidationHelper.GetString(ConfigurationManager.AppSettings["AzureSearchAPIKey"], "");

// Create an HTTP reference to Azure Search
_searchClient = new SearchServiceClient(searchServiceName, new SearchCredentials(apiKey));
Note that I am using my Azure Search service credentials to connect to the service.
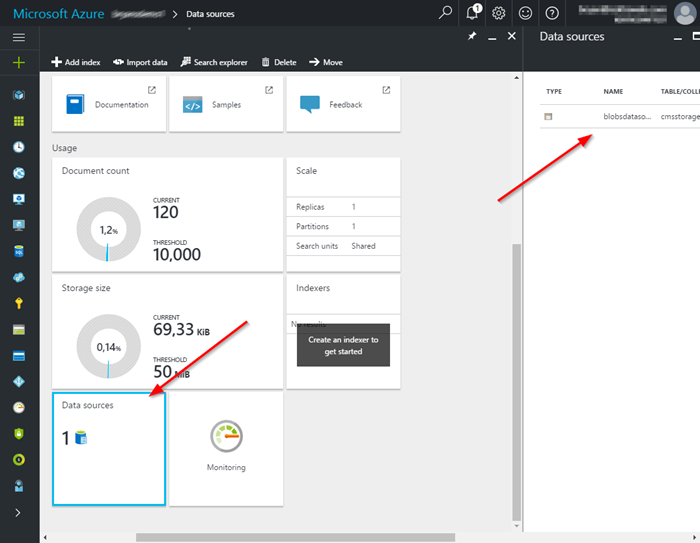
Creating a data source
The next step of the process was to create a data source for blobs. This meant having a specific container for my files that I could point my data source to. In my case, this was my media library for my image uploads within my site. In that container, I had four articles I’ve written, because I really like looking at my own ramblings over and over.
Here is what the storage account looks like:

My code will connect to this storage account and use these files to populate my index.
To create the data source, I added the following code to my AzureSearchHelper class.
// Create the data source
_searchClient.DataSources.CreateOrUpdate(new DataSource("blobsdatasource", DataSourceType.AzureBlob, new DataSourceCredentials(ValidationHelper.GetString(ConfigurationManager.AppSettings["AzureStorageCredentials"], "")), new DataContainer("cmsstorage", "dancinggoat/media/sample")));
This code uses my Azure Storage credentials to connect to my container. I then specify the path within my container to set as the storage account query. Using a “query” allows me to only watch a specific collection blobs within my storage account. I also specified the data source as blobsdatasource, which is required for the index to work properly.
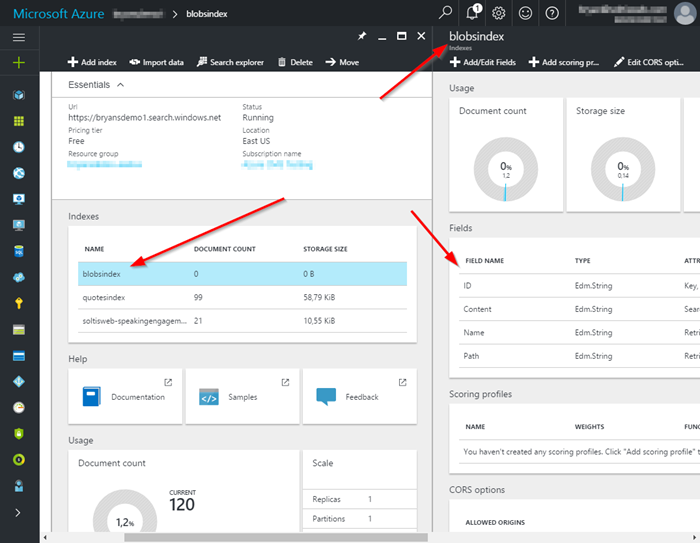
Creating an Index
With the data source created, the next step was to create the index. This process was similar to my previous code in that I defined the fields I wanted to index and set their properties.
// Create the index definition
var definition = new Index()
{
    Name = "blobsindex",
    Fields = new[]
    {
    new Field ( "ID", DataType.String) { IsKey = true,  IsSearchable = false, IsFilterable = false, IsSortable = false, IsFacetable = false, IsRetrievable = true},
    new Field ( "Content", DataType.String) { IsKey = false,  IsSearchable = true, IsFilterable = true, IsSortable = false, IsFacetable = false, IsRetrievable = true},
    new Field ( "Name", DataType.String),
    new Field ( "Path", DataType.String),
    },
};

// Create the index
_searchClient.Indexes.CreateOrUpdate(definition);
A big change was the ID and Content fields. These are standard fields to any blob index and are automatically populated by Azure Search when the index is loaded. Additionally, I added some fields to use in my implementation. For each field, I chose the appropriate data types and settings.
Here is an explanation of each field.
ID
This is the unique identifier for the index document. Azure Search will use the Azure Storage unique identifier for this value.
Content
This is a special field that Azure Search will populate when the index is loaded. Regardless of the file type, Azure Search will “read” all of the contents and inject it as text into this field. This is the primary field we will search against. Because of how it works, this fields allows us to have full-text search within documents and other files.
Name
This field will hold the name of the file. Specifically, this value will be what I want to display when I write out the search results.
Path
This field will hold the URL to file. This will allow me to link directly to search results.
Creating an Indexer
With the index defined, I was ready to tell Azure how and when to populate my index.
Indexer blobindexer = new Indexer();
blobindexer.Name = "blobsindexer";
blobindexer.DataSourceName = "blobsdatasource";
blobindexer.TargetIndexName = "blobsindex";

IndexingSchedule indexingschedule = new IndexingSchedule();
indexingschedule.Interval = new TimeSpan(0, 5, 0);
blobindexer.Schedule = indexingschedule;

List<FieldMapping> fieldmappings = new List<FieldMapping>();
fieldmappings.Add(new FieldMapping("metadata_storage_name", "name"));
fieldmappings.Add(new FieldMapping("metadata_storage_path", "path"));
blobindexer.FieldMappings = fieldmappings;

_searchClient.Indexers.CreateOrUpdate(blobindexer);
In this code, I’m doing a number of things:
Define the indexer
This section details the name of the indexer, the data source to pull data from, and the index to populate. These are the new objects I created earlier in the article.
Define the schedule
This section details how often to index the data. In my example, I’m opting to update the index every 5 minutes.
Define the field mappings
In this section, I am defining the custom fields I created for my index. The ID and Content fields are handled automatically by Azure Search, but I have to tell the indexer how to map the Name and Path fields. For this part, I am using some standard “meta” fields for Azure Storage blobs to populate the index. This allows me to use the name of the blob and the direct URL.
Testing
Once the data source, index, and indexer were defined, I was able to search against the index. This process is exactly the same as my previous demo as at this point, it’s a standard index within Azure Search. This means I could define scoring profiles, filters, facets, and any other Azure Search features to the index I need.
To test the functionality, I used my demo interface to execute the new code.
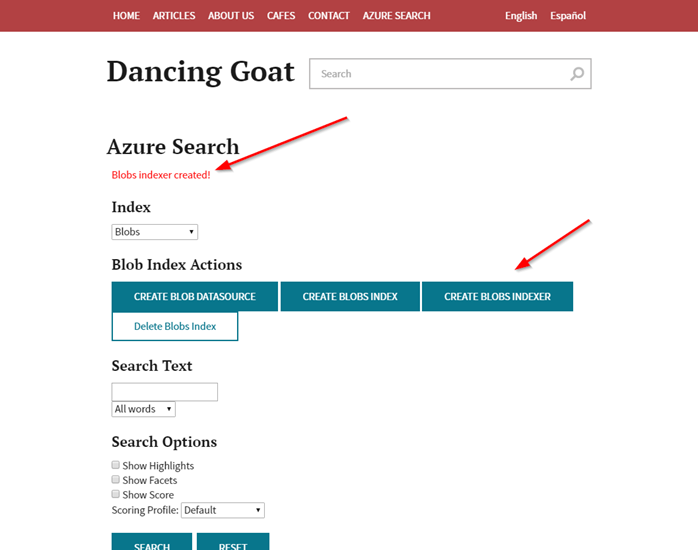
First, I created the data source.
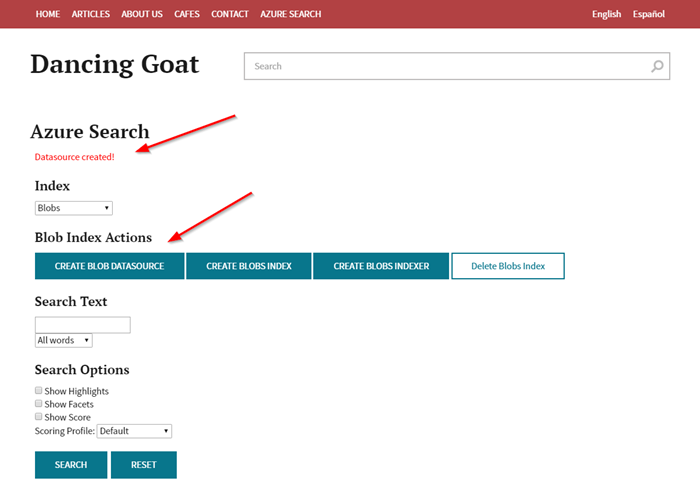
Next, I created the index.

Next, I created the indexer.

With that complete, I was able to search my Azure Storage account.
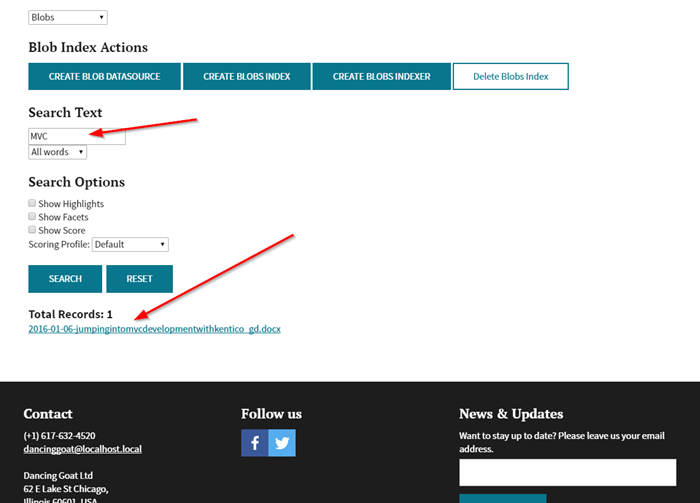
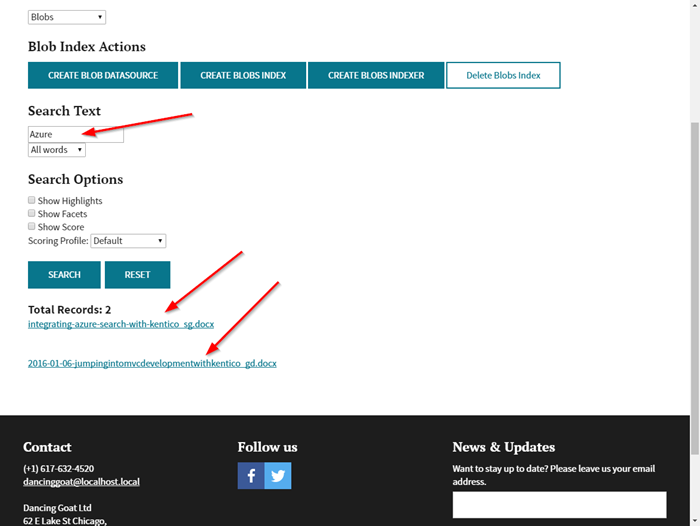
Because I populated the Path field in my index with the metadata_storage_path, I could display links to open the file directly.
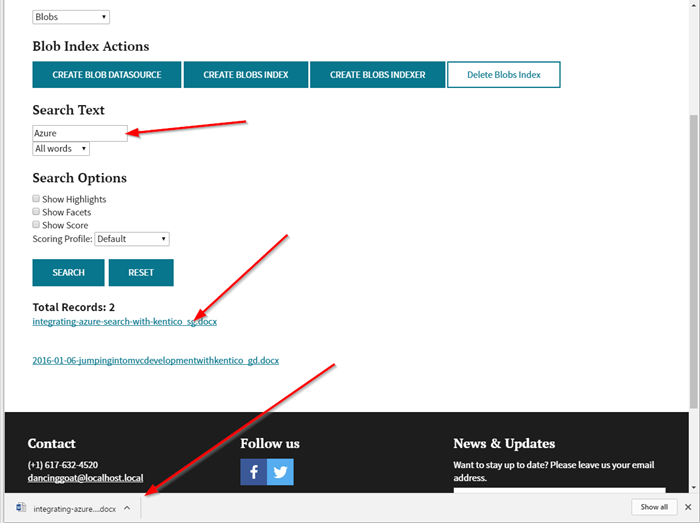
Note : If your storage account is not marked as Public, you will not be able to link directly to the blobs within it.
Moving Forward
As this blog demonstrates, Azure Search is a very powerful system you can integrate into your Kentico sites. And with Microsoft constantly updating it, you can be assured the capabilities will continue to expand as more functionality is added. If you haven’t checked it out, I highly recommend doing so to see what possibilities are available for your applications. Good luck!
You can learn more about Azure Search here.
Here is the entire code with all the Blob Index functions.
Get the code
This blog is intended for informational purposes only and provides an example of one of the many ways to accomplish the described task. Always consult Kentico Documentation for the best practices and additional examples that may be more effective in your specific situation.