Search for Media Libraries
Search is an essential functionality on all modern websites. In Kentico, we use Lucene.NET file system based search indexes to support our search functionality. The performance and capabilities of these search indexes are impressive, and when we add extensibility and flexibility into the mix, the results are outstanding. So what if we apply all this to Media Libraries and also enable searching through binary files like PDFs?
But let’s not get too far into the topic just yet. What I want to show you in the scope of this article is how to enhance Kentico in digital assets management field. This is a trending feature, and almost every editor asks for search, keyword or tagging functionality for Media Files.
As you know, we have a Media Libraries application in Kentico, which is able to cater for these requirements to some extent. But when it comes to rich search or looking for similar keywords, we need customizations.
This article has the following 4 parts:
- Extending Media Files to store keywords / tags
- Creating Media File Search Index
- Creating and handling of Media Files updates
- Building administration UI for Search functionality
Extending Media Files to store keywords / tags
Kentico does not have any field to store keywords or tags for Media Files. Therefore, we need to extend the list of fields and add one new.
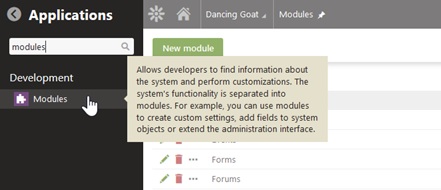
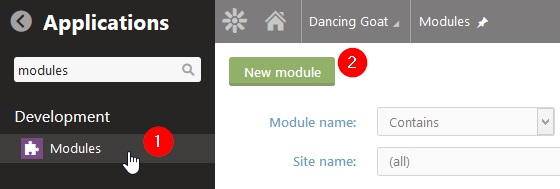
In order to do this, access the Modules application and open the Media Libraries module:
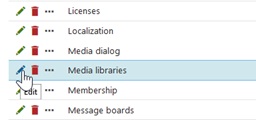
Then on the Classes tab, edit Media File:

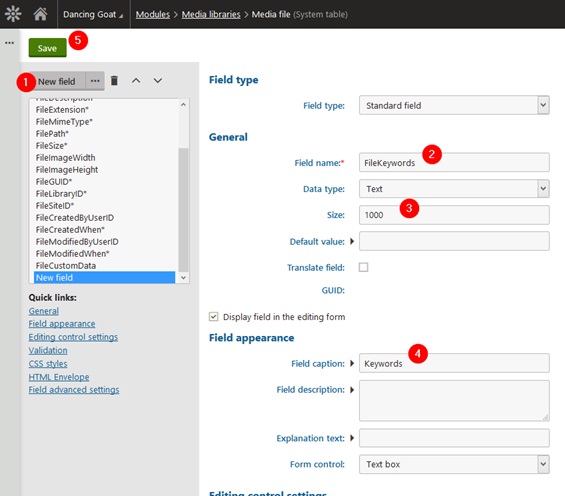
On the Fields tab, we can extend the definition of fields for Media File class.
Let’s add a new field and call it Keywords. Let’s also extend the field size to 1000 and use the TextBox form control as we will store keywords in a simple text form.
Then save the new field.
Now when we navigate to the Media Libraries application and select any file of any library, there will be a new tab available called Custom fields. This tab will contain our new text box called Keywords.
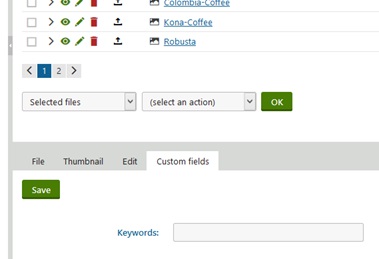
When we add some keywords into this field, Kentico will store them along with other metadata of the selected Media File.
Creating Media File Search Index
You can find a tutorial on how to create a custom Smart Search index in our documentation under the following link: Creating custom smart search indexes.
This documentation article is the best place where to start if you are not sure how Smart Search works.
What I want to achieve today is to create a search index that will store information about all Media Files in Kentico Media Libraries.
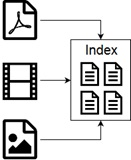
Smart Search index is a very easy thing to understand. For every Media File we have in Kentico, we collect some information, like file name, file extension, URL of the file, keywords (this is our new text field), etc. When we build the index, then for each file, all this information is formed in a list and stored in the index file as one page. Therefore, we will have as many pages in the index as we have Media Files in Kentico.
There are many types of Smart Search indexes in Kentico. However, there isn’t any index for Media Files yet, which is why we are creating one now. As we will be creating multiple custom code files during this article, let’s try and follow the best practices and create a new project for all custom code files in Visual Studio. I call mine MediaLibrarySearchIndex and it is a Class library type of project (find all code files in GitHub).

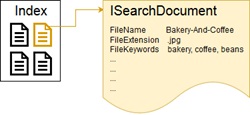
Before we create the Smart Search index implementation, let’s create a converter that would take any MediaFileInfo object and convert it into an ISearchDocument object. ISearchDocument is an interface used for pages inside the Smart Search index file and holds a list of keys and values.
This object can be created by Kentico’s SearchHelper:
SearchHelper.CreateDocument(SearchDocumentParameters parameters)
And we can add key-value pairs using another method from the same class:
SearchHelper.AddGeneralField(ISearchDocument document, string name, object value, bool store, bool tokenize, [bool valueToLower = true])
Text Extractors
Now, before we move further, there is one last bit of information I haven’t mentioned yet. In Media Libraries, we may have files that contain text, such as TXT files, PDF or DOCX documents and so on. When we have these files stored as attachments, Kentico Pages Search Index allows you to also search through content of these files. For our Media Libraries Search Index, we also want to have this possibility.
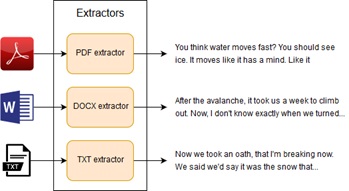
In Kentico we have so called Extractors which are able to convert a binary file to a simple string. They open the file and look for all texts. Once we have a string containing all texts from the file, we can simply add it as another key-value pair into ISearchDocument page of the index. A page in the index will look like this:
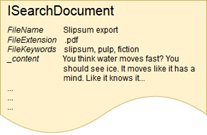
Both of these actions are part of the attached SearchHelper.cs code file. The GetContent method returns a string containing all texts from the binary files of the supported types. Kentico has extractors for various data types, however, for some files we cannot get any content, like image files. In that case, this method just returns the file name.

The GetSearchDocument method will create a new index page that can be added to the Smart Search index file and fill it with key-value pairs of data gathered from the provided file – these are the fields from MediaFileInfo object in Kentico where we also store our Keywords!
Search Index
Now when we have our SearchHelper ready to give us ISearchDocument pages for the index, we can start creating the index itself. Every custom search index needs to implement the Rebuild method – Kentico calls it to create the index on the file system. In this method, we need to perform the following two tasks:
- Limit the number of processed Media Files in one batch.
- Convert media files into ISearchDocuments.
Limiting the number of processed Media Files in one batch
First of all, there can be a lot of files in Kentico Media Libraries. When we enhance the functionality, editors will probably add even more files. Whenever Kentico rebuilds the index, it needs to store all information from the files – including extracted text from the corresponding files on the file system – in memory. For that reason, there is a batch size limit. While rebuilding, we can use it to limit the number of processed Media Files in one step.
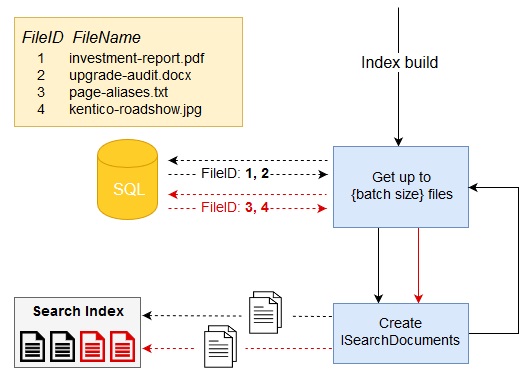
Converting media files into ISearchDocuments
The next action is to create ISearchDocument for each Media File. For that purpose, we already have a method in our custom SearchHelper. We just need to collect all ISearchDocument pages and store them within one Smart Search index. Writing into the index files on the file system is handled by IndexWriter. All code is available in the attached SearchIndex.cs code file.
Registering a new index in Kentico
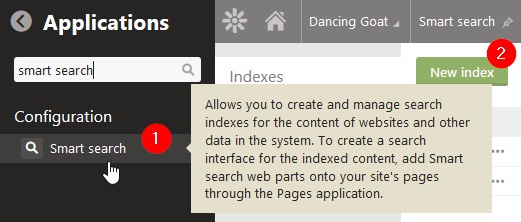
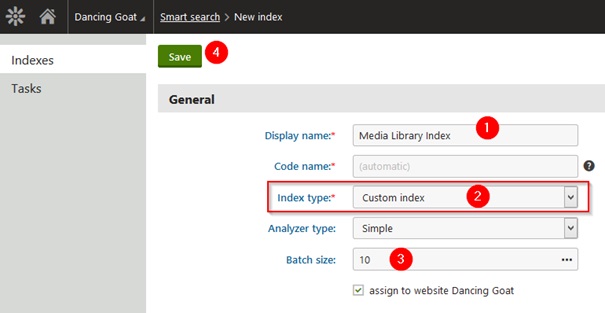
Once we have the implementation ready, we need to register the Search Index in Kentico. That can be done in the Smart Search application by clicking on the New index button.
Make sure you select Custom index as the index type. This setting cannot be changed later.
As a next step, open the Indexed content tab and configure the provider class for the index. From the first dropdown, select the name of your project (MediaLibrarySearchIndex in my case) and from the second dropdown, select the name of the custom index implementation class – SearchIndex.
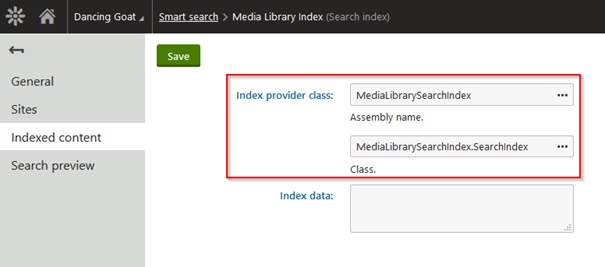
If you cannot select your custom assembly from the first dropdown, please make sure there is [assembly: AssemblyDiscoverable] attribute in Properties/AssemblyInfo.cs and that the CMS project has a reference to your custom project.
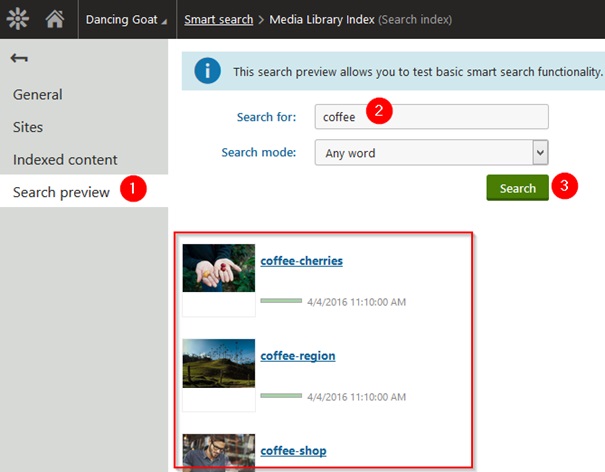
Once saved, Kentico will prompt you to rebuild the index. After confirming the action, it will take a while to process all the media files into ISearchDocuments and write them into the index file. Finally, you can check the functionality on the Search preview tab.
Creating and handling Media Files updates
The index is now indexing all files in Media Libraries. However, when you change a file or remove it or add a new one, the index will not reflect these changes. Remember that we provided an implementation just for a complete rebuild of the index. Rebuilding it every time when some file changes would be a performance hit, so we need to take a different approach.
Smart search tasks
Let’s take a look at how index updates work on pages. Whenever page data is changed, Kentico creates Smart Search task in the database. This task contains information about the page and also the Smart Search index which should be updated. These tasks are then picked up by another component called SearchTaskExecutor which executes them and updates the respective indexes.
When we go back to our index, there are two types of Smart Search tasks we need to think about – insert/update and delete. Deleting a page from Smart Search index is an easy task. Every page in the index has an ID field which Kentico uses to identify a page that should be removed. In our case it is the ID of the respective MediaFileInfo object.

In case of the insert/update action, when we want to add a new or update an existing index page, the situation is more complicated. Because we are working with the custom Smart Search index, Kentico does not know how to build the ISearchDocument index page. It does not even have a clue which objects we are working with. Therefore, we need to provide an implementation which would handle the insert/update Smart Search tasks. Delete tasks will be handled by Kentico automatically.
Creating smart search tasks
We need to create Smart Search tasks whenever any Media File is inserted, updated or removed. If this action occurs, Kentico fires events allowing us to trigger any custom code that we provide. How event handlers can be created in Kentico is described in detail in Handling global events. Take a look at the attached EventHandlers.cs file to see the actual implementation.
Let’s create a Delete_After handler first. This handler is bound to the MediaFileInfo.TYPEINFO.Events.Delete.After event. Note that we need to create the Smart Search task telling Kentico to update our search index after the action is performed when we know it was successful. Then we simply create a Smart Search task of type Delete and provide the ID of Media File which we want to exclude from the index.
The other handler is the same for both insert and update events. We need to create a new ISearchDocument and add it to the index. This process will be handled by an implementation which we will provide later. In the scope of the Smart Search task, we just need to provide the information about the file itself and the action. That is why we create a new Smart Search task of type Update with SearchTaskValue set to MediaFileInfo object ID.
Processing smart search tasks
Right now, whenever anyone adds, updates or removes files in Media Libraries, Smart Search tasks are created and stored in the database. Delete tasks are processed by Kentico immediately, other tasks will be piling up in the database as there is no component that would process them yet.
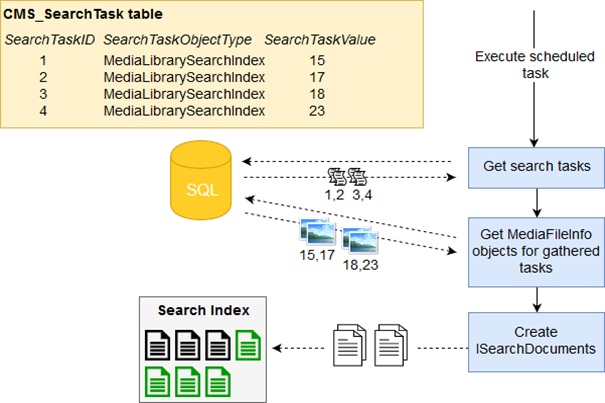
Let’s create a simple Scheduled task that will handle the insert/update Smart Search tasks. We will use the same approach when selecting Smart Search tasks from the database as we used with Media Files and also respect the maximum batch size setting.
For each task, we need to get the respective Media File from the database according to the SearchTaskValue field. This is the field where we stored the Media File ID when we created the task in the event handler.
For each Media File, we need to create ISearchDocument and add it (or update it) to the index file. Update of the index is handled by Kentico SearchHelper, we just need to provide the index file page. For that we will reuse our SearchHelper.GetSearchDocument method we implemented earlier.
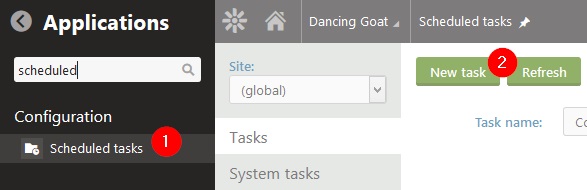
The last bit to get this working is to register our custom Scheduled task in Kentico. To do that, open the Scheduled tasks application and click on the New task button.
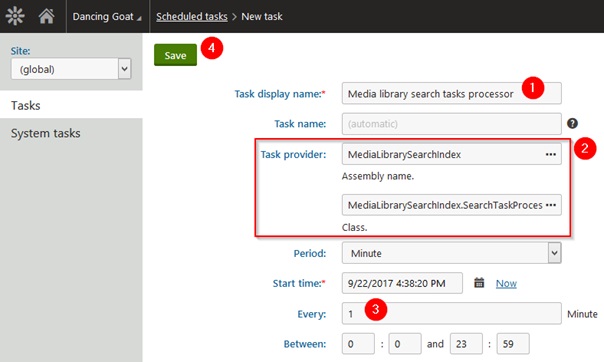
I named the Scheduled task as Media library search tasks processor. This is because it only processes tasks for Media Library files, not all of them. Make sure to select your custom assembly in the Task provider dropdown and the index class in the second dropdown. I configured the task to run every minute to keep the index up-to-date, however, you can set it to any other value.
Now try to upload a new image into any Media Library. Kentico will create a Smart Search task for updating the index.

And you can check this new task in the database:

After a minute or so when our Media Library Search Task Processor processes the Smart Search task, you can try searching on the Search preview tab in the Smart Search application and you will see the results from the updated index:

Congratulations, we now have a Media Library Search Index which is indexing all Media Files and is being updated automatically.
Building administration UI for Search functionality
We have the functionality in place, but till now we were only testing the custom Smart Search index functionality in the Smart Search application using the Search preview tab. Let’s make life easier for editors and give them nice search UI within the administration interface.
Creating custom module
To extend any UI in Kentico, we always need to have a custom module. We can create one in the Modules application and call it the same as our custom project in VS.
Once the module is created, make sure it is added to your current site on the Sites tab.
Creating UI page template
Before we add a new UI element to enable our editors to access just the implemented functionality, we need to create a UI Page Template for it. UI Page Templates look and work the same way as standard Page Templates, but they can be used within the administration interface.
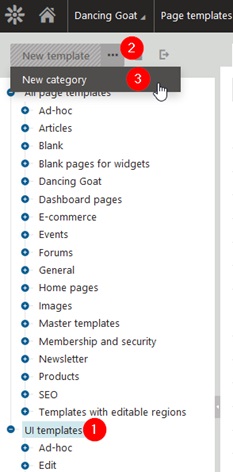
First we need to create a category. Open the Page templates application and create a new category called Media Library Search Index.
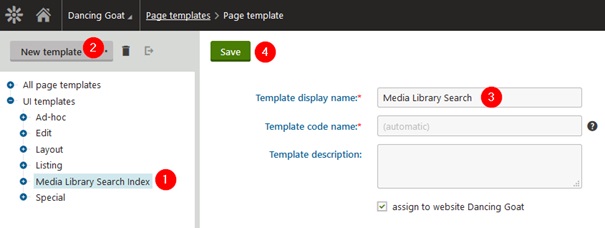
Now let’s go ahead and create a template for our admin UI page and call it Media Library Search. There will be two web part zones – one for the search dialog and the other for the search results. Each of these zones will currently host one web part. Obviously, just one web part zone would also be sufficient, however, we may need to extend the UI in the future, for example to add filters, so it is convenient to have the web part zones already separated.
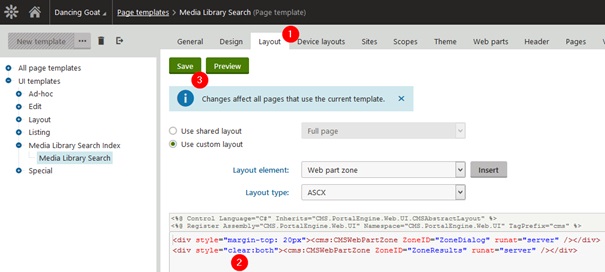
When we switch to the Design tab, we can add web parts to the layout of this new template.
Into the first web part zone, add the Smart search dialog web part. This web part displays a search box that enables editors to search for any content. The second zone will host the Smart search results web part. In the configuration of this web part, select our custom search index.
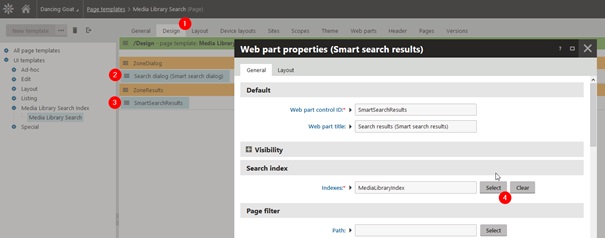
Because we are using this web part, we have a lot of other configuration options available. For example, we can enable typo tolerant search or set up faceted search using Smart search filter web parts. By changing Analyzer type in the configuration of our custom Smart Search Index, we can also achieve searching by only parts of keywords or stems.
There is one last thing we need to configure for the web part to display results. It is the transformation which will be used to display every single found item. At the field with the Transformation label, create a new transformation by clicking on the New button.
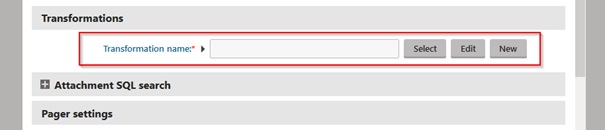
The transformation can contain any HTML markup to help you achieve your desired design. To get the data of media files, we can use the GetSearchValue macro and combine it with any other supported transformation methods (see the complete list in Reference - Transformation methods).
See the whole transformation markup in the attached file - SearchResultTransformation.txt.
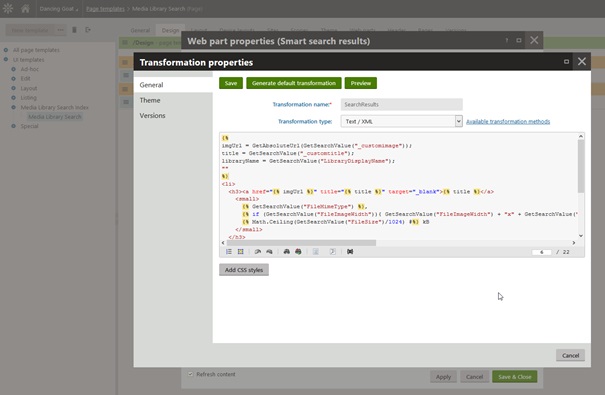
There are LI tags in the transformation, so once the transformation is set, we also need to add UL tags into the HTML envelope of the same web part.

Creating a UI element
Let’s go back to the Modules application and open our custom Media Library Search Index module.
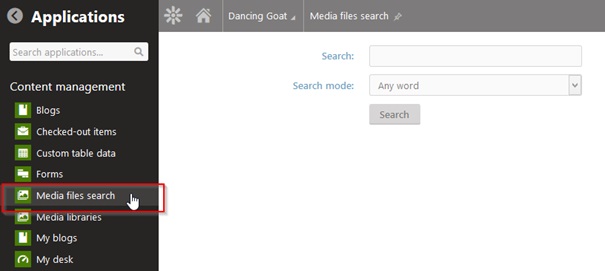
Under the UI elements tab, expand the Content management category and select it. By clicking on the plus button at the top, create a new UI element (i.e., application) under this category. Let’s name it Media files search and give it the same icon as the Media Libraries application is using. In the Element content section, define what Kentico should do when a user clicks on this UI element – we have already prepared a UI Page Template, so select it by clicking on the Select button and picking it from the list.
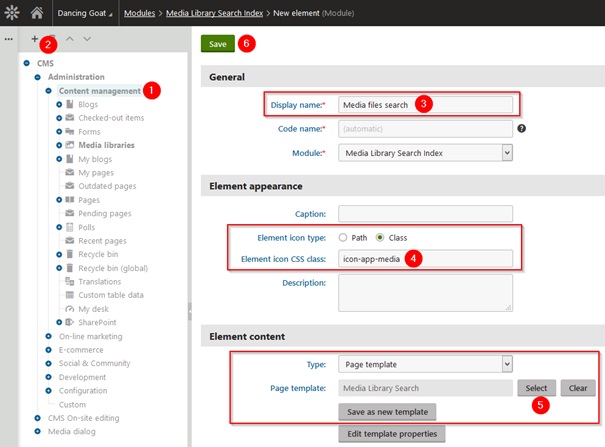
Once you save the UI element and reload the whole frame, you will see our new Media files search application under the Content management category.
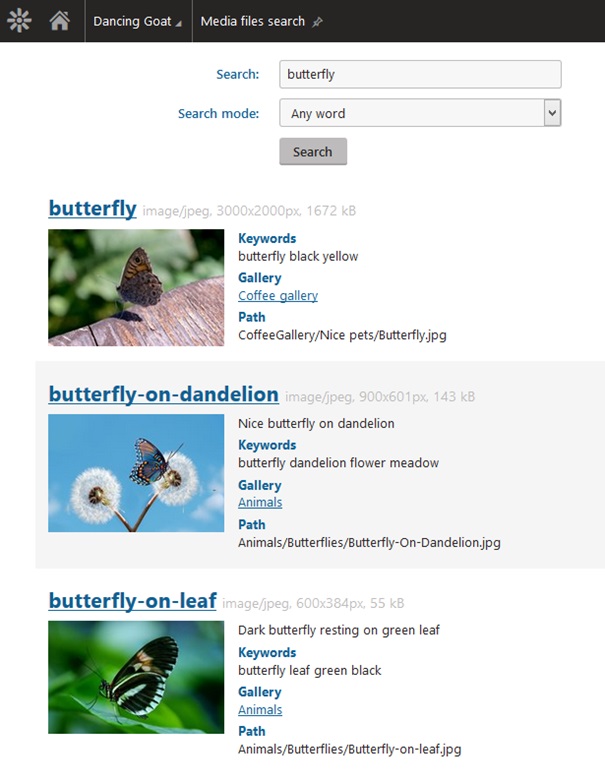
When you click on the application, you can see a search dialog that enables editors to search through all media files. How capable the search is depends on the implementation of the custom Smart Search index. You can verify that our index also works for keywords, descriptions and file names.
If you used the same transformation as I did, for every item in the list of found files, you will see an image preview, a list of keywords, and some basic information about the Media File. There is also a link that opens the Media Libraries application and selects the respective Media Library in which the file resides.
Congratulations!
This was the final step in order to enable users to search for media assets stored in Media Libraries.
In this article I explained how to extend Media Files and how to build a custom Smart Search index that enables searching through all of those files and displaying results within the Kentico administration interface.
In the scope of the following articles, I will show you some other possibilities on how to extend the functionality of Media Libraries and media assets overall, so stay tuned!
Get the code