Module development - Order and priorities
Sometimes building an unordered list of objects in a Kentico custom module is not enough, especially if you have a long list, but work with a set of preferred options most of the time. This article will show you a handy option to improve the experience of your users
Hi there,
Today I am going to show you an easy way to make your list of data prioritized. Similar to what you can see in the list of device profiles or personalization variants.
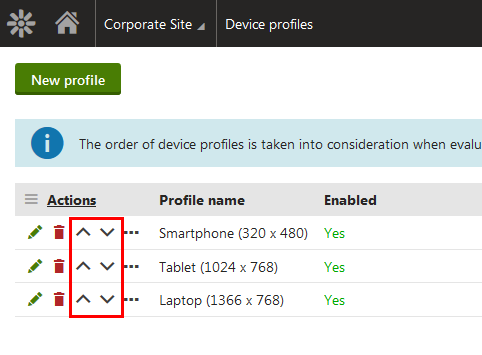
We will add the same ability to the list of Industries created within
one of my previous articles. The task is very simple, since Kentico provides a native way to do this, including the related API.
Prepare the data and API to support ordering
The item order value must be a part of the data of objects, so the first step is to navigate to a specific class and add an integer field which will store the order value. This value is going to be an integer number maintained by the Kentico API. Unless you make low-level modifications to the order value, the system will keep a consistent list of unique values all the time.
I have created an optional integer field named
IndustryOrder not visible on the editing form. Like with other field types, I recommend that you follow our naming best practices, and name the field with an “Order” suffix.
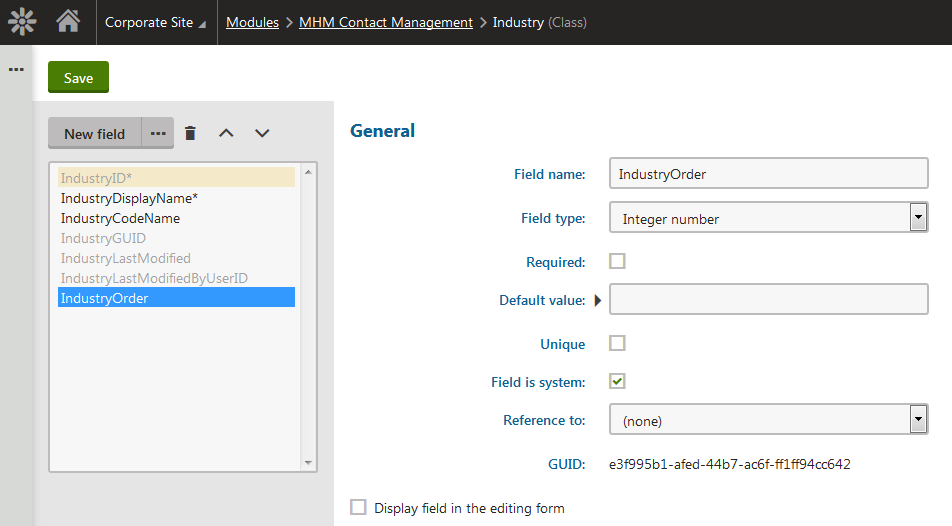
Make sure you create the field as not required, as it won’t be populated until the first ordering request.
Ordering API
As the next step, open your info class code (IndustryInfo.cs in my case), and modify the class’s type information to include the knowledge that the new field is the order field. Also, add a new strongly typed property representing the order field:
namespace MHM.ContactManagement
{
  public class IndustryInfo : AbstractInfo<IndustryInfo>
  {
    ...

    public static ObjectTypeInfo TYPEINFO = new ObjectTypeInfo(...)
    {
      ...
      OrderColumn = "IndustryOrder"
    };

    ...

    [DatabaseField]
    public virtual int IndustryOrder
    {
      get
      {
        return ValidationHelper.GetInteger(GetValue("IndustryOrder"), 0);
      }
      set
      {
        SetValue("IndustryOrder", value, 0);
      }
    }

    ...
  }
}
Now the API knows how to maintain the order information of your data and will start using it. If you don’t want to work with the order in your API, you can skip the following part and proceed straight to the section about the UI.
Just for demonstration, I have created two wrapper methods in
IndustryInfoProvider to show you how to access this API from your code. Here is their code:
namespace MHM.ContactManagement
{
  public class IndustryInfoProvider : AbstractInfoProvider<IndustryInfo, IndustryInfoProvider>
  {
    ...

    public static void MoveIndustryUp(IndustryInfo info)
    {
      info.Generalized.MoveObjectUp();
    }

    public static void MoveIndustryDown(IndustryInfo info)
    {
      info.Generalized.MoveObjectDown();
    }

    ...
  }
}
Many of you probably haven’t yet used the
generalized interface of info classes, so let me give you a general introduction.
We didn’t want to expose the general functionality of all objects into their public API, because that would provide an overwhelming number of Intellisense options. So instead we made all these general members protected (you may call them directly from your info class), and added a wrapper for info objects that provides public access to them.
Anytime you want to access this generalized interface of objects, either use the
Generalized property of the object, or assign the object to a
GeneralizedInfo variable (there is an implicit conversion between regular info objects and the generalized wrapper). I used the first approach in my example, because I think it’s more readable. However when working with Kentico API that requires a GeneralizedInfo instance from you, you can just pass in the info object as well.
Anyway, there are more methods than just these two for managing the order of objects. To see more, just search for “Order” in Intellisense.
Order arrows in the listing UI
Providing the order arrows in the object listing interface is simple. You can use the Device profiles UI as a reference, but I will show you how to do this for our sample scenario anyway. We just need to add a couple of new items in our grid configuration.
Open your grid configuration file for the listing you want to modify (in my case it is
~/App_Data/CMSModules/MHM.ContactManagement/UI/Grids/MHM_Industry/default.xml) and add two actions to the action definition just like these:
<?xml version="1.0" encoding="utf-8" ?>
<grid>
  <actions>
    ...
    <action name="#moveup" caption="$General.Up$" fonticonclass="icon-chevron-up" />
    <action name="#movedown" caption="$General.Down$" fonticonclass="icon-chevron-down" />
  </actions>
  ...
</grid>
These are both built-in UniGrid actions implemented to leverage the API I have outlined above. You don’t need to worry about any code-behind for handling these actions. If you want to handle the actions yourself, just use custom action names, and implement your own logic through a
UI extender. Here are some examples of implementing the grid actions:
http://devnet.kentico.com/articles/advanced-unigrid-example
https://docs.kentico.com/display/K82/UniGrid#UniGrid-Gettingstarted
Now that we set up the grid, we can enjoy the possibility of setting a custom item order in the listing UI.
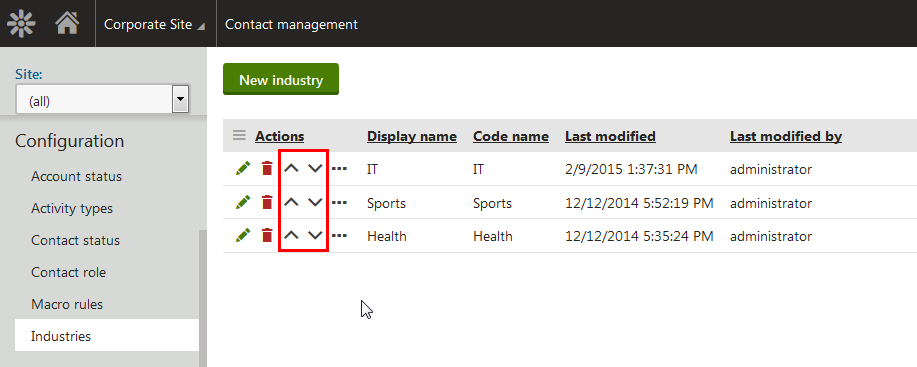
If you click the arrows, the items will move accordingly. If they don’t, you probably need to double-check the configuration of your type info or recompile the project in the case of web applications.
We’ve previously been asked if we plan to provide native support for more efficient ordering within large numbers of items. We technically could, we just didn’t see it as a priority compared to other things. If you want to support such a feature, please vote here for this idea:
http://ideas.kentico.com/forums/239189-kentico-product-ideas/suggestions/5932832-html5-drag-n-drop-reordering-for-custom-table-reco
Applying order to components
If you now go to the contact properties, the Industry selector still displays items ordered by their display name.
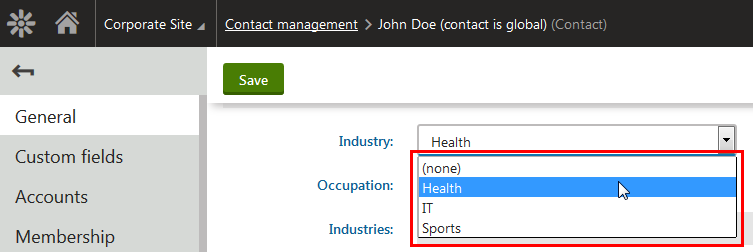
This is because different components use different rules for the default order of items. Specifically, the UniSelector uses display name ordering by default.
To set the selector to use your order column, just configure this column in the “Order by” property of the form control in the contact field editor:
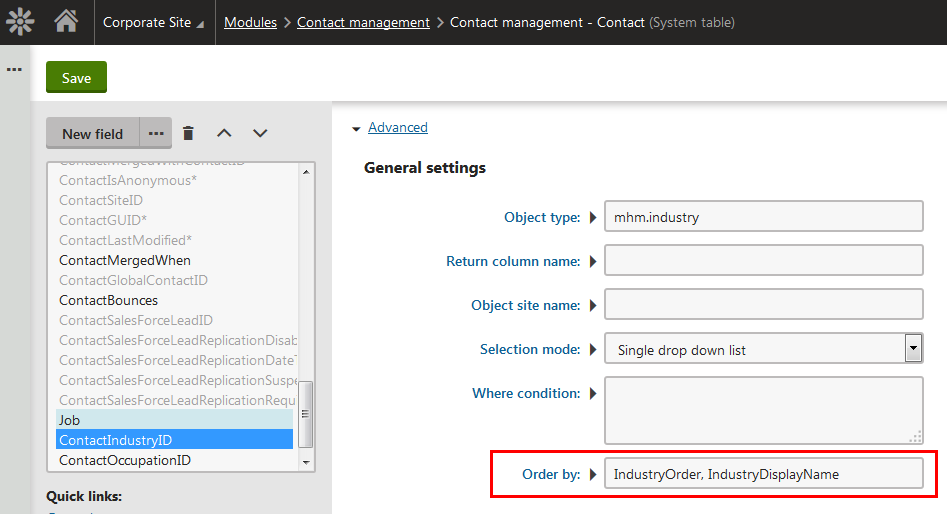
Note that I have used both order and display name columns to make sure that the order is as deterministic as possible even in situations where two order values overlap for some reason (for example due to low-level changes).
And the result is that the selector displays the values in the correct order we wanted:
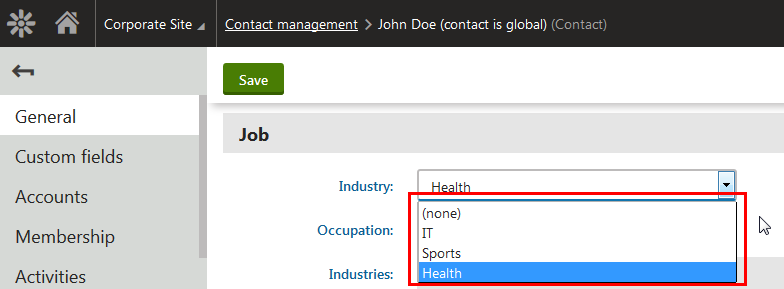
And that is all you need to do to successfully leverage support for explicit ordering in Kentico.
Wrap up
Today you learned how to easily leverage order column support in Kentico. We went through:
- Creating the order column
- Setting up the order column in type info
- Accessing the general API
- Providing order actions in the listing UI
- Altering selectors to leverage the order column
See you next time!