Events as products in Kentico 8
This document describes how to enable events to become products; it means how to enable attendees to pay for the event registrations.
First, download this package with already prepared code changes and extract it somewhere.
Please follow these steps:
Backup your database.
- Copy contents of the CMS folder to your web project folder.
- The \App_Code\CMSModules\Ecommerce\EventsProducts\ folder contains custom E-commerce providers. If you are already using such custom providers, you will need to merge their code. The folder name is optional, and you can move it within App_Code according your needs.
- Add a reference to your web project BIN folder DLLs (CMS.DataEngine, CMS.Ecommerce, CMS.EventManager, CMS.Helpers, CMS.Base, CMS.Synchronization, CMS.DocumentEngine) in the CustomEventManager project, then add a reference to the CustomEventManager project in the web project.
- Build the solution.
- Go to the Admin interface -> Document types (Page Types in Kentico 8.1) -> Event (booking system) -> E-Commerce tab, and check Document type (Page in Kentico 8.1) represents a product type box.
- Create a new product document of type “Event (booking system)” in the content tree, go to the Document (Page) types -> Event (booking system) -> Transformations tab, and modify or create transformation to show the button for adding a booking event to the shopping cart, see another product’s transformation for more details.
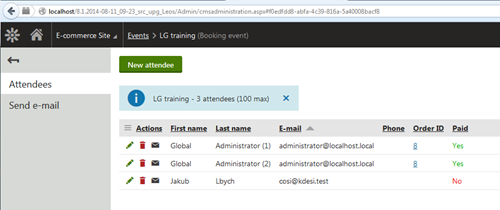
- Open /CMSPages/ModifyAttendeesTable.aspx page in your web browser. Do that only once. No response will be shown if it runs correctly, however you can verify the result in the global Event log (class update event). This action will add two new columns to the Events_Attendee database table:
AttendeeOrderID – identifier of an order the event attendee is associated with
AttendeePaymentCompleted – indicates if attendee has already paid for the registration
Please note: Attendee payment status is updated when the corresponding order is paid:
