Working with Forms in Kentico Marketing Automation—Part 1
Marketing Automation is one of the most powerful features of Kentico. By defining and configuring the process to execute automatically, you can simplify the marketing processes and minimize mistakes and issues. When combined with Kentico Forms, this becomes a very valuable tool to use within an organization and improve business processes. In this two-part blog, I’ll show you how to leverage several EMS features to achieve powerful and efficient results using Forms with Kentico EMS.
Forms have been part of Kentico since the beginning. As a simple, intuitive method to get information from a user, Forms are easily created and designed, all from within the application. By adding EMS Marketing Automation to the mix, you can create a powerful and capable process to manage your data and automate actions. Often, companies have specific business rules and requirements when it comes to their data. By using the built-in capabilities, you can add a number of steps into your Marketing Automation.
For this blog series, I will demonstrate creating a new form and process, adding a wait period, and automating emails. This will include setting up a new form, configuring a basic process, and then adding some awesome functionality by way of a custom macro and some dynamic values. Due to the amount of setup required to demonstrate this custom code, I have split this post into two blogs for easier reading.
Intrigued? Let’s get to Part1!
Create a Form
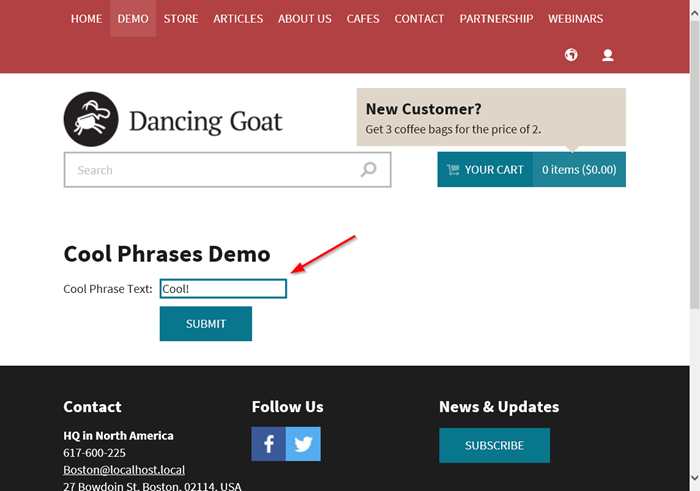
I defined a basic form within my site named Cool Phrases. This form would contain some of the most epic phrases throughout history, submitted by my users. For the form itself, I added two fields, one for the phrase and one for a status.
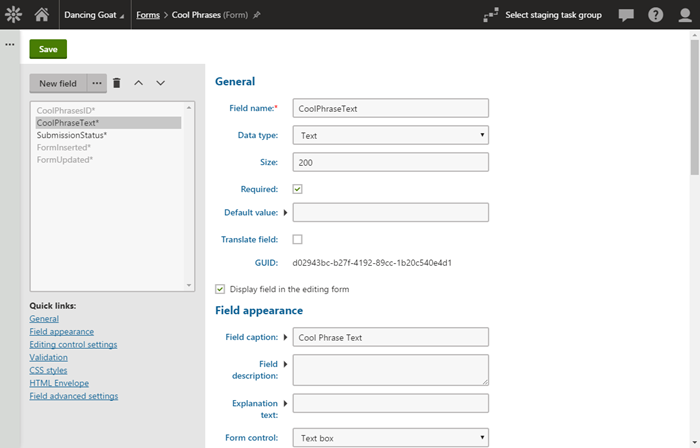
I added the form to my site so users could enter data.
Create a Marketing Automation Process
The next step was to create my Marketing Automation Process I wanted to execute. The Kentico EMS engine already has some built-in rules you can leverage when working with Forms. Most often, companies will want to send an email or a similar action when a form is submitted to prevent an admin from manually doing so. Luckily, Kentico has a trigger to do just that. But more on that later, first I needed to create a form.
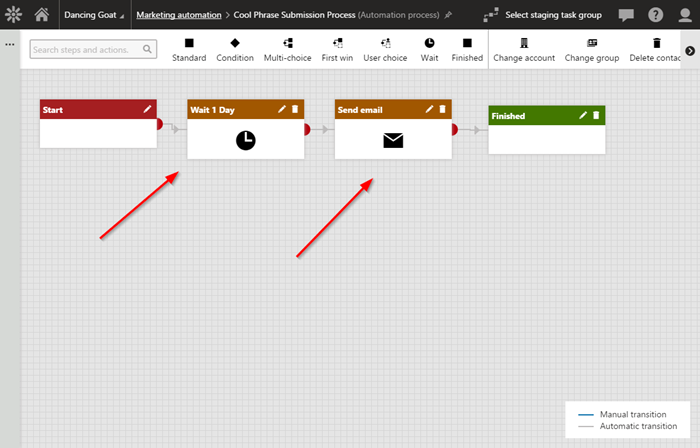
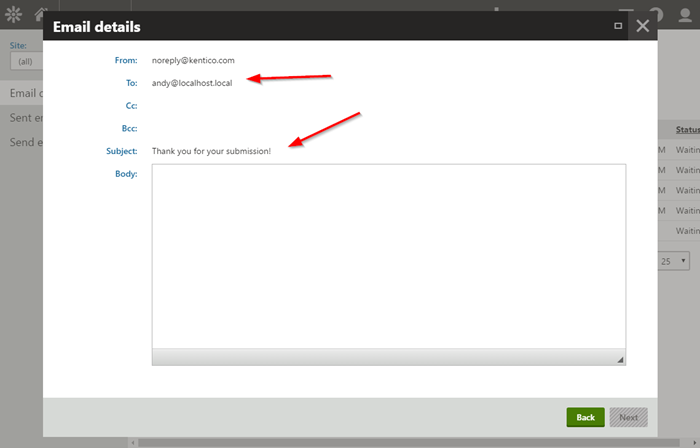
In the admin UI, I created a new process and added a “Send an email” step. This step would be used to notify an administrator a new form had been submitted. Because I need to delay this notification, I placed a Wait step before the Send an email step to force the system to wait a specified amount of time before continuing.
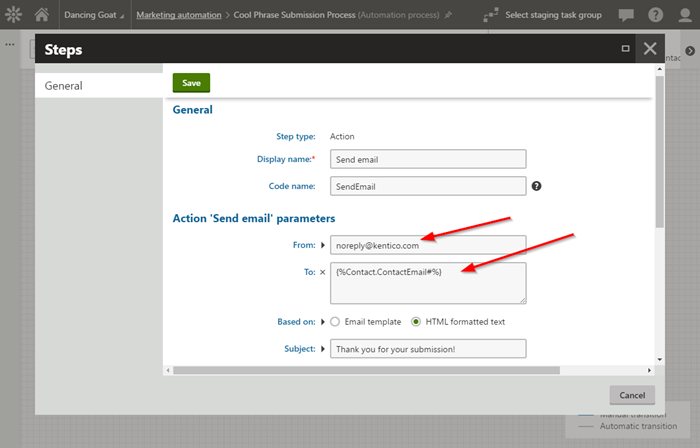
In the Send an email step, I added in the contact’s email address to dynamically set the recipient.
Note
Yes, I know Forms have this functionality built-in with the Notification email feature. For the purpose of my demo, I needed to delay the sending of this email to the recipient. This will also come into play in Part 2 of the blog series.
Adding a Trigger
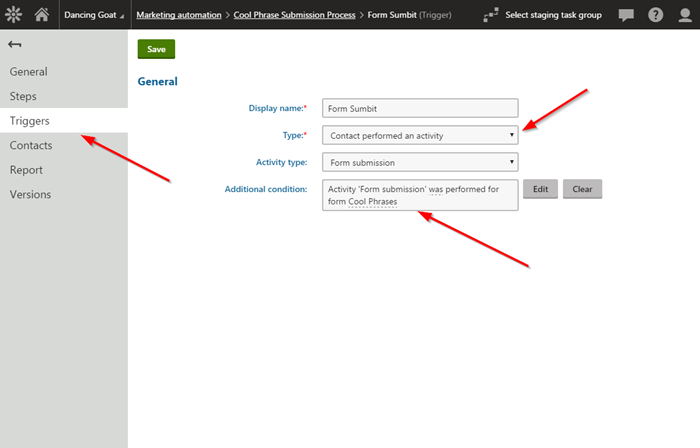
The next step was to add a trigger for the process. Kentico has a number of built-in trigger types, including the Contact performed an activity type, which allowed me to select Form submission as the specific activity type. This type of trigger will cause the process to execute anytime the user fills in the specified form.
Testing
With those pieces in place, I was ready to test my process to ensure it was working properly. I submitted a form via the site and confirmed the data was recorded properly.
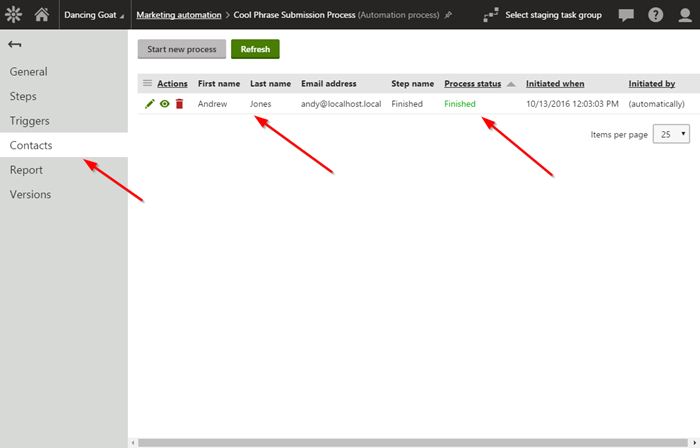
Within the process, I confirmed the contact had started the execution and had been moved to the Wait step.

Finally, after the designated wait period, I confirmed the user was moved to the Send an email step, and an email was sent, and the process completed.
Moving Forward
As you can see from this blog, it’s very easy to set up a process to execute when a user submits a form. But what about if you need to get the form values or implement a more complex process? In Part 2 of this blog, I will show you how you can leverage a custom macro to add some awesome functionality to your site. For now, get familiar with the Marketing Automation engine and check out the other built-in processes and capabilities. Good luck!