This article will describe how the various Permissions matrixes interact to create user permissions for documents within the CMS Desk.
First let’s take a look at the different permissions options within Kentico.
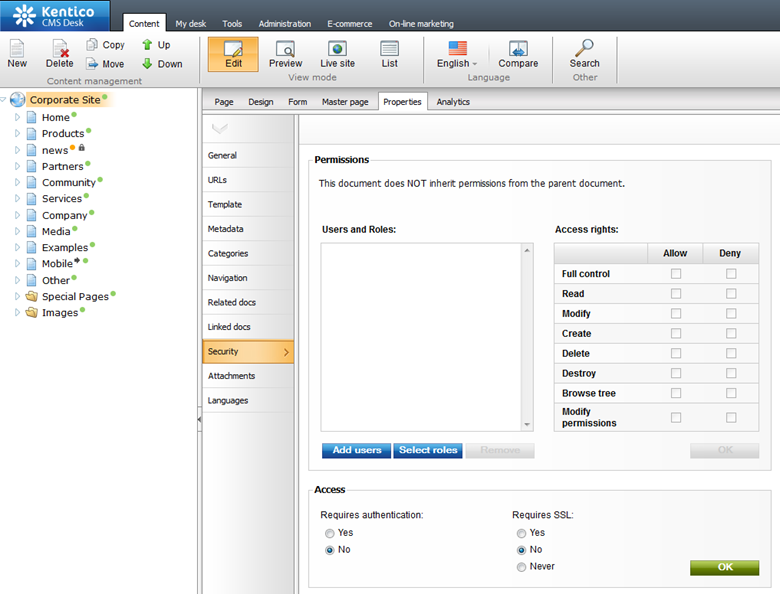
Document Level Permissions - can be accessed via CMS Desk -> Content -> select a document -> Properties -> Security. As you can see from the screenshot, we have an option to either Allow or Deny a given permission for this document. A Deny permission will always overrule any Allow permission regardless of where the Allow permission is set.
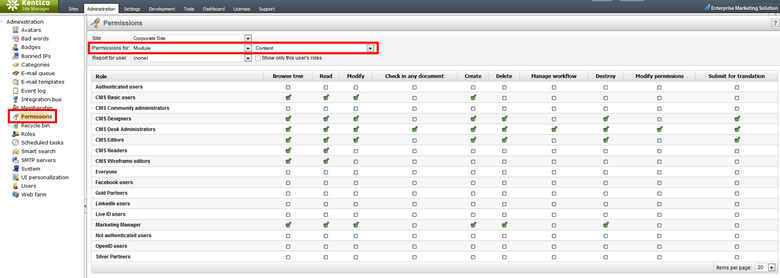
 Content Module Permissions
 - can be accessed via Site Manager -> Administration -> Permissions -> Module -> Content and work with Document Level permissions to control document access.
Now that we know the different permissions matrixes, let’s see how they actually work together. Our example will be based of the default
Corporate site for the user
Andy, who has the
Is editor permissions enabled, and has no UI personlizations in order to keep our example as simple as possible. You should also note permissions on the live site are checked according to Site Manager -> Settings -> Security & Membership ->
Check page permissions setting and control when the document permissions are checked outside the CMS Desk.
In order for the user to see the Content tab in the CMS Desk, you must enable the
Browse tree permission on either the
Root document on the
document level permissions, or on the
Content module permissions. Once the user can see the documents in the Content tree, you can use the
Content module permissions for all documents in the Content tree and then use the
document level permissions to
Deny permissions to certain documents in the content tree, or you can use the
Document level permissions to control access on a per document basis.
Think of the
Content module permissions as a building, and the
Document level permissions as rooms within the building. The user must have access to the building in order to access the rooms, but you can control which rooms the user can access once they enter the building.

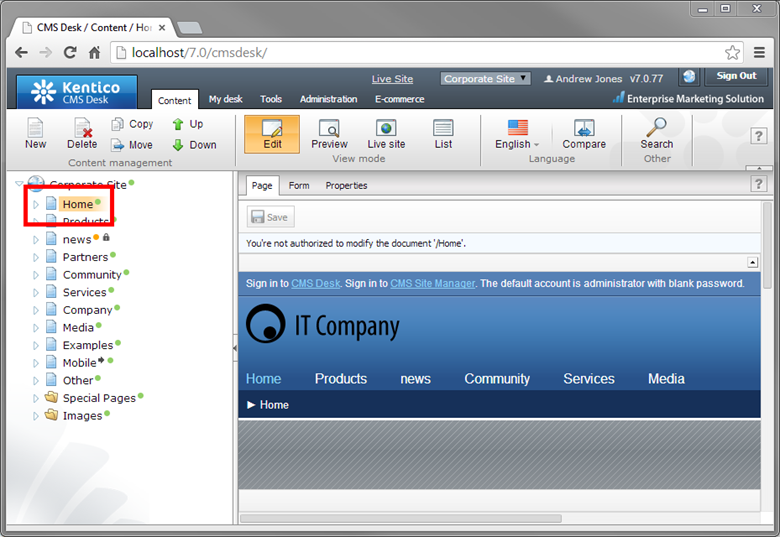
The user
Andy is able to read the Home document.
Now let’s
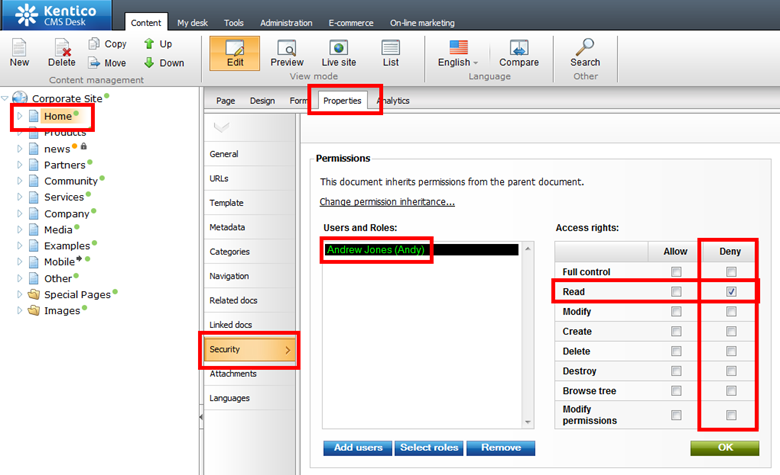
Deny the
Read permission for
Andy on the Home document.
 Andy
Andy can no longer read the Home document
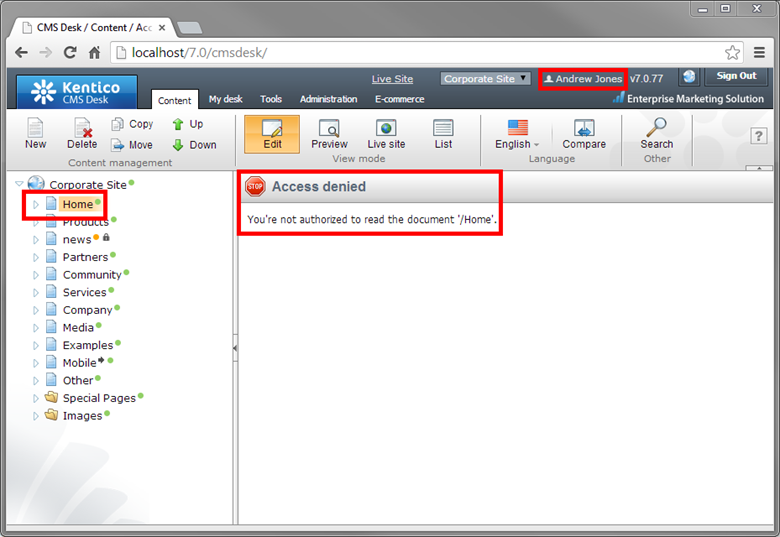 Andy
Andy can read any other document in the content tree.
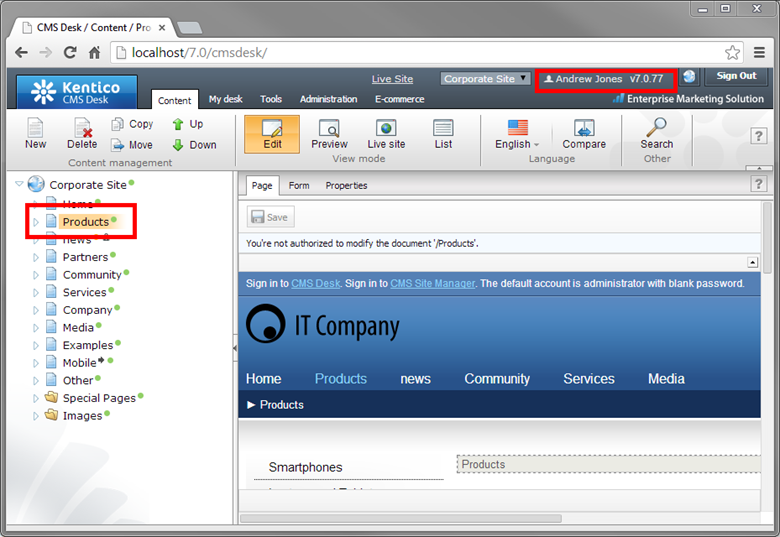
Let’s say you want to allow the user to
Modify only
News document types without allowing him to
Modify any other documents with the Content tree, this is where the
Document type permissions come into play.
Our example user
Andy only has the
Browse tree and
Read permissions currently set from our last example, so he cannot modify any document in the Content tree. If we set the
Modify permission for only the
News document type,
Andy will be able to modify any
News document type within the Content tree, provided we have not set a
Deny permission on the
Document level permissions within the CMS Desk.
 Andy
Andy is allowed to
Modify a
News document type
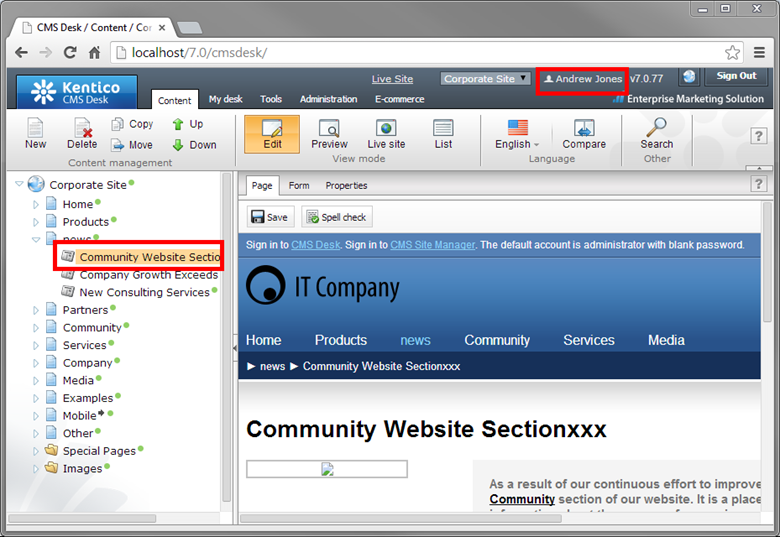
But not allowed to
Modify any other documents like a
Page Menu.
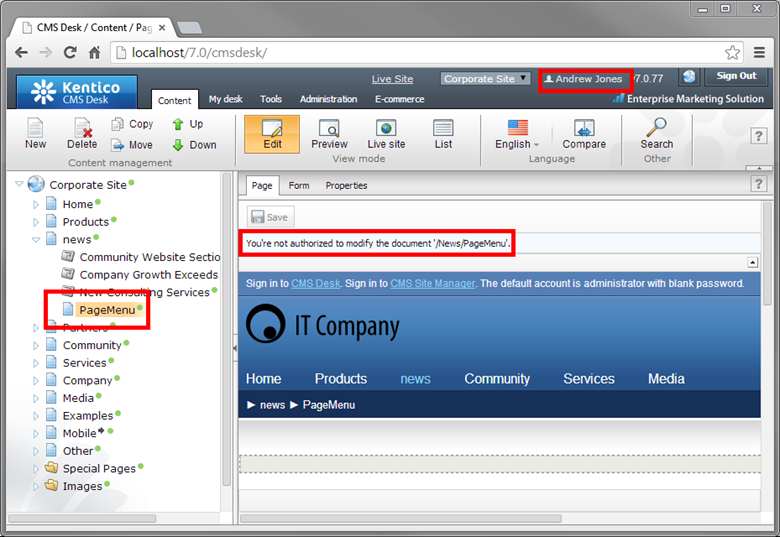
The screenshot below illustrates how all these permissions matrixes interact
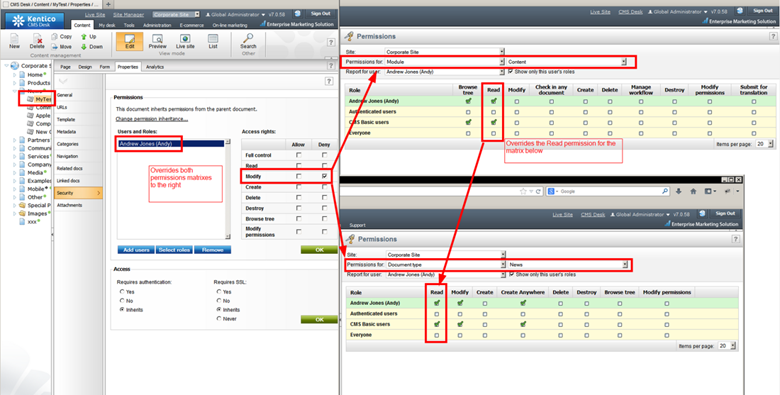
Any
Deny permission that is set on the
Document level permission (left) will override all other permission matrixes. Any permission that is set on the
Content module permissions (top) will override the same permission set on the
Document type permissions matrix (bottom).
I hope this example will give you a better understanding of how to setup permissions within your site. If you run into some permissions issues or can’t quite figure out what permission is missing, you can use the
security debug which shows the permissions the user is receiving for the document in question.