How To: Creating a Custom Document Type
Content needs to be driven by the demands of business. While there are an enormous amount of document types in Kentico, business specific schemas are inevitable. Custom document types enable system administrators to create data schemas specific to the needs of your business. In this blog post we will walk threw the creation of a custom document type for employee biographies.
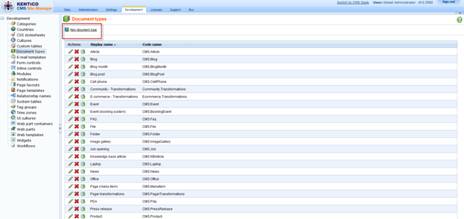
1. Log into Site Manager, select Development tab, Document types and then click New Document Type as shown below
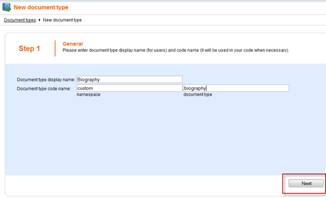
2. In the New Document type wizard enter the following information and select Next as shown below
|
|
Document type display name: Name used to create new documents.
Document type code name: Namespace used to differentiate the document type from system types.
|
Note: Depending on your naming conventions you may use a different namespace convention.
3. Enter the following information and select Next
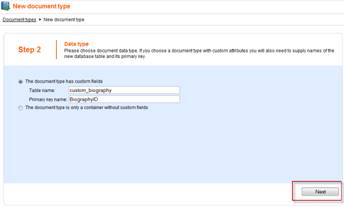
Note: This step selects the name of the database table used to store document information. Make sure to enter the name of a table that doesnt currently exist.
4. Click New attribute to create a new field. Enter the following attributes by clicking the green plus sign shown below for each entry, then click OK to save.
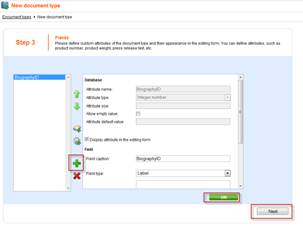
Enter the following attributes:
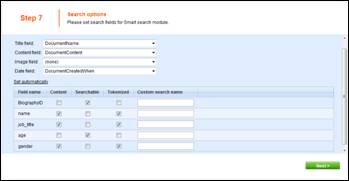
Attribute name: name
Attribute type: Text
Attribute size: 50
Field caption: Name
Field type: Text box
Attribute name: job_title
Attribute type: Text
Attribute size: 50
Field caption: Job Title
Field type: Text box
Attribute name: age
Attribute type: Integer Number
Field caption: Age
Field type: Text box
Attribute name: gender
Attribute type: Text
Attribute size: 2
Field caption: Gender
Field type: Radio buttons
Options:
1;Male
2;Female
Attribute name: bio
Attribute type: Long Text
Field caption: Biography
Field type: HTML area (Formatted Text)
5. Select Use document name field from the drop down list and select Next as shown below.
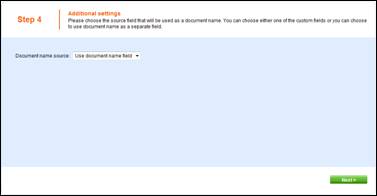
Note: This step defines the name of new documents. When a new document is created the document name field is used to create the new document and appears in site navigation and in the CMS Desk content tree.
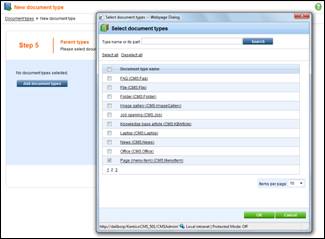
6. Select Add document types and select Page (menu item) as shown below.
7. Select Corporate Site and choose Next as shown below.

8. Leave the default selection and click Next.
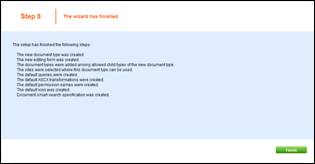
9. Complete the wizard by clicking Finish as shown below.
This completes the creation of the employee biography document type. Lets create a new document based on the new document type using the following steps.
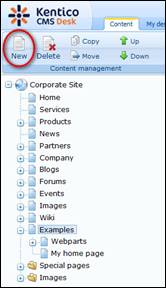
1. Login to CMS Desk, select the Examples node and then click the New button on the toolbar
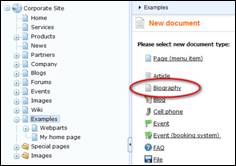
2. Within New document select the Biography document type
3. Complete the Biography form and select Save as shown below.

Youve just created a new custom document type!