DIY: How to handle robots.txt and favicon.ico in a multisite environment
Very often question with very easy solution. See how to do it, there are no workarounds, it can be done with standard settings and approaches ...
Hi there,
I last few weeks, we have encountered several requests on how you can implement
robots.txt or
favicon.ico files specific to the web site in the
multisite environment. Needless to say, such environment is not only resource friendly, since it doesn't need several instances of the application, but also very easy to maintain in comparison to mupliple setups. So the questions are really in place.
Not to mention our large clients that use our solution as a platform for their services where they implement and host hundreds of web sites of their clients in a single instance. If you didn't know something like that is possible with a standard
CMS, believe that Kentico CMS handles that very well.
But let's go straight to the topic ...
Location of the robots.txt file
The file
robots.txt is required
in the root of the web site, that is why it seems hard to implement if you have just single file system with multiple files. But in reality, the oposite is true. Kentico CMS has several means of aliasing the content which gives you great power of customizing the content per-site.
Prepare the file
The best location for you
robots.txt file is the same where you store the content: in the
content tree. The reason for that is that the content tree is specific to specific site, and the content can be aliased. See where I am going?
Let's go ahead and try that. Create a new document of type
Folder named "System files" under the root of your web site. It can be actually anything (any document type), anywhere, named anyhow, and you don't actually even need to do that as you will see later. But I like things organized and that is exactly why I prefer to go this way.
Now create a new document of type
File, and upload your robots.txt file to it. This will result in having the file with URL like
/System-files/robots.aspx which will return the text file.

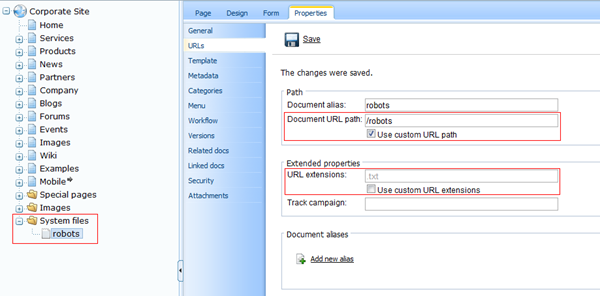
The only other thing we need to do with the file is go to it's properties tabs, and on the URLs tab set the URL path to
/robots. This step will make the main URL of the file
/robots.aspx which is very close to what we wanted, right? Note that this URL can be set to this value no matter where the document is, that is why the step above is completely up to you.
Working with extensions
You may also notice that the URL extensions field was automatically populated with
.txt extension, because you uploaded the text file.
This in the perfect world should mean that the document is also accesible through URL
/robots.txt but in reality, when you attempt to display that, you will get something like this:
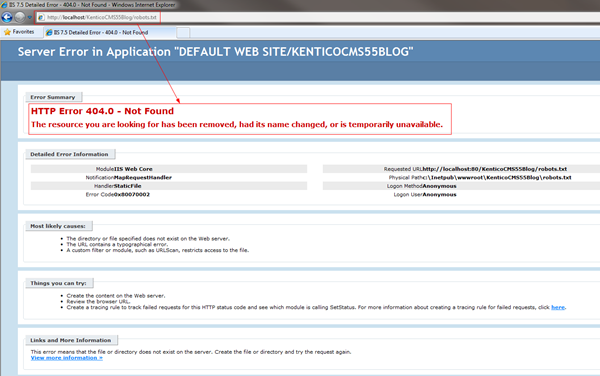
When you are playing with extensions that aren't standardly processed by ASP.NET and if you get an
404 error like this, it means that the request never reached the application code. Simply said, this is a result of some missing configuration.
What we need to achieve is that the requests go through. That is exactly the same scenario as for setting up different extension for pages or even
extensionless setup, except for that in this case we want to keep current extension intact, and just let the requests go through to reach the file. That is why we only use the part that let's the requests go through.
The documentation on how to setup extensionless can be found here:
http://devnet.kentico.com/docs/devguide/index.html?configuration_of_extensionless_urls.htm
I am on Windows 7, so IIS 7 and higher is our case. The documentation says:
"For it to work, you need to modify the system.webServer section of your web.config file by adding the first highlighted line and changing the opening <modules> tag to the second highlighted line in the code example below."
|
<system.webServer>
...
|
<httpErrors existingResponse="PassThrough" />
<modules runAllManagedModulesForAllRequests="true">
|
...
</system.webServer>
|
So that is exactly what we need to do. Just update the
web.config like that.
Finished
And that's it! Now if you go to
/robots.txt URL, the request reaches the application, matches the URL path and extension and returns the file as expected.
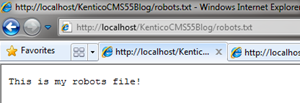
It was simple, isn't it?
What with favicon.ico?
The favicon.ico file is exactly the same case but you need to do something in addition to that to get it on the page. What you do in content and configuration is exactly the same (of course with different data, URL path will be
/favicon).
What you may need to encounter is that your settings do not allow you to upload .ico files, to fix that, just add the ico extension to the settings of allowed extensions:
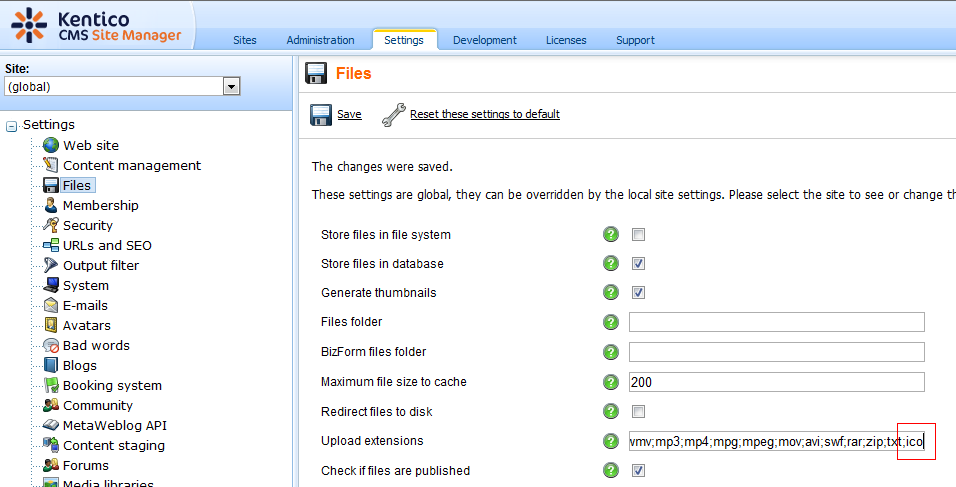
But if you open the
/favicon.ico URL, you still get the default one. That is because there is a physical file with that path in the root of the web site. If there are both physical file and virtual content under the same URL, the physical file has higher priority. That is a simple performance rule that we obey. So the next step is to get rid of that physical file.
Just delete the file favicon.ico from the root of the project. Now if we look at the favicon.ico (note that you may need to clear the cache of your browser, it may not handle it correctly with the previous icon cached), we see exactly what we want under that URL:
Not everything yet
You may thing that is the end. But if you look at some page code, you quickly find out that the tag for the favicon is missing. That is because by deleting the icon from the root of the project the system lost track of it and thinks there is no favicon to include.
To fix that, we will just add that tags manually. The simplest way is to use the web part
Head HTML code, and put the following code in it:
<link rel="shortcut icon" href="/KenticoCMS55Blog/favicon.ico" />
<link rel="icon" href="/KenticoCMS55Blog/favicon.ico" />
Note that you need to use the correct virtual directory instead of my KenticoCMS55Blog or link directly to root if your web site is in the root of the web site.
And we are finished with the favicon. It will behave the same way like before, except that now it can be used for each of the sites separately.
That is all for today, see you next time ...