Adding a custom report to the E-commerce report section
This article explains how to add a new report to the E-commerce reporting section in CMSDesk.
First of all, you need to create a new report element. For this, please go to
CMS SiteManager -> Development -> Modules -> E-commerce -> User interface and navigate to
E-commerce -> Orders and select
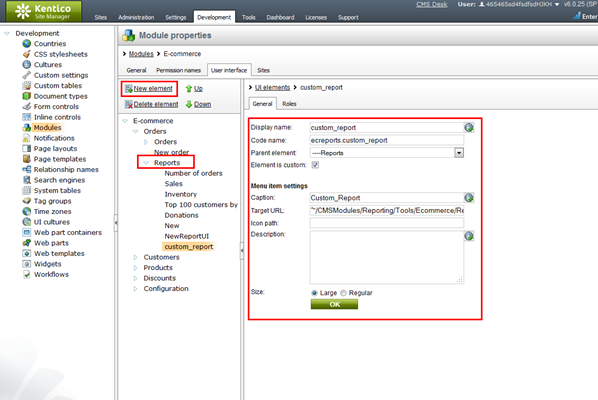
Reports. Now click the New element link button. Create the report with the following values:
-
Display name: custom_report
-
Code name: ecreports.custom_report
-
Note that the code name must begin with the prefix "ecreports."
-
Parent element: ----Reports
-
Element is custom: True
-
Caption: Custom_Report
-
Target URL: ~/CMSModules/Reporting/Tools/Ecommerce/Reports.aspx?statcodename=custom_report&reportcodename=custom_report&displayfilter=1

The
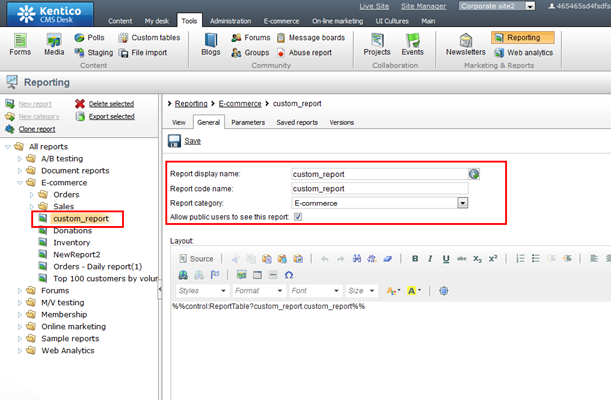
custom_report code name refers to the report created in CMS Desk / Tools / Reporting / E-commerce. Please check the screenshots below for more details. On the
Roles tab please select the correct site and check the permissions for the role that should have access to this report. All the parent elements need to be accessible too, as otherwise the user can’t navigate to this custom report in CMSDesk.
Additionally, please
clear the cache and restart the application after this change, because these values are saved to hashtables.

-bp-
See also: Creating a new report
UI personalization
E-commerce permissions
Applies to: Kentico CMS 6 and higher