
Managing steps |

|

|

|

|
|
Managing steps |
|
|

|
|
Managing steps |
|
|
|
|
|
Managing steps |
|
|
|
|
|
|
||
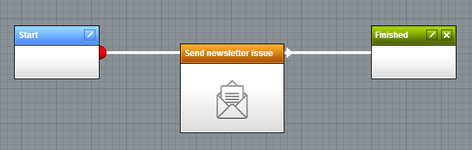
Every marketing automation process consists of a set of interconnected steps. Using steps, you can define automatic (conditional) or user-made branching decisions and various other actions throughout the flow of the process.
For example, you can designate a user to decide whether the contacts in a given process are prospective clients and should continue through the rest of the process. You can also make the process decide automatically based on each contact's previous behavior, such as purchases made on the website or newsletter subscriptions.
To design the steps of an automation process, edit the process in On-line marketing -> Processes and open the Steps tab.
1. Click a step on the designer toolbar and hold down the mouse button.
2. Drag the step onto the grid.
3. Release the mouse button.
The step appears in the grid.
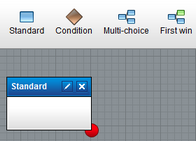
A step placed onto the process designer
To learn more about using specific kinds of steps, see:
•Defining timeouts and waiting
To add a new step between two existing steps:
1. Click a step on the designer toolbar and hold down the mouse button.
2. Drag the step onto an existing connection between two steps.
oThe connection increases in thickness once it is in the correct position under your mouse pointer.
3. Release the mouse button.
The new step breaks the existing connection and automatically creates two new connections with the original steps.
Splitting a connection by inserting a new step
Note: You cannot split connections when moving existing steps, only when adding new steps from the designer toolbar.
To change the names of steps in the process designer:
1. Double-click the step's name in the grid.
2. Type in a new name.
3. Press Enter to save the new name.
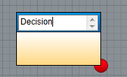
Renaming a step
Note: You cannot delete steps that are currently active for a contact in a running instance of the process. Before you can delete such steps, you need to remove the given contacts from the process or move them into a different step.
To remove steps from a process:
1. Select the step in the designer grid (left click).
2. Click ![]() Delete on the designer toolbar or press the Delete key.
Delete on the designer toolbar or press the Delete key.
3. Click OK in the confirmation box.
Deleting a step also removes the related connections. You need to manually reconnect the steps that were originally connected to the deleted step.