|
|

Creating a new blog |

|

|

|

|
|
Creating a new blog |
|
|

|
|
|
|
Creating a new blog |
|
|
|
|
|
Creating a new blog |
|
|
|
|
|
|
||
Each user signed in to the Intranet Portal can create a new blog and add posts to this blog. It means that the user must be the owner of the blog to be able to add blog posts.
The following example demonstrates how a user of the portal can perform these actions. We will use Luke Hillman, one of the sample users shipped with the portal. Log on using the LukeH username with blank password.
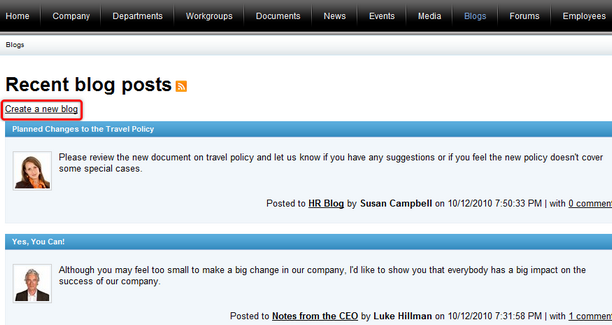
1. If you would like to create a new blog on the Intranet Portal, access the portal and sign in. Now navigate to the Blogs section using the main menu and click the Create a new blog link on the main page of the section.
2. This displays the dialog used for the creation of a new blog.
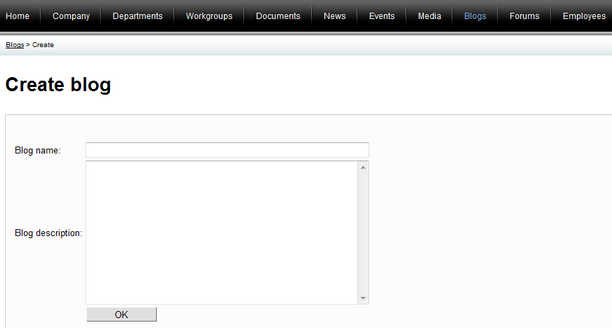
The following fields are available to define the blog:
•Blog name - the name of the blog displayed on the portal; a required field.
•Blog description - the description of the blog displayed on the portal; an optional field.
When you have all values entered, click OK to save the new blog. You will immediately be redirected to the blog page. Please note that if you now went to the main page of the Blogs section, the newly created blog would be listed among other blogs in the Recent blogs box.
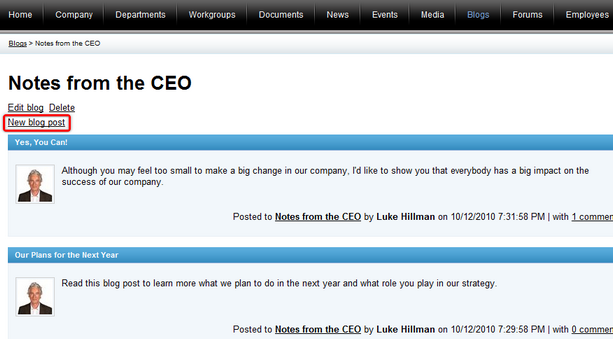
1. If you would like to add a new blog post to the Intranet Portal, you must be the owner of at least one blog. Access the portal, sign in and navigate to the Blogs section using the main menu. Now select one of your blogs where you would like to add a blog post. Click on the name of the blog and on the blog page, where you will be redirected to, click the New blog post link.
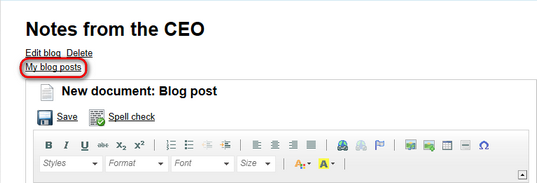
2. This displays the dialog used for the creation of a new blog post.
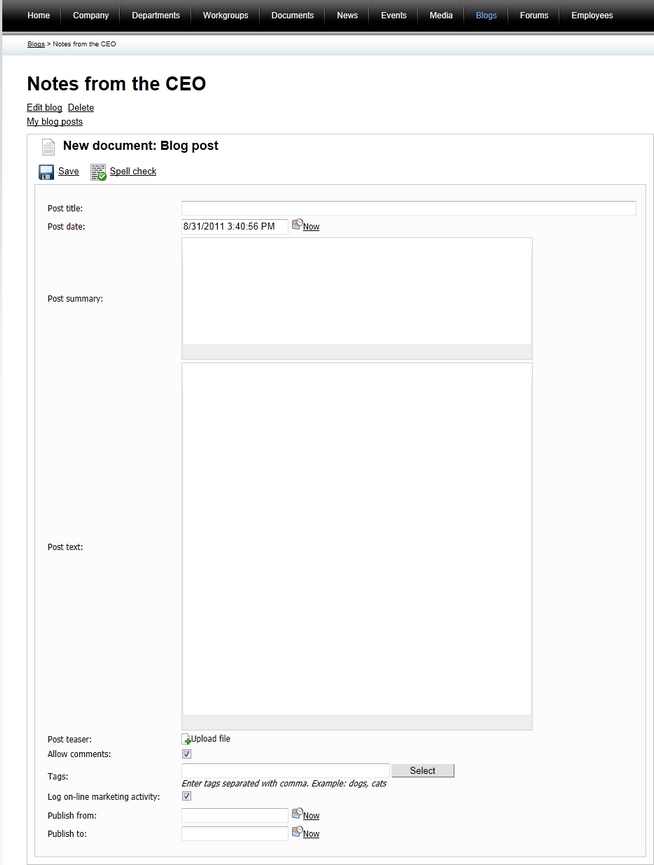
The following fields are available to define the blog post:
•Post title - the title of the blog post displayed on the portal; a required field.
•Post date - the date and time of creation of the blog post, displayed in the details of the blog post; a required field. You can click the Now link to insert the current date and time or you can click the ![]() icon to choose the date and time from the calendar.
icon to choose the date and time from the calendar.
•Post summary - the summary of the blog post displayed in the list of blog posts; a required field.
•Post text - the text of the blog post displayed on the blog post page; a required field.
•Post teaser - blog post teaser (preview) image displayed in the list of blog posts; an optional field. Click the ![]() Upload file link to upload the image from the local or network file system.
Upload file link to upload the image from the local or network file system.
•Allow comments - indicates if commenting on the blog post is allowed; an optional field.
•Tags - special words that are associated with the blog post, displayed in the form of links; an optional field.
•Publish from - the date and time when the blog post will be published on the portal; an optional field. If you leave this value blank, the blog post will be published right after its saving. You can click the Now link to insert the current date and time or you can click the ![]() icon to choose the date and time from the calendar.
icon to choose the date and time from the calendar.
•Publish to - the date and time until when the blog post will be published on the portal; an optional field. You can click the Now link to insert the current date and time or you can click the ![]() icon to choose the date and time from the calendar.
icon to choose the date and time from the calendar.
You can use the built-in WYSIWYG editor to edit the Post summary and Post text fields. The WYSIWYG editor is used in various parts of the portal and you can learn more about it in Other features -> WYSIWYG editor.
You can optionally click the ![]() Spell check button; the spell-checker will check the content of the post summary and post text and if it finds any mistake, you will be allowed to decide whether to ignore the word, add it to the dictionary or replace it with the suggested word.
Spell check button; the spell-checker will check the content of the post summary and post text and if it finds any mistake, you will be allowed to decide whether to ignore the word, add it to the dictionary or replace it with the suggested word.
When you have all values entered, click ![]() Save to save the new blog post. You will immediately find it listed among other blog posts below the blog post properties form.
Save to save the new blog post. You will immediately find it listed among other blog posts below the blog post properties form.
5. Finally, you can display the newly created blog post on the blog page by clicking the My blog posts link.