Kentico CMS 7.0 E-commerce Guide

Example - Directly integrating a custom payment gateway

Example - Directly integrating a custom payment gateway

Previous topic Next topic Mail us feedback on this topic!  

Example - Directly integrating a custom payment gateway

Previous topic Next topic JavaScript is required for the print function Mail us feedback on this topic!  

Here you will learn how to directly integrate a custom payment gateway. You will also learn what steps you need to take to enable the use of the gateway during the checkout process. Unlike the approach demonstrated in Example - Integrating a custom payment gateway as a library, this approach is simpler and does not require library compilation.


In this topic


The process of directly integrating a custom payment gateway can be divided into three logical parts.


1. Defining the required classes

2. Registering the payment gateway in the system

3. Registering the payment gateway in shipping options


Besides, the Using the payment gateway during the checkout process section shows how your customers can use a custom payment gateway during the checkout process.


1. Defining the required classes


This section demonstrates how to write classes providing functionality for your custom payment gateway.


1. Open your web project in Visual Studio and add two new classes into the App_Code folder (or Old_App_Code folder if the project is installed as a web application). Name the classes CustomGatewayLoader.cs and CustomGateway.cs.


ecommerceguide_clip0677


2. Edit the classes and change their code to the following:


CustomGatewayLoader.cs


[C#]


using System;


using CMS.GlobalHelper;

using CMS.SettingsProvider;

using CMS.Ecommerce;


  /// <summary>

  /// CustomGatewayLoader e-commerce loader class. Partial class ensures correct registration.

  /// </summary>

  ///

[CustomGatewayLoader]

public partial class CMSModuleLoader

{

   #region "Macro methods loader attribute"


  /// <summary>

  /// Module registration

  /// </summary>

  private class CustomGatewayLoaderAttribute : CMSLoaderAttribute

   {

      /// <summary>

      /// Constructor

      /// </summary>

      public CustomGatewayLoaderAttribute()

       {

          // Require E-commerce module to load properly.

           RequiredModules = new string[] { ModuleEntry.ECOMMERCE };

       }


      /// <summary>

      /// Initializes the module.

      /// </summary>

      public override void Init()

       {

          // This line provides the ability to register the classes via web.config cms.extensibility section from App_Code.

           ClassHelper.OnGetCustomClass += GetCustomClass;

       }


      /// <summary>

      /// Gets the custom class object based on the given class name. This handler is called when the assembly name is App_Code.

      /// </summary>

      private static void GetCustomClass(object sender, ClassEventArgs e)

       {

          if (e.Object == null)

           {

              // Provide your custom classes.

              switch (e.ClassName.ToLower())

               {

                  // Create a custom getaway object inheriting from CMSPaymentGatewayProvider.

                  case "customgateway":

                       e.Object = new CustomGateway();

                      break;

               }

           }

       }

   }


   #endregion

}


CustomGateway.cs


[C#]


using System;

using System.Collections.Generic;

using System.Text;

using System.Web;

using System.Collections;


using CMS.EcommerceProvider;

using CMS.GlobalHelper;

using CMS.UIControls;

using CMS.ExtendedControls;


  /// <summary>

  /// Class representing the Custom Gateway processor.

  /// </summary>

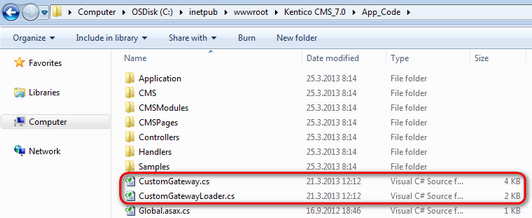
public class CustomGateway : CMSPaymentGatewayProvider

{

  /// <summary>

  /// Returns a payment gateway form with custom controls.

  /// </summary>

  /// <returns></returns>

  public override CMSPaymentGatewayForm GetPaymentDataForm()

   {

      try

       {

          return (CMSPaymentGatewayForm)this.ShoppingCartControl.LoadControl("~/CustomGatewayForm.ascx");

       }

      catch

       {

          return null;

       }

   }


  /// <summary>

  /// Process payment.

  /// </summary>

  public override void ProcessPayment()

   {

      // Get payment gateway url.

      string url = this.GetPaymentGatewayUrl();


      if (url != "")

       {

          // Initialize payment parameters.

          Hashtable parameters = InitializePaymentParameters();


          // Add required payment data to the url.

           url = GetFullPaymentGatewayUrl(url, parameters);


          // Redirect to payment gateway to finish payment.

          this.ShoppingCartControl.Page.Response.Redirect(url);

       }

      else

       {

          // Show error message - payment gateway url not found.

          this.ErrorMessage = "Unable to finish payment: Payment gateway url not found.";


          // Update payment result.

          this.PaymentResult.PaymentDescription = this.ErrorMessage;

          this.PaymentResult.PaymentIsCompleted = false;


          // Update order payment result in the database.

          this.UpdateOrderPaymentResult();

       }

   }


  /// <summary>

  /// Returns table with initialized payment parameters.

  /// </summary>

  /// <returns></returns>

  private Hashtable InitializePaymentParameters()

   {

      Hashtable parameters = new Hashtable();


       parameters["orderid"] = this.ShoppingCartInfoObj.OrderId;

       parameters["price"] = this.ShoppingCartInfoObj.TotalPrice;

       parameters["currency"] = this.ShoppingCartInfoObj.Currency.CurrencyCode;

       parameters["cardnumber"] = Convert.ToString(this.ShoppingCartInfoObj.PaymentGatewayCustomData["CustomGatewayCardNumber"]);


      return parameters;

   }


  /// <summary>

  /// Returns payment gateway url with payment data in query string.

  /// </summary>

  /// <param name="url">Payment gateway url.</param>

  /// <param name="parameters">Initialized payment paremeters.</param>

  /// <returns></returns>

  private string GetFullPaymentGatewayUrl(string url, Hashtable parameters)

   {

      foreach (DictionaryEntry parameter in parameters)

       {

          // Add payment data to the url.

           url = URLHelper.AddParameterToUrl(url, Convert.ToString(parameter.Key), HttpUtility.UrlEncode(Convert.ToString(parameter.Value)));

       }

      return url;

   }

}


2. Registering the payment gateway in the system


Once you have implemented the classes, you need to register your custom payment gateway as an object in Kentico CMS.


1. Navigate to CMS Desk -> E-commerce -> Configuration -> Payment methods and click AddNewPaymentMethod New payment method.

2. Enter the following values into the payment method's properties:


Display name: Custom gateway

Code name: Leave the (automatic) option. The system will generate the code name as CustomGateway (based on the display name).

Description: Enter payment gateway description (optional).

Teaser image: Upload payment gateway teaser image (optional).

Allow if no shipping is supplied: yes

Enabled: yes

Payment gateway URL: ~/Special-Pages/Temporary-Payment-Page.aspx

Payment gateway assembly name: App_Code

Payment gateway class name: customgateway

Order status if payment succeeds: In progress

Order status if payment fails: Payment failed


ecommerceguide_clip0672


3. Click Save Save.


Your new payment gateway is now fully functional and ready for use in the system.


ecommerceguide_clip0675


InfoBox_Exclamation


If you registered your custom payment gateway as a global payment method, you need to enable it for use on the current site.

You can do this in CMS Desk -> E-commerce -> Configuration -> Store settings -> Global objects.


3. Registering the payment gateway in shipping options


To enable the use of your custom payment gateway during the checkout process, the last step you need to take is to register it in selected shipping options.


1. Navigate to CMS Desk -> E-commerce -> Configuration -> Shipping options.

2. Edit (Edit) a shipping option where you want to add your custom payment gateway on the Payment methods tab.

3. Click Add payments and in the Select payment dialog that opens select Custom gateway. Click OK.


ecommerceguide_clip0673


As you can see, your custom gateway is now listed among other payment methods available for the current shipping option.


ecommerceguide_clip0674


4. (Optional) Repeat this procedure to register your custom gateway in other shipping options.


Using the payment gateway during the checkout process


If your customers select during the checkout process a shipping option to which you added your custom payment gateway, they can use the gateway as any other payment method available.


ecommerceguide_clip0676