Using different graphics for different site sections
In some cases, you may want to display a different header or graphics for different site sections. This article explains how you can easily achieve that using the Kentico CMS portal engine.
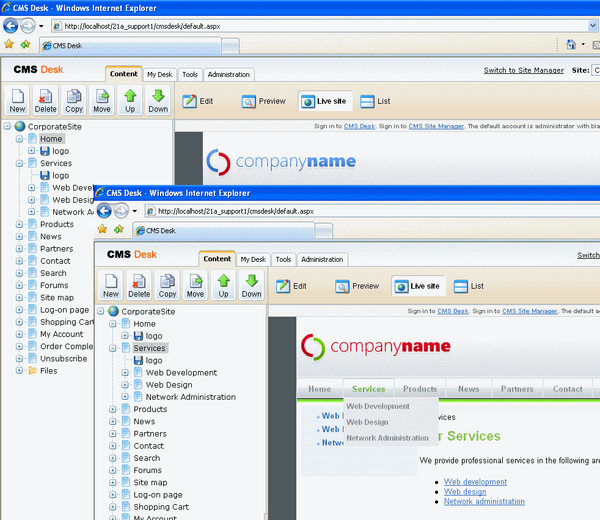
The easiest way how to specify a different logo for each web site section is to organize your content like this:
The Logo document is an uploaded file, but it could be an article as well. The important point here is that its alias name is always "Logo". You can set the alias name in Properties -> General.
Now we can display the logo image using a Repeater web part with following settings:
- Path: /{0}/logo
- Document types: cms.file
- Selected item transformation: CMS.File.imagegallery-detail-400
Please note the Path value: it uses a dynamic path expression {0} which represents the first section of the currently visited path. When the visitor comes to page /Products or /Product/Nokia, the path is /Product/logo. When the visitor comes to page /Home, the path is /Home/logo. The dynamic path ensures that the Repeater web part displays the logo document from the current site section.
The transformation used here is only an example. You can define your own transformation in Site Manager -> Development -> Document types -> File -> Transformations, like this one:
<%# GetImage("FileAttachment") %>
The following figure shows the Home and Services sections with different logo:
See also: Applies to: Kentico CMS 2.x - portal engine