Simplify Your Upgrades with the Kentico Upgrade Tool
Every new version of Kentico always has some changes that impact development. Whether it’s a new feature or the realignment of an API, there is no doubt there is going to be some updates that have to be made within your application. While this can be a daunting task for some, Kentico offers a great tool to help you through the process. In this article, I’ll show you how the Kentico Upgrade Tool can simplify your upgrades, and save you a lot of headaches.
Introduced with Kentico 8, the Kentico Upgrade Tool (KUT from here on out) is a handy tool to have in your arsenal when tackling an upgrade project. Because each version of Kentico contains new features, many of the internal APIs and code gets updated to accommodate the new functionality. In addition, there are all of the improvements and streamlining changes baked into each version, often requiring the reworking and restructuring of core components and libraries.
With each new version, Kentico offers a tested upgrade path, with step-by-step instructions. While this is great for many sites, custom code will always require a little more attention. The KUT is geared solely toward this purpose, by helping developers identify the areas of their code that need to be updated. This includes their custom classes and assemblies, as well as transformation code and macros. With the KUT, you can easily find out what needs to be updated and even apply the changes automatically.
Let’s take a look at how it works.
Downloading
First, we need to download the utility. On the Download tab on DevNet, we have an entire section dedicated to Upgrades. On this page, you’ll find a list of all of the available update packages, going back to Version 1. For Version 8.0 and newer, you’ll see a link to the Code Upgrade Tool. Be sure to download the correct version for your upgrade.

Remember: Upgrades with Kentico need to be sequential, meaning you need to apply the upgrade to each version incrementally, building and accessing the site after each step. This is because each upgrade contains a number of changes that can only be applied after the project is compiled.
Viewing the Package
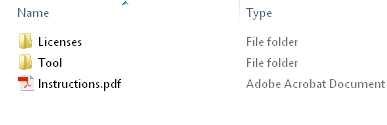
In the Code Upgrade Tool package, you’ll find a couple of folders and an Instructions file. Read It! Because upgrades affect every part of the platform, it’s important to know exactly how to use the utility to get your desired results. Also included in the zip file is the Tool folder, which contains the upgrade functionality, and the Licenses folder containing all of the library licenses.
Running the Tool
After reading the instructions, you should understand that the KUT offers a few different pieces of functionality:
- Identifies areas of the code that are no longer valid
- Provides helpful information for each section of identified code on how to update it
- Provides functionality to apply the updated code to your project automatically, if needed
What capabilities you want out of the tool will depend on your specific situation and needs. Personally, I often ran the tool to identify the changes, but manually applied them to my projects. Others may find it useful to have the tool apply the code changes, which is fine. Just be sure to review any changes with a merge tool so you know exactly what was modified. I would recommend running the tool to get the report first, then running it again if you want to apply the changes.
Identifying Changes
Once you decide that the Tool is right for you, execute the CodeUpgrade.exe from the command line, specifying your project file. This command will generate a CSV file with all of the changes required.
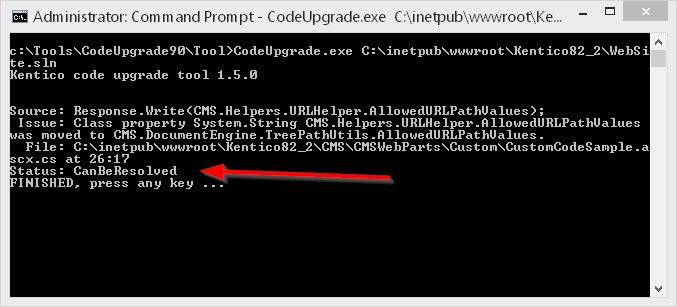
Once this operation completes, you will have a list of all of the areas of the project that need updating. You will find that many of the changes will be the same, especially when a core library or class has been updated in the new version. Use this file to go through and make the updates to your code.

Note the Status for each issue. This will determine if the CodeUpgrade.exe tool can automatically update the code. It must be CanBeResolved in order to update the code automatically.
Automatically Applying Changes
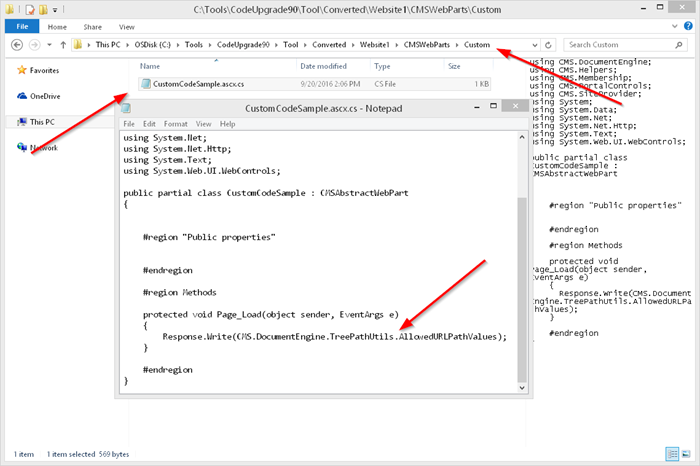
So you’re feeling brave and want to let the tool apply the changes? Just use the -resolve when calling the executable. This will process your project, creating a new version of it in the Tool/ConvertedCode folder with the updated code.
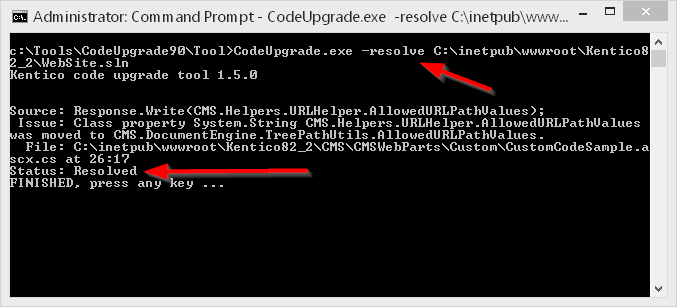
THis creates a new folder in your Tool folder call ConvertedCode.
Virtual Objects
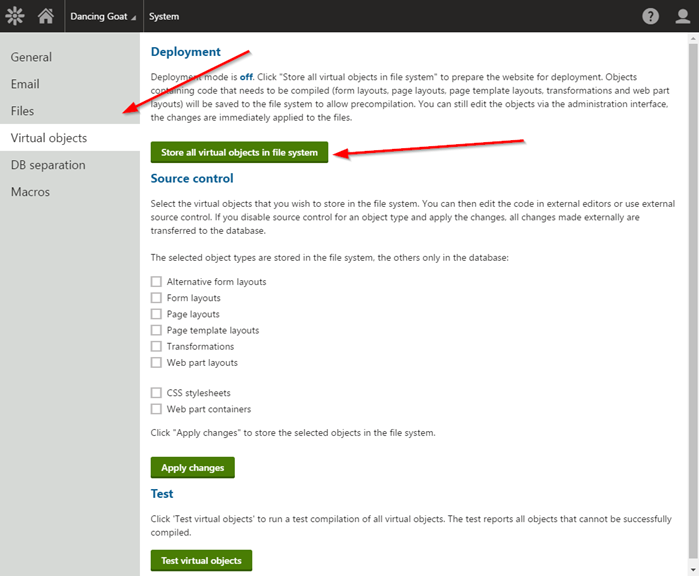
When running the tool, most developers focus on applying changes to their physical code files. It’s important to remember that transformations and other data objects can contain code, as well. To get around this, it is recommended you enable Deployment Mode for your site, which copies all of the virtual objects to disk into the ~/CMSVirtualFiles folder within the site. This allows the KUT to read through these files and identify any changes required. Be sure to disable Deployment Mode after you are done so the virtual objects get copied back to the database.
Planning
Now that you know how the tool works, you should start planning your upgrade. While every project is different, I would recommend the following steps:
- ALWAYS start with a backup. Get a backup of your website, database, and media library (if it’s stored externally). Starting with these will limit the impact to your production site.
- Plan on the upgrade taking some time. This will largely depend on the amount of custom code, however, even “simple” upgrades may take a few hours to complete.
- Plan for a content freeze, if possible. Limiting site changes during the upgrade process can minimize the headache of merging data once the upgrade is complete.
- Be sure you are storing your custom code correctly. Mainly aspects of the upgrade process depend on custom code residing in specific folders, so be sure you are following best practices for your code.
- Plan on going through the process more than once. Many projects can easily be upgraded in a single pass, however, custom-heavy implementations may require some trial and error to complete.
- If possible, try and stay current on your version. Upgrading multiple versions can be time-consuming and require a lot of coordination with your developers and content editors.
- Test your code! The KUT is designed to identify the changes and implement them, if needed. You should always plan on thoroughly testing your application after upgrading to ensure all of your functionality works properly.
Get to Upgrading!
Hopefully, this blog has provided you some insight on how to simplify your upgrade process. If you follow the instructions and use the Kentico Upgrade Tool properly, you can significantly improve your experience and identify needed changes quickly. And the tool has a few other tricks that may help you, so be sure to test it out and see what works best for your projects. Good luck!
You can fiond out more about the Kentico Code Upgrade Tool in the documentation here.
This blog is intended for informational purposes only and provides an example of one of the many ways to accomplish the described task. Always consult Kentico Documentation for the best practices and additional examples that may be more effective in your specific situation.