Setting up Windows Authentication
Kentico CMS 5.5 R2 comes with an intranet solution sample site so we expect increased number of installations using Windows authentication. See how to efficiently move from Forms authentication to Windows authentication ...
Hi there,
The reason why I am writing this post is because Kentico CMS 5.5 R2 Beta with the WebDAV functionality is out and I expect you to start using Windows authentication heavily. So I simply want to save your time on it. It doesn't neccessarily need to be 5.5 R2, it works this way with any version of Kentico CMS.
Kentico CMS offers several kinds of authentication mechanisms, all built on the .NET features:
-
Forms authentication - Basic authentication directed by the cookies that most of the internet web sites use. It doesn't require any specific infrastructure.
-
Windows authentication - Automatic (in IE) or manual (other browsers) authentication based on the Windows domain accounts. It uses the Windows authentication tokens so it depends on the infrastructure of your company AD.
-
Mixed mode authentication - Mixed mode authentication in Kentico CMS is based on Forms autentication so it works on standard cookies and manual login through standard dialogs. What it has is the membership provider to Active Directory so in case the credentials cannot be verified against a local database, it validates the user through AD.
-
Custom authentication mechanism - You can also use the custom security handler to authenticate against your own source of users. In that case the users are imported to the database but still authenticated against your source as external users.
You can find more details on authentication options here:
http://devnet.kentico.com/docs/devguide/index.html?authentication.htm
Windows authentication
As I said, Windows authentication works automatically, that is on both the IIS side and the Kentico CMS side. Here is how it works with Kentico:
-
The page requires authentication and sends the standard 401 (unauthorized) response
-
The browser provides the user credentials (manually or automatically) via an authentication token
-
IIS consideres the user authenticated and sets up the authenticated user for the application
-
Kentico CMS figures out that the user is authenticated and the system is using Windows authentication
-
Kentico CMS ensures that the user and their roles are imported into it's database so it can use it
-
The security model works the standard way with the authenticated user
Steps 1 to 3 are standard for just any application. What is important here is that the
user and
roles somehow get
imported to Kentico database so you can work with them and set their permissions and other settings. If the user is already in the database, they keep their existing settings.
Because the system doesn't know if the user is supposed to be admin or not, the user is imported (registered) as standard visitor without any special rights.
Setting up Windows authentication
As you probably already know, you can set up the Windows authentication in web.config. So either take your existing project (if you already know what it will do) or a new installation to test it, and change the
web.config from the default:
<authentication mode="Forms">
to
<authentication mode="Windows">
There is one more thing you may want to consider. Because the Windows authentication process is automatic, it is only performed when needed, so basically the system does authenticate the user only in cases in which it would require authentication in a standard setup. But you may want the user to authenticate against the whole portal, which is typical for intranet sites. You can do that by uncommenting the following block in your web.config:
<!-- Windows authentication BEGIN -->
<!--
<location path="">
<system.web>
<authorization>
<deny users="?"/>
</authorization>
</system.web>
</location>
-->
<!-- Windows authentication END -->
This basically says that all locations require authentication. You need to do this in the web.config with Windows authentication, because IIS has to know that. With the Forms one, you can just use the document settings.
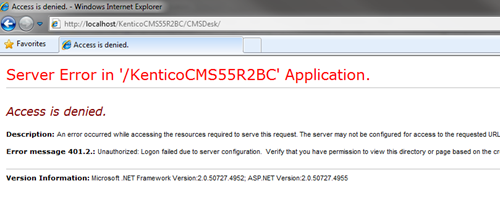
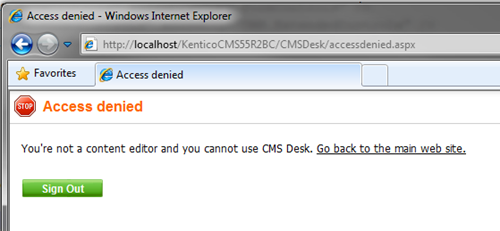
If you access the web site now, you will either be authenticated or you get an error like this:
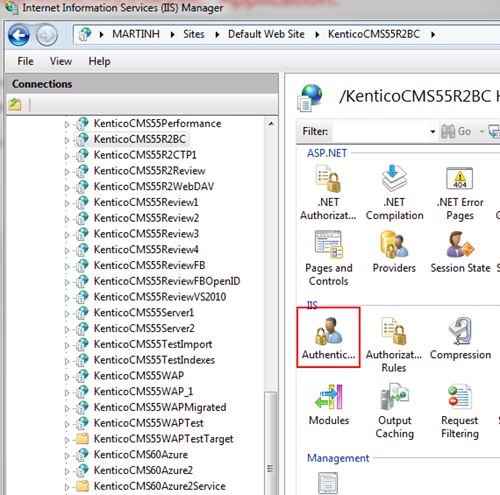
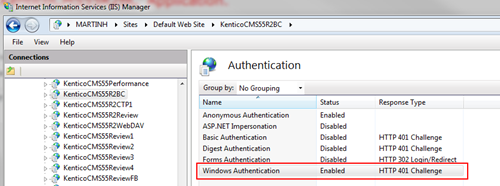
In that case, your IIS is not set up to provide Windows authentication yet and you need to go to the web site (or virtual directory) properties and allow Windows authentication there:
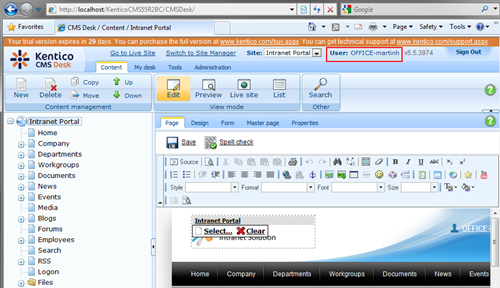
After you allow it, you should be able to go to the web site without any problems and be authenticated:
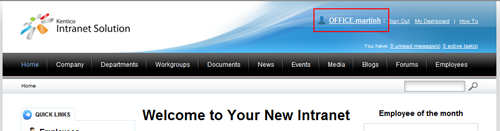
You may notice, that the backslash from your Windows name has been changed to a dash. That is because the user name can act as a wildcard in the URL of a user profile so it needs to be URL-safe. The system does the conversion automatically and there is nothing wrong with it.
Becoming global admin
There is one bad thing about Windows authentication, which is making your current accounts for Forms authentication useless. That is because Windows authentication either authenticates you, or denies you the access. It doesn't allow any alternative manual login based on DB credentials. So what you have right know is a system without any Global administrator that could log in. That certainly is not what we wanted. You probably realize that once you try to access CMSDesk or SiteManager and get the Access denied message:
 Going back to Forms authentication
So you need to make yourselves the Global administrator, but to do that, you already need to be one. To achieve that, you need to make a step back and do that with Forms authentication. Change your web.config back from:
<authentication mode="Windows">
to
<authentication mode="Forms">
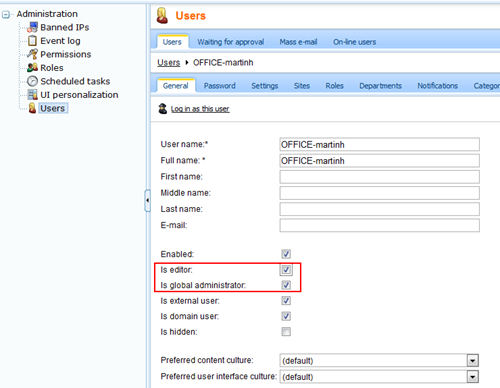
Then go to Site manager as an administrator, locate your Windows user that was
automatically imported, and configure that account to be Global administrator.
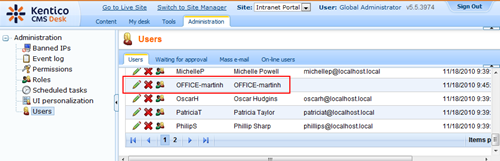
I the roles section, you can see that some roles from AD were also imported.
Reenabling Windows authentication
The last remaining action is to reenable Windows authentication which again is simple, just change the web.config from:
<authentication mode="Forms">
to
<authentication mode="Windows">
And that is all. Now if you go to your website, you will be logged in under your Windows credentials and you will also be the Global admin so you will be able to administer the web site(s). That is what we wanted.
 AD Import utility and preparing users
This article presented you with the simplest way how to start with the Windows authentication in Kentico CMS. However, you may also use other ways. You can skip going back to Forms authentication if you prepare the user in advance before you enable Windows authentication. But that certainly needs some experience.
Or you can use our AD Import utility that comes with the installation to import your whole AD structure before you actually enable this. See more about that here:
http://devnet.kentico.com/docs/devguide/index.html?ad_import_utility_overview.htm
And that really is all from me today.
See you next time ...