Push notifications to your phone for workflow and marketing processes
Sometimes email just isn’t enough. It can get lost amongst the heaps of spam you receive daily and you may not even notice its arrival. If you want to be notified about something immediately, or perhaps even need to elevate an issue, push notifications to mobile devices or PCs are the way to go. This article shows you how to set up push notifications for any of your devices (Android, iOS, PCs) as part of an online marketing or workflow process in just a few steps.
Setting it all up
You need to have Kentico 8.1 installed (or later).
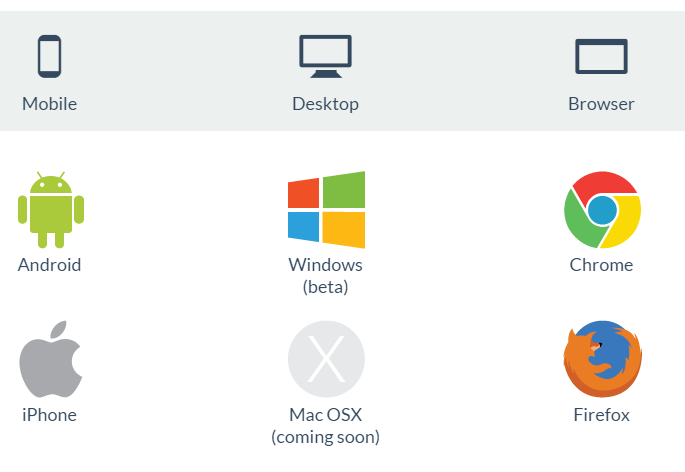
Firstly, download
Pushbullet for any of the devices you want to receive notifications on:
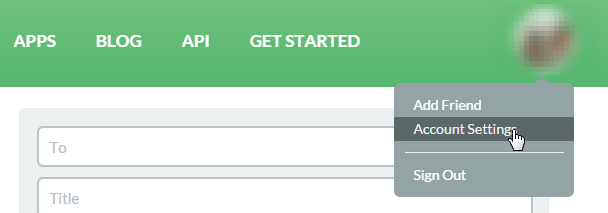
Register with the site and head over to the Account Settings:
Here you get your access token:
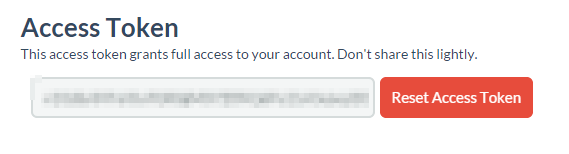
Make sure you save it for later, but keep it secure. Now you need to copy over the content of the
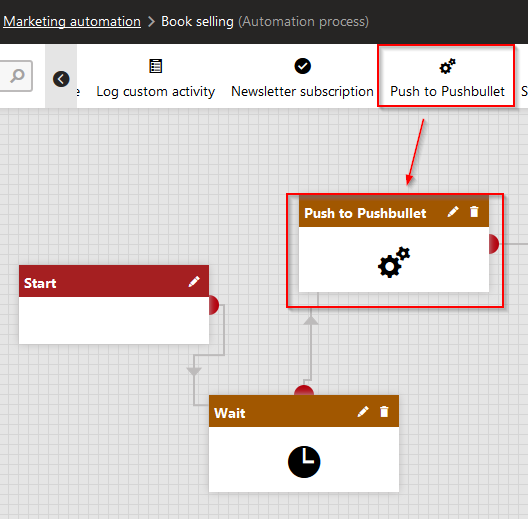
attached ZIP file and import the package in Sites > Import site or objects (import the push_actions.zip file). If you are using a web app project type, please rebuild it. Once you’ve imported the packages, you will be able to use the Push to Pushbullet action on an Advanced workflow or within your Marketing automation process:
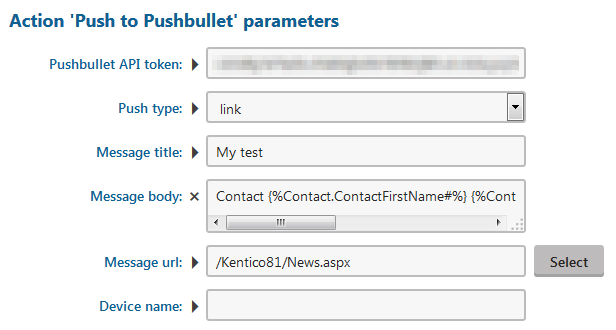
The settings for the actions are the same in both of the cases:
You need to specify the Pushbullet API token, which we saved in a previous step, and fill out the Push type (note or link) with some additional parameters. The difference between the Push types is in the way the notification will be displayed and what will happen when it is tapped/clicked on. If you use a link, you’ll get redirected to the URL you’ve selected. If you select the note type, a note is displayed once you tap the notification. You can also use macros to dynamically set these parameters. Here is an example of such a setup:
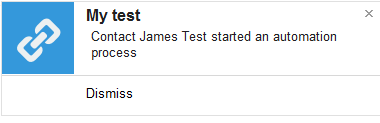
And here is a notification displayed on a Windows PC:
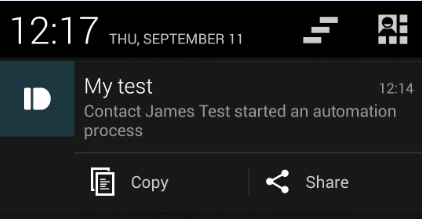
…and on an Android device:
For developers
The implementation part is quite straightforward. We perform GET and POST requests to the Pushbullet HTTP API, as described
here. As you can see, there are only two calls of interest to us;
devices and
pushes. The devices call isn’t necessary if you want to target all the devices in your account. If you want to filter out certain devices based on particular criteria (I implemented filtering based on name), you need to also get the devices associated with an account. The GET and POST requests use standard .NET API and the
workflow action and the
marketing action are implemented as explained in our documentation. So, as you can see, the implementation is, as promised, straightforward.
As always, there is certainly room for improvement and this customization isn’t supported by our Support team, but can be used as a starting point for your own implementation. Let us know if you have any suggestions in the comments section below.