Processing Outgoing Tasks with the Kentico Integration Bus
Integrating Kentico with other systems is at the core of nearly every enterprise project. Often, data needs to be synced between Kentico and another source, requiring developers to create custom solutions to keep the information up to date. The Kentico Integration Bus provides a fault-tolerant option for this integration by allowing tasks to be queued and processed, ensuring all changes are synced correctly. This functionality supports both inbound and outbound changes, allowing companies to keep two different systems synchronized, regardless of where the change originates.
In this blog I will demonstrate how you can leverage the Integration Bus to sync your outgoing tasks to a third-party system.
Some projects require data to be updated in a number of systems at any given time. In this scenario, there must be functionality in place to keep the data identical on all of the platforms. In order for this to setup to work, there must be functionality in place to “watch” for changes on each system and then propagate them to the other systems automatically. As with many areas of the platform, data synchronization within Kentico can be accomplished in several ways.
The Integration Bus provides synchronization by logging data changes and then processing them at set intervals. This solution provides a log of the outgoing changes that can be retained if the connection to other system is not available. This ensures the changes are synced properly and no data is lost.
You can read about the Kentico Integration Bus here.
Setup
The first step in integration is setup. I need to do a few things in order to setup the system for the integration. I will need a separate system to which to sync my data. In my demonstration, I will be using an Azure Storage table. In a “real world” scenario, this will most likely happen in a CRM or ERP system instead of Azure Storage.
In my table structure, I have added a few fields for my user accounts that I want to sync. Note that I have made the Kentico UserGuid as the ParitionKey and the LastName as the RowKey. This will help me keep data unique.
public class KenticoUserEntity : TableEntity
{
    public KenticoUserEntity(string userguid, string lastname)
    {
        this.PartitionKey = userguid;
        this.RowKey = lastname;
    }

    public KenticoUserEntity() { }

    public string firstname { get; set; }
    public string lastname { get; set; }
    public string email { get; set; }
}
Note
The table will only contain the PartitionKey and RowKey fields by default. Inserting data with additional fields will automatically create the columns.
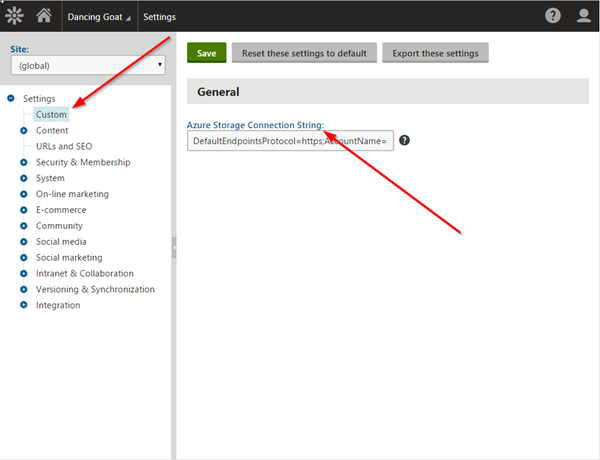
Next, I need to add a connection string to my storage account. I have added this to the site settings to make it easy to change in the future.
Adding the Connector
The Integration Bus relies on a connector class to log the changes and process them. Next, I will create this class and register it within the site.
[assembly: RegisterCustomClass("CustomIntegrationConnector", typeof(CustomIntegrationConnector))]
/// <summary>
/// Summary description for CustomIntegrationConnector
/// </summary>
public class CustomIntegrationConnector : BaseIntegrationConnector
{
    /// <summary>
    /// Initializes the connector name.
    /// </summary>
    public override void Init()
    {
        // Initializes the connector name (must match the code name of the connector object in the system)
        // GetType().Name uses the name of the class as the ConnectorName
        ConnectorName = GetType().Name;
    }

    public override IntegrationProcessResultEnum ProcessInternalTaskAsync(GeneralizedInfo infoObj, TranslationHelper translations, TaskTypeEnum taskType, TaskDataTypeEnum dataType, string siteName, out string errorMessage)
    {

    }
}
Using RegisterCustomClass, I can register the custom code within the system, and it will be picked up automatically when the application starts.
From here, I will need to decide what events I want to capture and sync. My demonstration will be syncing user data as it changes. To capture this event, I will add the SubscribeToObjects method to the Init method, and specify UserInfo.OBJECT_TYPE as the type of data.
// Creates subscription for all user objects (predefined method)
 SubscribeToObjects(TaskProcessTypeEnum.AsyncSnapshot, UserInfo.OBJECT_TYPE);
In capturing the event, I tell the system that I want to perform the operations asynchronously with the AsyncSnapshot modifier. This tells the system to log these events for processing later. Another option is to process them synchronously, which will cause the code to execute immediately when a data change occurs.
You can find out more about these and other processing methods here.
Adding the sync code
Now that I have the connector in place, it’s time to add sync code. For my example, every time a user is updated, I will be syncing the data to the Azure Storage table I have created. I must override the ProcessInternalTaskAsync method to execute my custom code. This method will process my custom functionality and return an IntergrationProcessResultEnum to the system. The Integration Bus module will use this result to determine if the task was successfully, and log it accordingly.
public override IntegrationProcessResultEnum ProcessInternalTaskAsync(GeneralizedInfo infoObj, TranslationHelper translations, TaskTypeEnum taskType, TaskDataTypeEnum dataType, string siteName, out string errorMessage)
{
    try
    {
        //Set the error message to null and the response to OK
        errorMessage = null;
        return IntegrationProcessResultEnum.OK;
    }
    catch (Exception ex)
    {
        //There was a problem.
        errorMessage = ex.Message;
        return IntegrationProcessResultEnum.ErrorAndSkip;
    }
}
In my method, I add the Azure Storage API code to my table, and I use the TableEntity class to help set the data for the sync. I will set the properties and sync the data to Azure.
//Determine if the record exists in Azure Storage
// Retrieve the storage account from the connection string.
CloudStorageAccount storageAccount = CloudStorageAccount.Parse(SettingsKeyInfoProvider.GetValue("Custom.AzureStorageConnectionString"));

// Create the table client.
CloudTableClient tableClient = storageAccount.CreateCloudTableClient();

// Create the CloudTable object that represents the "kenticousers" table.
CloudTable table = tableClient.GetTableReference("kenticousers");

// Create a retrieve operation that takes a customer entity.
TableOperation retrieveOperation = TableOperation.Retrieve<KenticoUserEntity>(ValidationHelper.GetString(infoObj["UserGUID"], ""), ValidationHelper.GetString(infoObj["LastName"], ""));

// Execute the operation.
TableResult retrievedResult = table.Execute(retrieveOperation);

// Assign the result to a CustomerEntity object.
KenticoUserEntity existinguser = (KenticoUserEntity)retrievedResult.Result;

//Check if the record already exists
if (existinguser == null)
{
    // create a new record
    KenticoUserEntity newuser = new KenticoUserEntity(ValidationHelper.GetString(infoObj["UserGUID"], ""), ValidationHelper.GetString(infoObj["LastName"], ""));
    newuser.firstname = ValidationHelper.GetString(infoObj["FirstName"], "");
    newuser.lastname = ValidationHelper.GetString(infoObj["LastName"], "");
    newuser.email = ValidationHelper.GetString(infoObj["Email"], "");

    // Create the Insert TableOperation
    TableOperation insertOperation = TableOperation.Insert(newuser);

    // Execute the operation.
    table.Execute(insertOperation);

    EventLogProvider.LogEvent("I", "CustomIntegrationConnector", "Information", "Record inserted!");
}
else
{
    //update the record
    existinguser.firstname = ValidationHelper.GetString(infoObj["FirstName"], "");
    existinguser.lastname = ValidationHelper.GetString(infoObj["LastName"], "");
    existinguser.email = ValidationHelper.GetString(infoObj["Email"], "");

    // Create the Update TableOperation
    TableOperation updateOperation = TableOperation.Replace(existinguser);

    // Execute the operation.
    table.Execute(updateOperation);

    EventLogProvider.LogEvent("I", "CustomIntegrationConnector", "Information", "Record updated!");
}
If everything works correctly, I set the OK response at the end. This tells Kentico the sync was executed, and no errors were reported. If not, I set the ErrorAndSkip response for the error message. This will tell the system to skip the current operation, but will still return the error to the UI so I can view it.
try
{
    ...
    //Set the error message to null and the response to OK
    errorMessage = null;
    return IntegrationProcessResultEnum.OK;
}
catch (Exception ex)
{
    //There was a problem.
    errorMessage = ex.Message;
    return IntegrationProcessResultEnum.ErrorAndSkip;
}
The result type you set will determine how the system will handle the record if it fails. Be sure to set it to the appropriate setting to meet your needs.
Testing
Now, it’s time to see if all of the code actually works! First, I’ll open up my Azure Storage table to confirm the structure is correct.

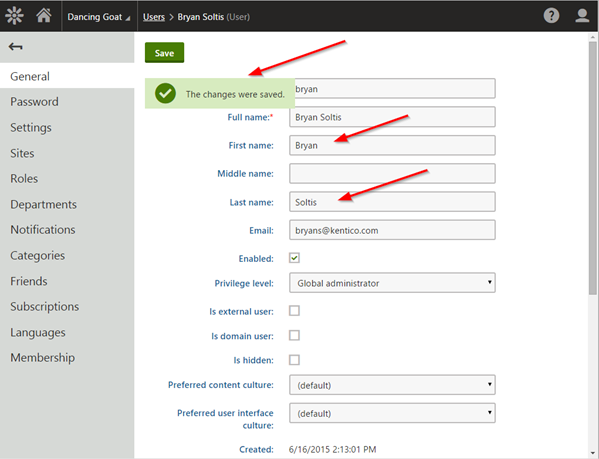
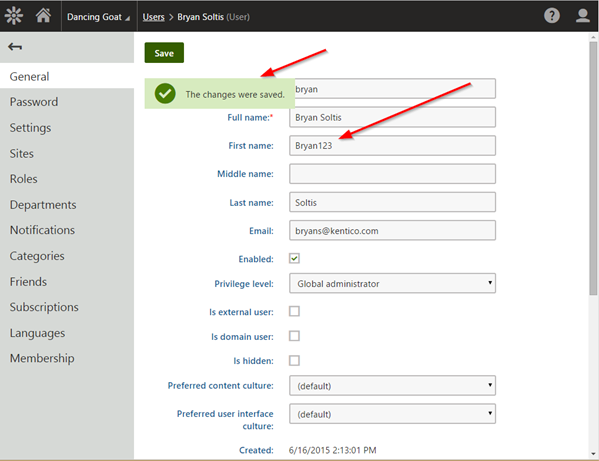
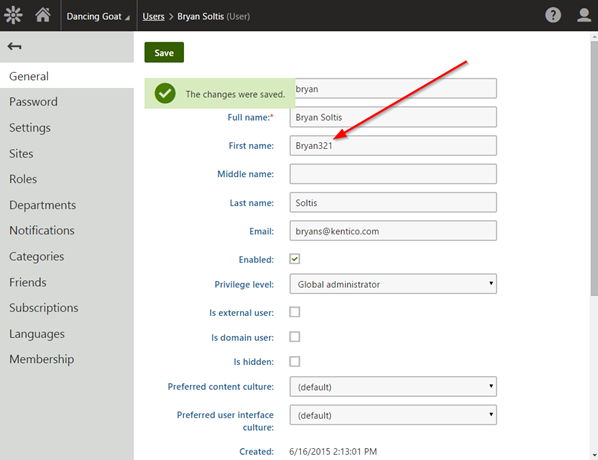
Next, I’ll log into Kentico and modify a user account.
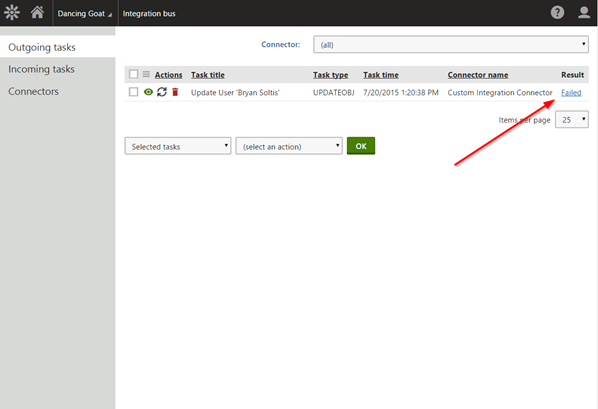
Once the user is updated, the task will be listed in the Integration Bus Outgoing Tasks.
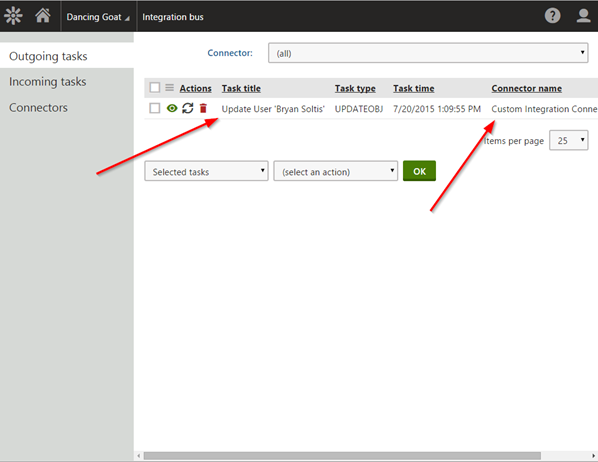
Note that, because of the way the system processes sync tasks, they may not be listed in the outgoing tasks for very long. This is because the system will process any available tasks on the EndREquest event, which happens any time a page is requested.
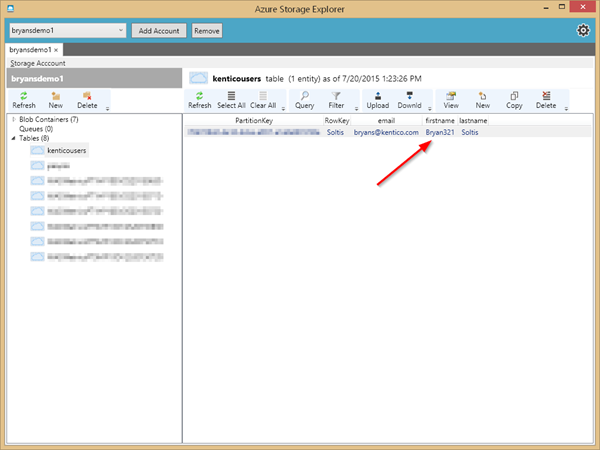
Once the task is processed, as you can see, I check the Azure Storage table to make sure it’s there.
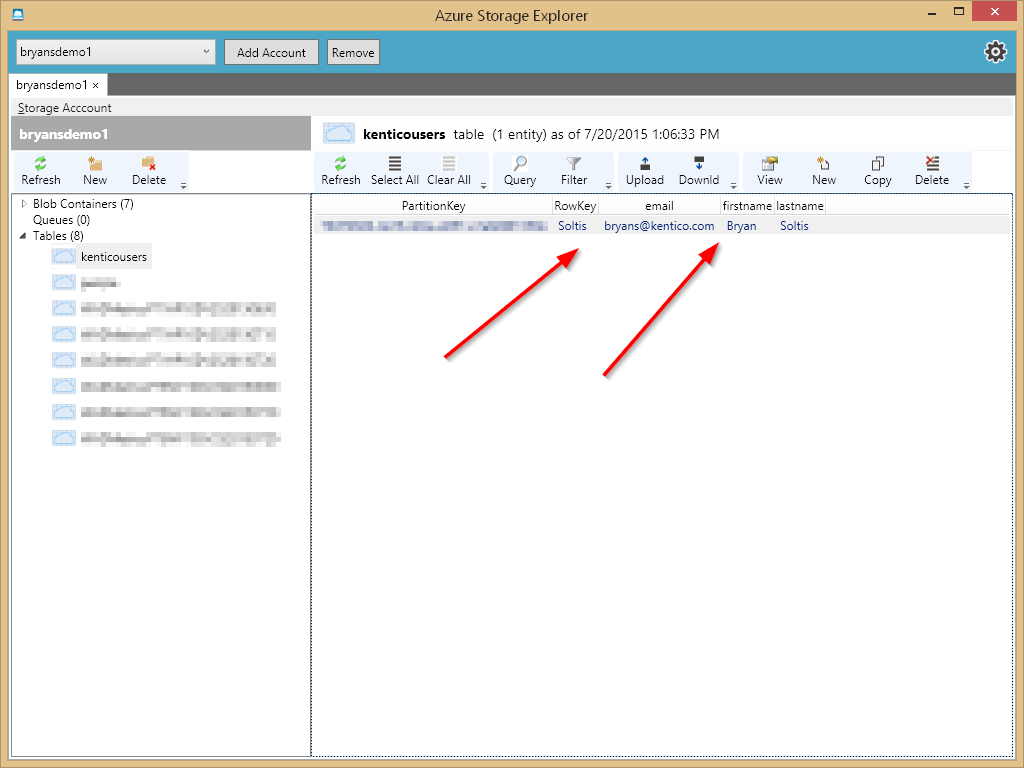
Because my table has the UserGuid as the ParitionKey and the LastName as the RowKey, these records will always be unique. Updating the user account again will update the existing record, rather than create a new record.

Handling an error
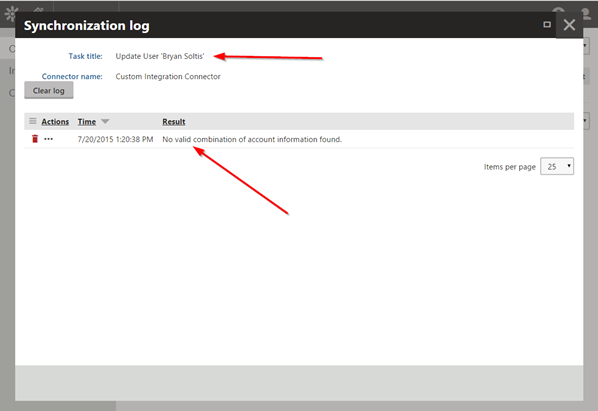
In the event my 3rd party system is unavailable, the Integration Bus will keep up a record of any tasks that failed to process. To test this, I update my Azure Storage connection string to an invalid value to force a failure.

Once the system tries to process the task, it should fail.
To resolve the issue, I update the connection string back to a valid value. After doing so, the task should process and update my record.

And finally, the updated record in Azure Storage table storage.
Moving Forward
Because I am using the asynchronous method, my tasks will always be written to the Integration Bus log. If Azure Storage is unavailable, the tasks will be retained and processed when it becomes available. This makes the solution fault-tolerant and very reliable.
Another integration option would be to leverage Scheduled Tasks to sync the data. This would work fine. However, it would require additional programming to handle without the third party solution.
The next step of the process will be to sync data changes from Azure Storage back into Kentico. I will cover this in my next blog on the series, which will be published in a few weeks.
Good luck and happy syncing!
Download Integration Bus Connecttor
This blog is intended to demonstrate one of many ways to accomplish this task. Always consult the Kentico Documentation for best practices and additional examples.