Integrating the Azure Bing Spell Check API into Kentico
The world is full of horrible typists. From the ever-devolving grammar on social media to the classic hunt-and-peck, there’s no shortage of people that could use a little help in their data entry. When it comes to capturing data on the web, this is especially important as the information often contains personal and contact information. In this article, I’ll show you how you can leverage Azure’s new cloud-based Bing Spell Check API within your Kentico sites to proof your user’s data.
From the most gifted court reporters to the smash-the-keyboard-with-your-face guy, everyone can benefit from having their information run through a spell checker. Every application has some sort of built-in capabilities to help developer cleanse information, clarify terms, and validate use input. It’s one of those staples that users have come to expect in their day to day lives, and with good reason.
While applications have this functionality, it’s hard to match the power and capabilities of a cloud-based solution like the Azure Bing Spell Check API. This AI-backed service can analyze spelling, grammar, and syntax, which can dramatically improve the suggestions for incorrectly typed terms. To test out the functionality, I decided to integrate this service into a Kentico form control.
You can learn more about the Azure Bing Spell Check API here.
Creating the form control
The first step was to create my form control. Because I wanted my spell check functionality available to my forms, I created new base control. In CMSFormControls/Custom folder, I created a new ASCX control. I then inherited the FormEngineUserControl class. I also added some default methods that every form control contains.
public partial class SpellCheckControl : FormEngineUserControl
{

        #region Properties

        /// <summary>
        /// Gets or sets the value that will be saved from this form control
        /// </summary>
        public override object Value
        {
            get
            {
                return "";
            }

            set
            {
                string fieldValue = ValidationHelper.GetString(value, "");
            }
        }

        #endregion

        #region Events

        /// <summary>
        /// Used to register events
        /// </summary>
        protected override void OnInit(EventArgs e)
        {
            // register events

            base.OnInit(e);
        }

        protected void Page_Load(object sender, EventArgs e)
        {
        }

        #region Form control methods

        /// <summary>
        /// Returns true if validation passes, false otherwise (see Kentico form control documentation for more info)
        /// </summary>
        public override bool IsValid()
        {
            // no validation is needed for basic usage
            return true;
        }

        #endregion
}
With the base form control code in place, I was ready to add my custom functionality. First, I created some constants for the HTTPClient and Uri.
        #region "Constants"

        private static Uri _serviceUri;
        private static HttpClient _httpClient;

        #endregion
Next, I added properties for my Azure Bing Spell Check Service URL and my API Key.
        public string ServiceURL
        {
            get
            {
                return ValidationHelper.GetString(GetValue("ServiceURL"), "");
            }
            set
            {
                SetValue("ServiceURL", value);
            }
        }

        public string APIKey
        {
            get
            {
                return ValidationHelper.GetString(GetValue("APIKey"), "");
            }
            set
            {
                SetValue("APIKey", value);
            }
        }
Next, I added some basic layout to my form control. In my demo, I added a very exciting textbox and button. When the user clicks the button, I call the Azure Bing Spell Check API to check the entered value. You may want to do this as the user types, or some other integration.
<asp:UpdatePanel ID="up" runat="server">
    <ContentTemplate>
        <asp:TextBox ID="txtSuggestion" runat="server" ClientIDMode="Static"></asp:TextBox>        <br />
        <br />
        <asp:Button ID="btn" runat="server" Text="Check" OnClick="btn_Click" CssClass="btn btn-secondary" />
        <asp:Label ID="lbl" runat="server"></asp:Label>
        <br />
        <br />
    </ContentTemplate>
</asp:UpdatePanel>
Note that I set the ClientIDMode to Static. This is so I could target the control with jQuery when the user clicks a suggestion.
Finally, I added some jQuery code to update the textbox.
<script>
    $(document).on('click', 'a.suggestionlink', function () {
        $("#txtSuggestion").val(this.text);
    });
</script>
Adding the Azure Bing Spell Check API
With the base form control created, I was ready to add my custom code. In the OnInit method, I set my HttpClient values using the new form control properties.
        protected override void OnInit(EventArgs e)
        {
            // register events
            //Build up the Azure Service path
            _serviceUri = new Uri(this.ServiceURL);
            _httpClient = new HttpClient();
            _httpClient.DefaultRequestHeaders.Add("Ocp-Apim-Subscription-Key", this.APIKey);

            base.OnInit(e);
        }
In the btn_Click method, I passed the entered values to the Azure Bing Spell Check Service URL.
                string strText = txt.Text;
                string strText2 = txt.Text;
                List<string> lstSuggestions = new List<string>();
                // Get the response from Bing
                UriBuilder builder = new UriBuilder(_serviceUri + "&text=" + strText.Replace(" ", "+"));
I then parsed the result to find all the recommend corrections. Because the API doesn’t have an SDK yet, I used a dynamic to read the results.
Task<string> str = response.Content.ReadAsStringAsync();
dynamic results = JsonConvert.DeserializeObject(str.Result);
bool blnHasMultipleSuggestions = false;
For each result, I retrieved the first suggestion and updated my suggestion string.
                foreach (dynamic result in results["flaggedTokens"])
                {

                    if (result["suggestions"] != null)
                    {
                        if (result["suggestions"][0] != null)
                        {
                            // Get the 1st suggestion
                            string strSuggestion = result["suggestions"][0]["suggestion"].Value;
                            strText = strText.Replace(result["token"].Value, strSuggestion);
                        }
                        // Check if any of the suggestions have multiple values. If so, set the flag to add them to the options
                        if (result["suggestions"].Count > 1)
                        {
                            blnHasMultipleSuggestions = true;
                        }
                    }
                }
                lstSuggestions.Add(strText);
Because the API can return multiple suggestions, I added some code to dig one level deeper in each suggestion.
                if (blnHasMultipleSuggestions)
                {
                    foreach (dynamic result in results["flaggedTokens"])
                    {
                        if (result["suggestions"] != null)
                        {
                            if (result["suggestions"][0] != null)
                            {
                                string strSuggestion = "";
                                if (result["suggestions"].Count > 1)
                                {
                                    strSuggestion = result["suggestions"][1]["suggestion"].Value;
                                }
                                else
                                {
                                    strSuggestion = result["suggestions"][0]["suggestion"].Value;
                                }
                                strText2 = strText2.Replace(result["token"].Value, strSuggestion);
                            }
                        }
                    }
                    lstSuggestions.Add(strText2);
                }
With all the suggestions retrieved, I created a list of options to display to the user. For each suggestion, I created a new link that will update the text box.
                if (lstSuggestions.Count > 0)
                {
                    lbl.Text = "<h3>Did you mean:</h3><ul>";
                    foreach (string strSuggestion in lstSuggestions)
                    {
                        lbl.Text += "<li><a class=\"suggestionlink\" href=#>" + strSuggestion + "</a></li>";
                    }
                    lbl.Text += "</ul>";
                }
Registering the form control
With the coding in place, I was ready to register my new control. In the Form controls application, I created a new form control and specified the new ASCX file for the source.
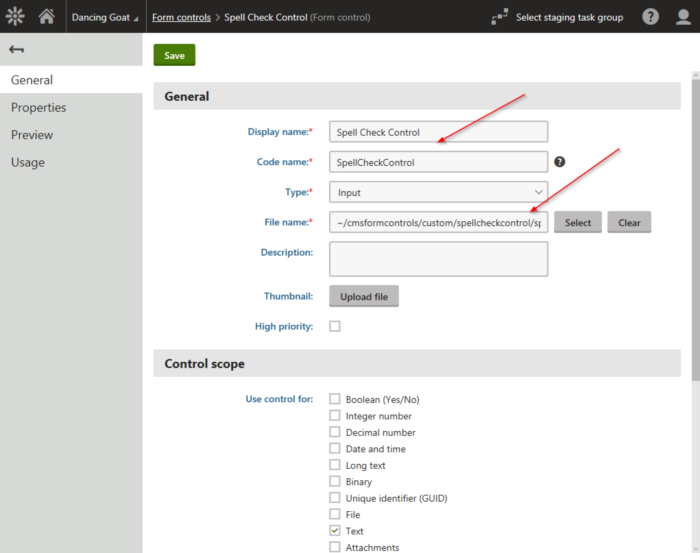
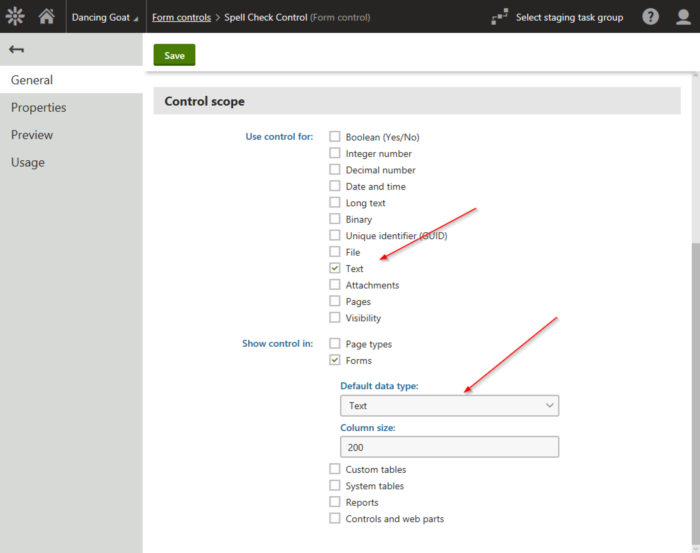
Under the scope, I specified where the control could be used.
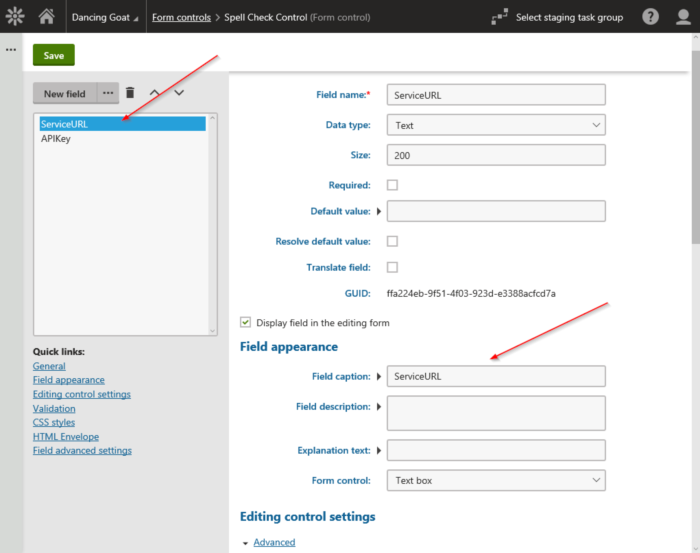
On the Properties tab, I created 2 new properties for my ServiceURL and APIKey.
Creating the form
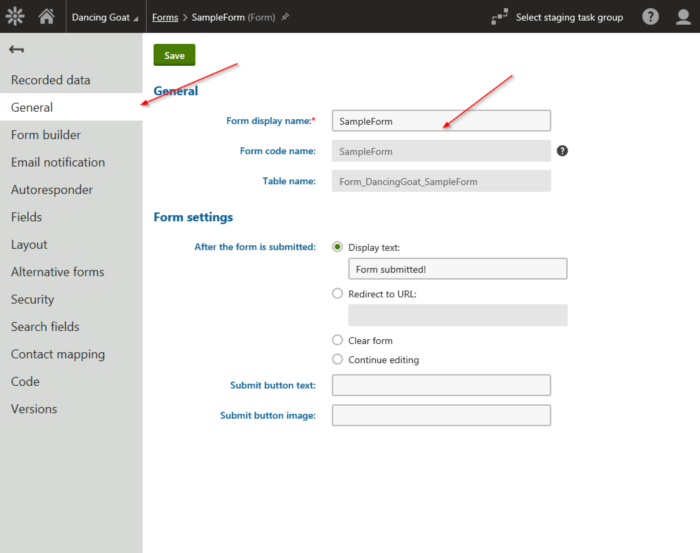
The last step was to create my form. In the Forms application, I created a new form.
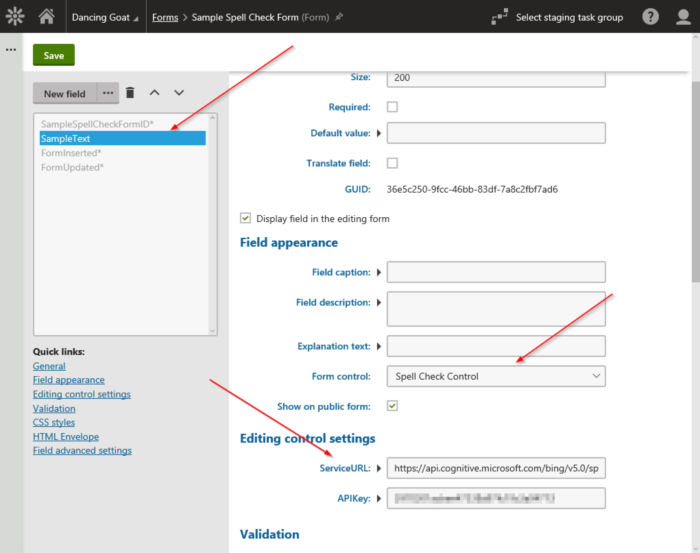
On the Fields tab, I created a new field and assigned the new form control to the Form control property. I also entered my service URL and API Key.
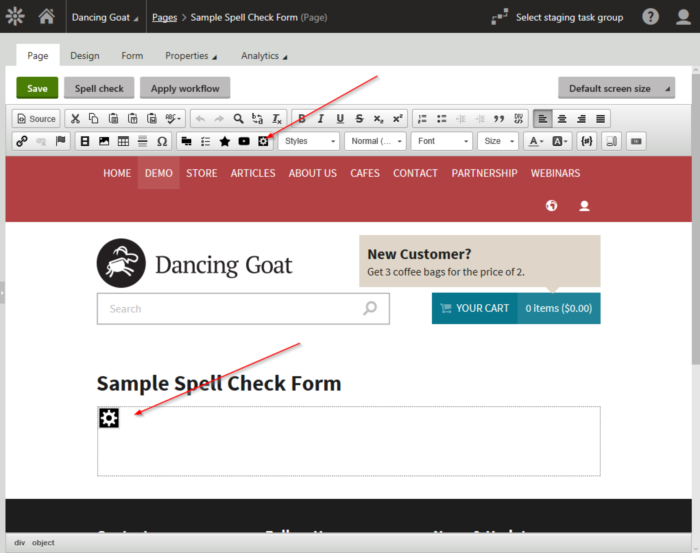
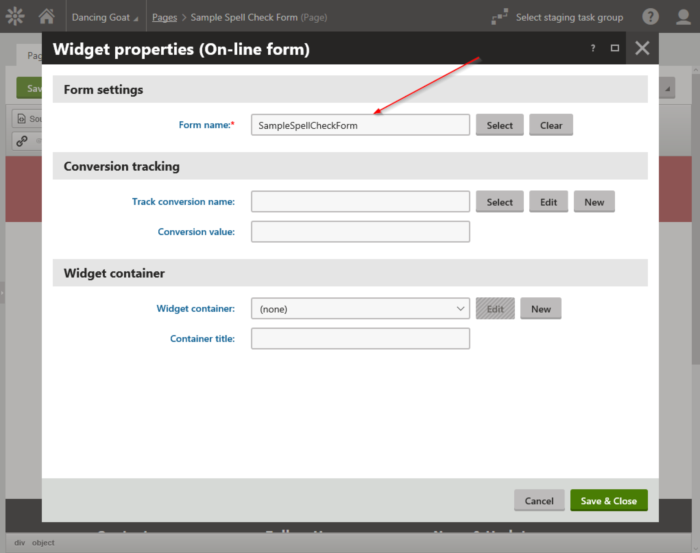
I then created a new page in my site and added the form to an editable region.
Testing
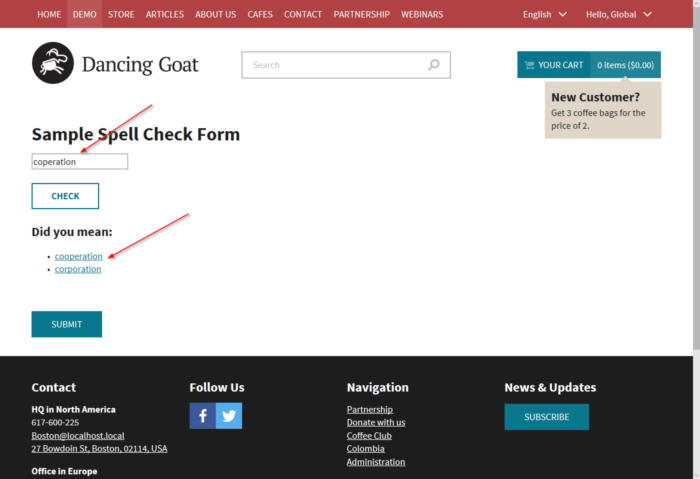
I was now ready to test. I opened my new page and confirmed my form control displayed properly.
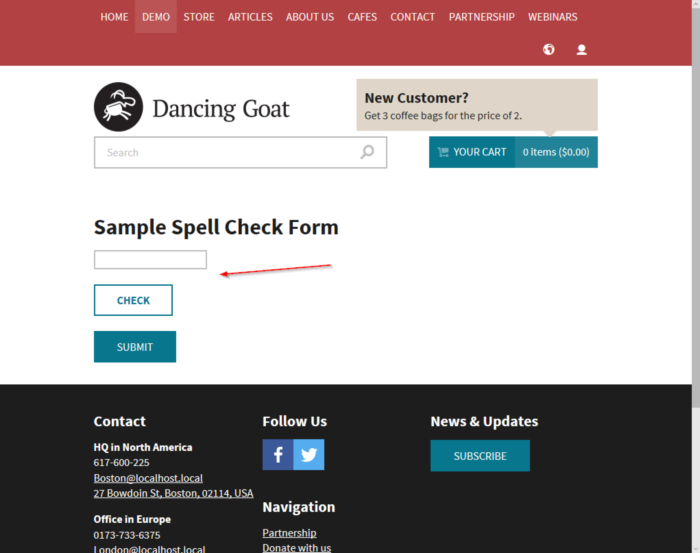
I then entered some incorrect text to confirm the functionality. For my first test, I entered [coperation].
Next, I entered a phrase, to confirm the code would parse each word. I entered [its al gud].

I then clicked a suggestion to update the textbox.

Here is the actual response from the Azure Bing Spell Check API. Each suggestions has a score, so you can programmatically decide what the threshold is for your suggestions.
{
    "_type": "SpellCheck",
    "flaggedTokens": [
        {
            "offset": 0,
            "token": "its",
            "type": "UnknownToken",
            "suggestions": [
                {
                    "suggestion": "it's",
                    "score": 0.844665965201618
                }
            ]
        },
        {
            "offset": 4,
            "token": "al",
            "type": "UnknownToken",
            "suggestions": [
                {
                    "suggestion": "all",
                    "score": 0.844665965201618
                }
            ]
        },
        {
            "offset": 7,
            "token": "gud",
            "type": "UnknownToken",
            "suggestions": [
                {
                    "suggestion": "good",
                    "score": 0.844665965201618
                },
                {
                    "suggestion": "god",
                    "score": 0.632316247371574
                }
            ]
        }
    ]
}
The Azure Bing Spell Check API has a couple different ways it can be used. It can check for spelling, grammar, or a combination be sure to check out the possibilities to see what would suit your needs the best.
Kentico’s Built-In Spellchecker
Kentico does come with a built-in spell checker, but it’s closely tied to HTML content (HTML editor, BB editor, etc.). This functionality allows you to present a user with an editable region that will automatically be checked for spelling. This is a little different than the solution in this article, as the Azure Bing Spell Check API can analyze not only spelling, but grammar and syntax.
Moving forward
Hopefully, this blog showed you how easily you can integrate the Azure Bing Spell Check API into your Kentico sites. Functionality like this can really help users interact with your applications and improve their overall experience. Now go check it out and see what cool stuff you can build. Good luck!
Get the form control