Integrating Custom Claims-Based Authentication with Kentico
When it comes to security and authentication, there’s no shortage of customization that developers will need to implement. On-premise and cloud-hosted AD servers, everyone’s favorite social media platform, or some Access database on that one guy’s machine; you name it! Companies have very specific verification processes for their users’ identities and it’s up to you to make it all work. While Claims-Based Authentication is nothing new, you may not know how to best handle it within your Kentico sites. In this article, I’ll show you how to get your external users logged in quickly and working within your application.
So, you have a requirement to use single sign-on, but you’re not sure how to handle the user within Kentico? This scenario is an extremely common one, as many companies leverage 3rd party systems to authenticate their users. When developers are faced with this task in Kentico, they may not know what code they need to add to the site to get it all working. In this blog, I’ll walk you through the process and get you authenticating in no time. Let’s go!
Planning the process
Every good solution starts with a plan so making sure you understand exactly how your integration is going to work is key. You need to figure out how and when your users will be authenticated, and more importantly, how that handoff will happen between your systems. It may help to draw out this process, so everyone is clear on the integration points.
Here is my process for my demo environment,

Deciding how to authenticate
With a process nailed down, you can start selecting the components. You are probably using claims-based authentication for single sign-on. If so, you need to decide who is the authority you’re going to use. You will want to pick a system that is flexible enough to meet your needs, while ensuring availability and performance.
For my demo, I chose to authenticate Google users.
Choose a provider
The next step of your journey is choosing a provider. There are so many options when it comes to authentication, it’s really up to you and your requirements. As long as the provider can properly authenticate the user against your chosen authority and create the claims token, you should be good to go.
In my case, I chose to use Auth0 to validate my Google credentials. While you’ll see some Auth0 code in this article, I’ll cover that integration in more detail in weeks to come. For now, just know that I’m going to use a little of the Auth0 API calls in this blog.

Every provider will need some information about the application, so you will want to configure your allowed origins, callback URLs, and other settings that you may need in your process.
Learn more about Auth0
Handle the authentication event
With the provider and authority figured out, you are ready to change some Kentico code. As our documentation shows, it’s very easy to add a global event handler for authentication events. By handling the SecurityEvents.AuthenticationRequested.Execute event, you can call your custom code to process the authentication. This usually involves creating a client to redirect the user to the provider for processing. This event is called anytime the user tries to access an area of the site that requires authentication (/admin or another secure page). This means you can add one handler for the entire site to ensure all users are authenticated properly.
Here’s my global event handler for the capturing the AuthenticationRequested.Execute event.
        // Contains initialization code that is executed when the application starts
        protected override void OnInit()
        {
            base.OnInit();

            // Assigns a handler to the SecurityEvents.AuthenticationRequested.Execute event
            // This event occurs when users attempt to access a restricted section of Kentico
            SecurityEvents.AuthenticationRequested.Execute += SignIn_Execute;
        }
The SignIn_Execute method may contain all sorts of code your provider may need to process the request properly. In my case, this is where I added some Auth0 API code to transfer the user to the Auth0 site., while setting some parameters After formatting the request, I redirected the user. In my next blog, I’ll break down that code.
Add a callback
Sending the user to the provider is only half the battle. The real code comes into play when they come back to your site. While providers work differently, they all depend on some endpoint within your application to the send the user to, along with the authentication token. You can create a web service, API, or another other component for this task.
In the case of Auth0, adding the Nuget packages generates an ASHX file within your application to handle these requests. This handler also contains Auth0 API code to parse the token and validate the request.
public class LoginCallback : HttpTaskAsyncHandler {
        public override async Task ProcessRequestAsync(HttpContext context)
        {
            AuthenticationApiClient client = new AuthenticationApiClient(
                new Uri(string.Format("https://{0}", ConfigurationManager.AppSettings["auth0:Domain"])));

            var token = await client.GetTokenAsync(new AuthorizationCodeTokenRequest
            {
                ClientId = ConfigurationManager.AppSettings["auth0:ClientId"],
                ClientSecret = ConfigurationManager.AppSettings["auth0:ClientSecret"],
                Code = context.Request.QueryString["code"],
                RedirectUri = context.Request.Url.ToString()
            });
          ...
        }
}
Create the users account
With the callback handler in place, you are ready to add your Kentico code. When the user comes back from your provider and is authenticated, you will want to set their user information within your site. This means you will need to add code to check for an existing account, and create one if necessary. The API Examples in the Kentico documentation can give you some straightforward code to do this.
In my demo, I checked for an existing account and created a new one, if needed. I populated the user information with profile details Auth0 passed in the callback.
            // Check if the user exists in Kentico
            CMS.Membership.UserInfo ui = UserInfoProvider.GetUserInfo(profile.NickName + "@gmail.com");
            if(ui == null)
            {
                // Creates a new user object
                CMS.Membership.UserInfo uiNew = new CMS.Membership.UserInfo();

                // Sets the user properties
                uiNew.UserName = profile.NickName + "@gmail.com";
                uiNew.Email = profile.NickName + "@gmail.com";
                uiNew.FirstName = profile.FirstName;
                uiNew.LastName = profile.LastName;
                uiNew.FullName = profile.FullName;
                uiNew.IsExternal = true;
                uiNew.Enabled = true;

                // Saves the user to the database
                UserInfoProvider.SetUserInfo(uiNew);
                ui = uiNew;
            }
In my demo, I’m setting some basic user details. You may want to extend this functionality to assign roles, permissions, and other user settings. Also note that I marked the user as IsExternal and Enabled.
Note
The IsExternal flag tells Kentco to not send the user to the normal login page, but that they will be authenticated somewhere else. If you don't set this, anyone could log in with a blank password.
Log the user in
Now that you know who the user is and have an account, you will want to log them into your site. You may even want to redirect them to a particular area or page based on some characteristic or property.
For my demo, I wanted the user to continue to the requested secure page. To log them in, I added the following code in the ASHX file.
            if (ui != null)
            {
                // Log the user in
                AuthenticationHelper.AuthenticateUser(ui.UserName, true);

                var returnTo = "/";
                var state = context.Request.QueryString["state"];
                if (state != null)
                {
                    var stateValues = HttpUtility.ParseQueryString(context.Request.QueryString["state"]);
                    var redirectUrl = stateValues["ru"];
                    returnTo = redirectUrl;
                }

                // Redirect to the requested page
                context.Response.Redirect(returnTo);
            }
The above code sets the user context to selected user, and redirects to their original page. This value was stored as part of the initial call to Auth0 in the state parameter.
Testing
With the integration in place, I was ready to test. First, I created a secure area of my site to have a simple test environment.
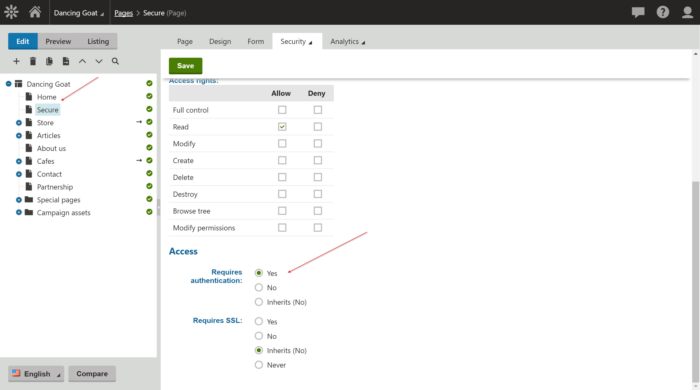
NOTE
In order to continue using the administrator (or other Kentico-based accounts), you will want to have a page with a sign in form. This will allow you to specify these credentials and not go through the new authentication process. Alternatively, you could create the account using the new process, and then update the new Kentico account with the appropriate roles and permissions.
Next, I accessed the site as a non-authenticated user and attempted to go to the new /Secure page. I confirmed the site properly redirected me to my provider (Auth0 in my case).
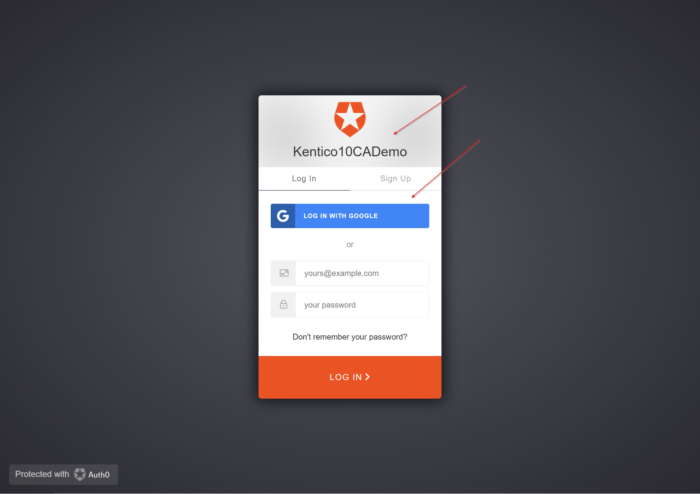
I clicked the Log in with Google link and entered my Google account information.
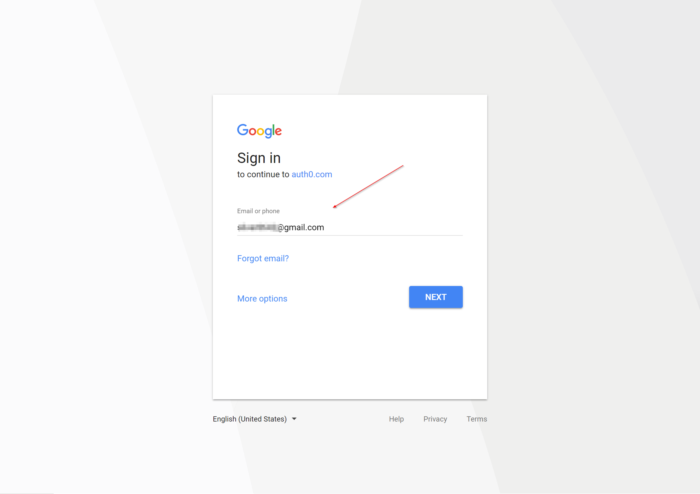
After entering my password, I completed the process and verified I was redirected back to the /Secure page of my site.
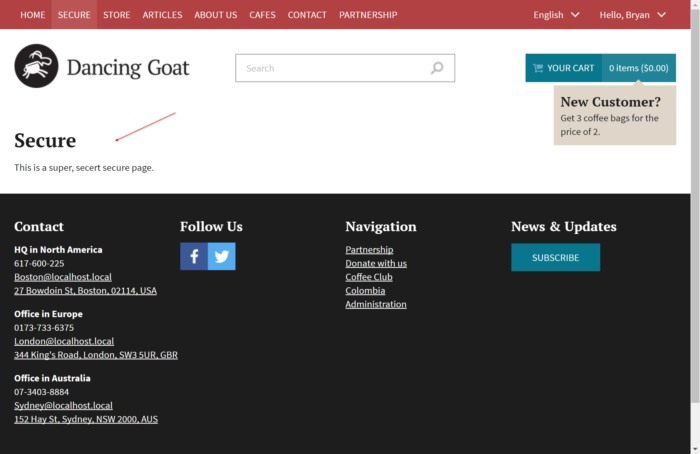
This confirmed I completed the authentication process and was redirected back to the requested page. As a final validation step, I checked to make sure that the new user was created within Kentico, with the correct properties set.

Moving forward
As this blog shows, it’s very easy to configure your Kentico sites to use claims-based authentication. This integration lets you quickly validate your user accounts against a 3rd party, and create their account within your site. By leveraging a solid provider, you can even get sample code for your callback handlers and token validation, to simplify the process even more. In a couple weeks, I’ll follow up this blog with one that covers the entire Auth0 integration process, so stay tuned! In the meantime, I hope you get your authentication working just the way you want it. Good luck!
This blog is intended for informational purposes only and provides an example of one of the many ways to accomplish the described task. Always consult Kentico Documentation for the best practices and additional examples that may be more effective in your specific situation.