Integrating Auth0 With Kentico
In a recent article, I showed you how to leverage claims-based authentication within your Kentico sites. In my example, I chose Auth0 for my identity provider, as it’s one of the easiest systems to implement around. In this blog, I’ll give you a deeper look at how to setup and configure Auth0 for your Kentico sites..
People have a lot of logins to remember these days. From social media sties to bank accounts, usernames and passwords are master keys to a person’s digital life. With data breaches being reported every week, the need to keep things organized and secure is a never-ending challenge. People want to use existing credentials where they can to help keep things under control.
When it comes to Kentico, we’ve long supported third-party authentication to help with this scenario. By validating a person’s credentials against a reputable party, you can simplify your security model, while freeing up a few bytes of storage in your customers’ brains.
There are a lot of identity providers available, but Auth0 is one of the easiest I have come across. Their API is simple to use, and covers many use cases right out the box. In this article, I’m going to show you how you can quickly set up your site to leverage Auth0 to validate your users and get your authentication going in no time! So, let’s get to it!
Learn more about Auth0
You can view my Integrating Claims-Based Authentication with Kentico blog here.
Creating an Auth0 Account
The first step of the process is to create your Auth0 account. Auth0 is a service, and one you may want to use with many of your systems and platforms. I recommend you create a “company-level” account to keep things simple. This will allow you to share the credentials with your team and manage all your client applications from a single login.
You can also create an account using several other industry-standard systems:
Creating a Client
Once you get your account set up, the next step is to create a client. Each application you integrate is a separate Auth0 client, to help you keep things organized. Creating a client includes several properties that you will need to set. Some of them are created for you, while others are configurable.
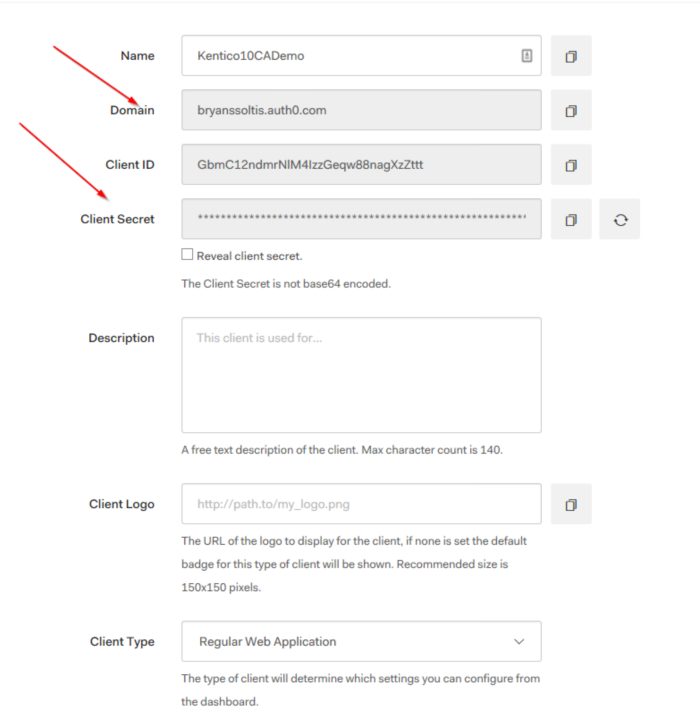
Generated properties
- Domain – This is the public domain for your account within Autho0. All the clients created under your account will use the same domain value.
- Client ID – This is your client id. This identifies the new client within Auth0 and will be different for each one.
- Client Secret – This is your client secret. This is required to interact with the client via the API.
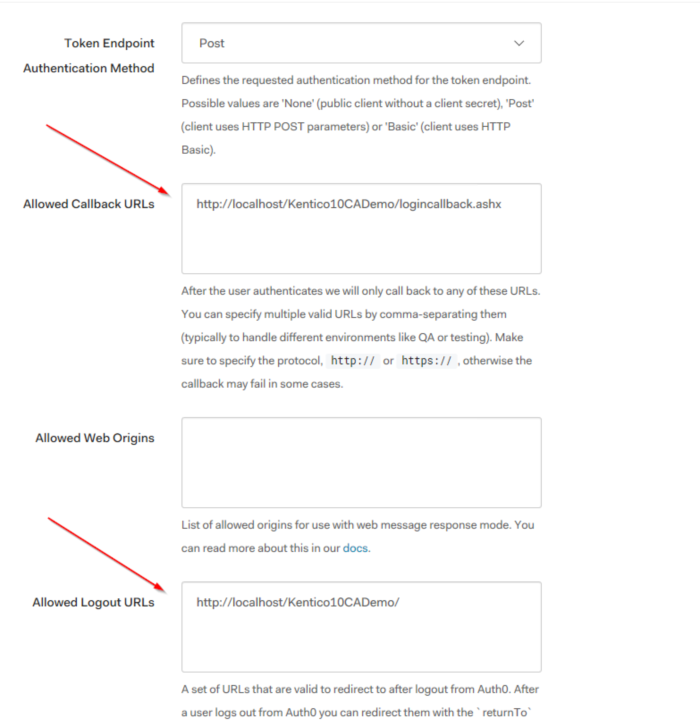
Configurable properties
- Client Type – This designates the type of client you are configuring. This will match your project/language type.
- Allowed Callback URLs – This is the URL Auth0 will send the response to within your application. You can
- Allowed Web Origins – This property allows you to configure what URLs Auth0 will accept requests from.
- Allowed Logout URLs – This is the URL Auth0 will redirect the user to when logging out.
There are several other properties available. Be sure to review them all to determine which ones will be required for your application.
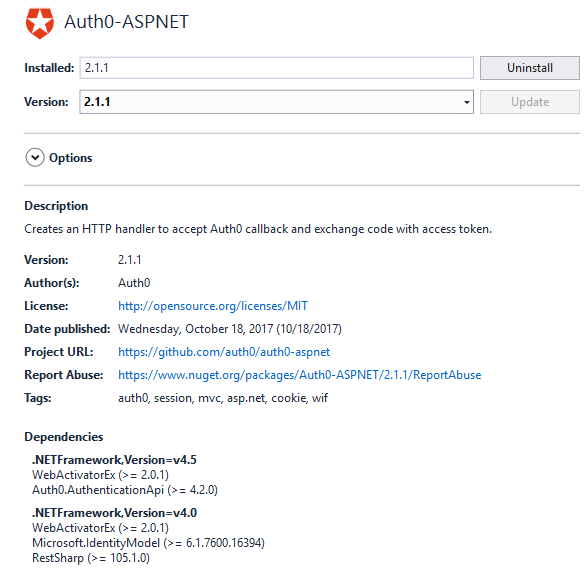
Adding the Auth0 Nuget Packages
With your Auth0 client configured, you are ready to add the NuGet packages to your application. In Visual Studio, search for Auth0 and add the appropriate package. In my case, it was the Auth0-ASPNET version.
Once you add the package, you will see some new keys in your web.config to store your Auth0 client details.
    <add key="auth0:ClientId" value="GbmC12ndmrNlM4IzzGeqw88nagXzZttt"/>
    <add key="auth0:ClientSecret" value="XXXXXXXXXXXXXXXXXXXXXXXXXXXXXXXXXXXXXXXXXXXXX"/>
    <add key="auth0:CallbackURL" value="http://localhost/Kentico10CADemo/logincallback.ashx"/>
    <add key="auth0:Domain" value="bryanssoltis.auth0.com"/>
Use your new client settings to update the keys.
This package also adds the necessary libraries to call the Auth0 API code. This process includes adding a special LoginCallback.ashx handler to for the Callback functionality.
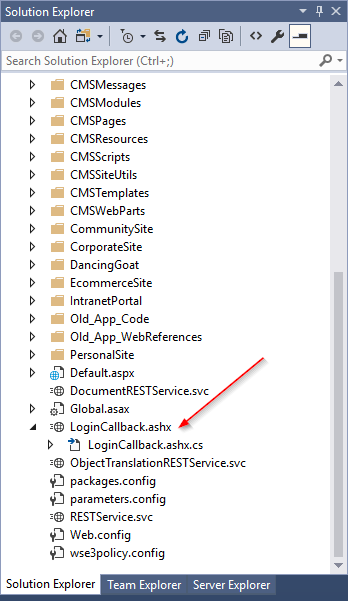
This file is preconfigured to accept the incoming Auth0 posts after a user is authenticated. This is where you will add your custom code to handle the user within Kentico.
public class LoginCallback : HttpTaskAsyncHandler
{
  public override async Task ProcessRequestAsync(HttpContext context)
  {
      AuthenticationApiClient client = new AuthenticationApiClient(
      new Uri(string.Format("https://{0}", ConfigurationManager.AppSettings["auth0:Domain"])));
      var token = await client.GetTokenAsync(new AuthorizationCodeTokenRequest
      {
             ClientId = ConfigurationManager.AppSettings["auth0:ClientId"],
             ClientSecret = ConfigurationManager.AppSettings["auth0:ClientSecret"],
             Code = context.Request.QueryString["code"],
             RedirectUri = context.Request.Url.ToString()
      });
      var profile = await client.GetUserInfoAsync(token.AccessToken);
      …
   }
}
Configuring Kentico for Single Sign-on
With the API in place, you are ready to add your custom code. The next step will be to configure your site for single sign-on. This means you will need to create a new Global Event Handler to override the authentication process. Specially, you will want to handle the SecurityEvents.AuthenticationRequested.Execute event, which fires any time the site needs to confirm a user’s identity.
       // Contains initialization code that is executed when the application starts
       protected override void OnInit()
       {
           base.OnInit();
           // Assigns a handler to the SecurityEvents.AuthenticationRequested.Execute event
           // This event occurs when users attempt to access a restricted section of Kentico
           SecurityEvents.AuthenticationRequested.Execute += SignIn_Execute;
        }
In the SignIn_Execute method, you will want to send the user to Auth0 for authentication. This involves calling the Auth0 API and adding your client details.
       private void SignIn_Execute(object sender, AuthenticationRequestEventArgs e)
       {
           var client = new AuthenticationApiClient(
           new Uri(string.Format("https://{0}", ConfigurationManager.AppSettings["auth0:Domain"])));

           var authorizeUrlBuilder = client.BuildAuthorizationUrl()
               .WithClient(ConfigurationManager.AppSettings["auth0:ClientId"])
               .WithRedirectUrl(ConfigurationManager.AppSettings["auth0:CallbackURL"])
               .WithResponseType(AuthorizationResponseType.Code)
               .WithScope("openid profile")
               // adding this audience will cause Auth0 to use the OIDC-Conformant pipeline
               // you don't need it if your client is flagged as OIDC-Conformant (Advance Settings | OAuth)
               .WithAudience("https://" + @ConfigurationManager.AppSettings["auth0:Domain"] + "/userinfo");
           if (!string.IsNullOrEmpty(e.RequestedUrl))
           {
               var state = "ru=" + HttpUtility.UrlEncode(e.RequestedUrl);
               authorizeUrlBuilder.WithState(state);
           }
           HttpContext.Current.Response.Redirect(authorizeUrlBuilder.Build().ToString());
       }
The API code includes the following:
- Domain for Auth0 client
- Client ID
- Client Secret
- CallbackURL
Additionally, the requested URL (ru) parameter is set. This allows you to pass the original URL as part of the authentication request. If the user is successfully authenticated, you can use this to redirect them to their desired page during the callback.
Mapping Users / Roles
With single sign-on configured, you are ready to handle the user within the site. In the LoginCallback.ashx handler, add whatever code you need to process the user within the site. You will need to check for an existing user account, and create one if needed. Additionally, you may need to assign the user to a role or group, depending on your requirements.
In my demo, I authenticated against Google. Because of this, I added some code to pull out the profile information to use within my Kentico site. The Google profile information required a little customization to make sure I had the full email for the Kentico username.
           // Check if the user exists in Kentico
           CMS.Membership.UserInfo ui = UserInfoProvider.GetUserInfo(profile.NickName + "@gmail.com");
           if(ui == null)
           {
               // Creates a new user object
               CMS.Membership.UserInfo uiNew = new CMS.Membership.UserInfo();

               // Sets the user properties
               uiNew.UserName = profile.NickName + "@gmail.com";
               uiNew.Email = profile.NickName + "@gmail.com";
               uiNew.FirstName = profile.FirstName;
               uiNew.LastName = profile.LastName;
               uiNew.FullName = profile.FullName;
               uiNew.IsExternal = true;
               uiNew.Enabled = true;

               // Saves the user to the database
               UserInfoProvider.SetUserInfo(uiNew);
               ui = uiNew;
           }
NOTE
You MUST mark the account as IsExternal when using a 3rd party identify provider. This tells Kentico to force the user to the external system for validation. If you do not set this value, Kentico will allow the user in without a password, and that would be BAD!
If the UserInfo object is successfully created, you can log the user in and send them onto their requested page. You will want to retrieve the ru value you set in the initial call to Auth0.
           if (ui != null)
           {
               // Log the user in
               AuthenticationHelper.AuthenticateUser(ui.UserName, true);

               var returnTo = "/";
               var state = context.Request.QueryString["state"];
               if (state != null)
               {
                   var stateValues = HttpUtility.ParseQueryString(context.Request.QueryString["state"]);
                   var redirectUrl = stateValues["ru"];
                   returnTo = redirectUrl;
               }

               // Redirect to the requested page
               context.Response.Redirect(returnTo);
           }
NOTE
If you want to see the process in action, be sure to check out my Claims-based Authentication with Kentico blog here.
Moving forward
Claims-based authentication is very common in web applications, so making it a smooth process for developers is always a good thing. In this blog, I wanted to show you how easily you can set up this process within your sites. With Auth0, you can quickly configure your application to validate user information across multiple systems, all from a simple API. With Kentico and Auth0 in your arsenal, you’ll be simplifying your security in no time! Good luck!
Get the code
This blog is intended for informational purposes only and provides an example of one of the many ways to accomplish the described task. Always consult Kentico Documentation for the best practices and additional examples that may be more effective in your specific situation.