Deploying Kentico to Amazon AWS
Over the last 6+ years, I have deployed Kentico to Azure a lot. A whole lot. Amazingly, I had never tried out deploying to Amazon AWS. In an effort to broaden my horizons and bring info to others, I decided to deploy Kentico to Amazon’s cloud platform. In this blog, I’ll cover my experiences and results.
Regardless of the platform, every developer should be focused on deploying Kentico to the cloud. Whether it’s the seemingly endless resources, global scalability, or just the evolution of computing, deploying applications to the cloud is the future. From a platform standpoint, Kentico is agnostic, meaning that for every platform, you should get a capable and stable experience.
With most of my previous experience being with Microsoft’s Azure platform, I wanted to try my hand at Amazon. Note that prior to this, I had knowledge of AWS and RDS, but no real experience. This article details my experiences and some of the challenges I faced. I’ll also include some comparisons to Azure throughout the process, just to add some contrast between the systems.
Setup
For my Science Fair project, I started out with a basic Kentico 9 site. Nothing special, just a nice e-commerce site where you can learn everything you want about dancing goats and coffee beans. I created the site locally and made sure everything was running smoothly.
I followed the Amazon deployment in our documentation here.
Create EC2 instance
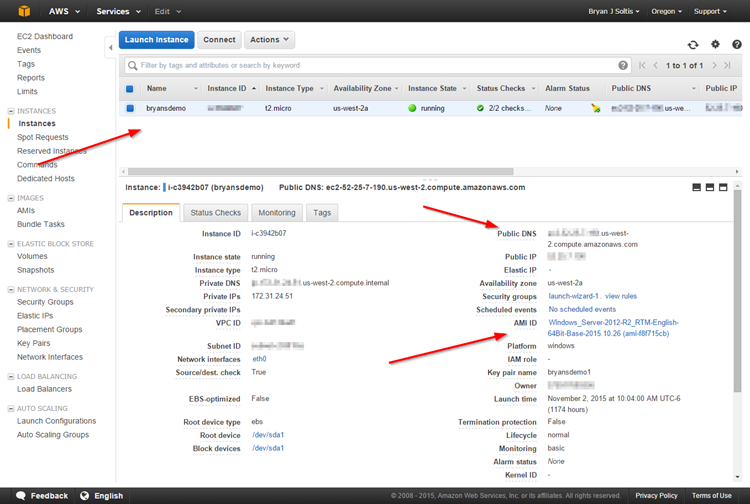
The first step I took was to create an EC2 instance. This essentially is creating a virtual machine in Amazon AWS that I will deploy my application to. This was pretty straightforward and I was able to choose the flavor of server I wanted and configure the appropriate security settings.
Main Takeaways
- The Amazon AWS portal is pretty basic. While full of information and links, it’s a very plain looking site with mostly text and links.
- I chose the Windows Server 2012 R2 flavor.
- I had to do a good bit of manual processes to make sure my IP/Ports/Security settings were set correctly.
- A developer really needs to know a lot about the routing, security, and port settings to deploy a site to EC2, as this configuration is part of the process.
Comparison to Azure
- The Azure portal is much more UI-focused.
- A lot of the same settings (ports, etc.) are configurable in Azure, however, they are in a different area and not necessarily part of the base server creation process.
- The EC2 server is the equivalent of an Azure IaaS (VM). You get full control over both, allowing you to configure whatever you like in the environment. All maintenance of the server is the client’s responsibility.
Deploy site
Deploying the site to the EC2 server was the first encounter I had with a manual/administrative task that I did not expect. After creating the server, I had to go into the server and configure the IIS role, along with the Application Server settings. Now, this experience is the same with Azure, but because I usually deploy to Azure Web Apps or Cloud Services, this step was unexpected and took a good bit of my old Network Admin knowledge to get set correctly
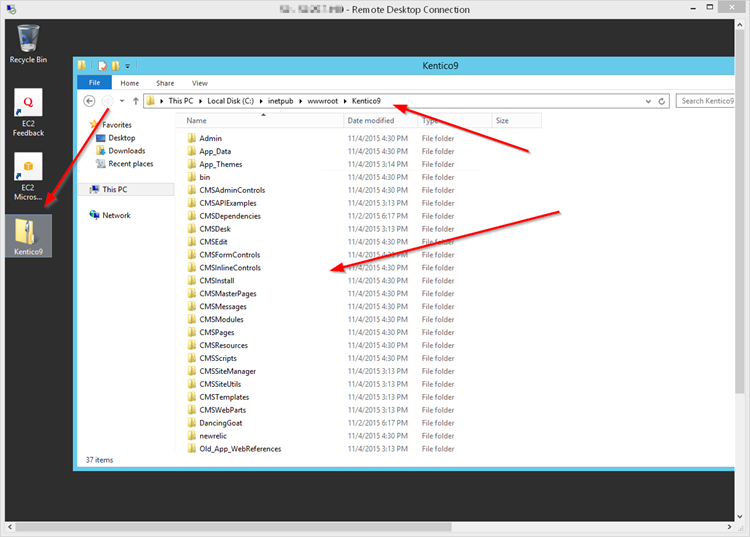
Other than that, the rest of the setup process was normal. I was able to configure IIS and set up my AppPool and Site without issue. I elected to zip up my site and copy it directly to the server via RDP.
Main Takeaways
- The site deployment process was fairly standard. It reminded me of every site I have ever deployed manually on any server.
- I was a little surprised that I had to physically copy the site up to the server to deploy. I expected an FTP option or some other route. I supposed I could have installed an FTP on the server and utilized that. There is probably an option for this, but I didn’t know where it was at the time.
Comparison to Azure
- There was really no difference to Azure in terms of deploying a site to Azure IaaS.
- With using Azure Web Apps or Cloud Services, the IIS setup/configuration is handled for you, so it results in a lot less administration.
- When deploying to Azure IaaS (the closest equivalent), the deployment process would be the same experience (zip and copy), unless an FTP was set up on the server.
Create an RDS instance
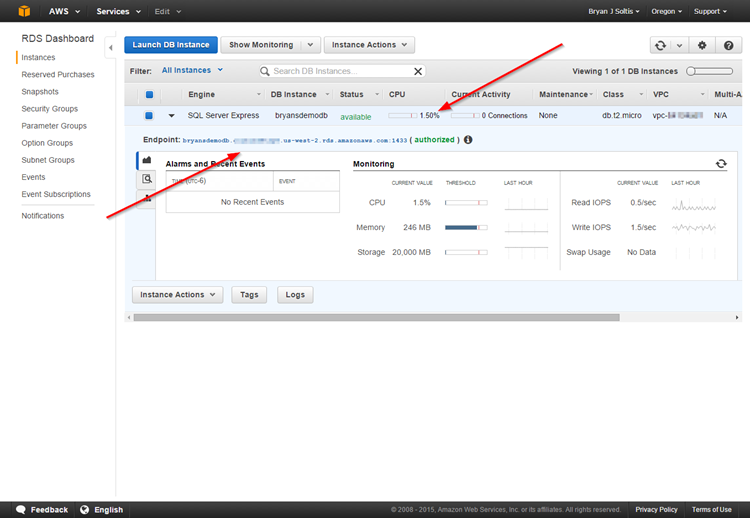
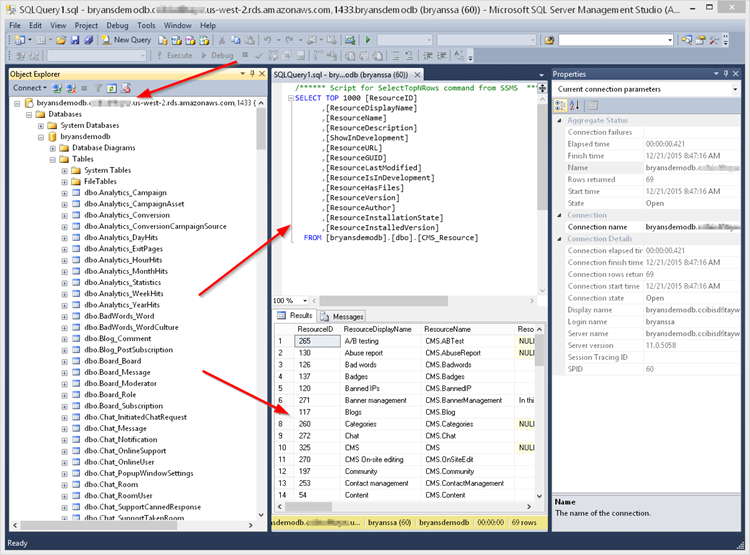
Creating the database server was another step where I was met with a little confusion and had to work my way through it. I believe I initially chose the wrong security policies because I was unable to connect to the DB after creating the server. Even after resolving those issues, I found out creating a new DB on the server and having Kentico setup and configure it worked better than trying to copy my database to the RDS instance.
Main Takeaways
- I had some issues with the connection string to the database. In the Amazon portal, it displays it with the port defined with a “:”. The correct format is (for .NET connection at least) to have the port denoted with a “,”. This took me a little time to figure out during the process.
- Wrong: [dbname].[server].us-west-2.rds.amazonaws.com:1433
- Right: [dbname].[server].us-west-2.rds.amazonaws.com, 1433
- I had a lot of issues deploying my existing DB to RDS. I tried a few different options, but, in the end, went with creating a new DB directly on the RDS server. I then let Kentico think there wasn’t a DB and had it go through the setup process.
Comparison to Azure
- I found the RDS instance is a lot like an Azure IaaS SQL Server, without the RDP access.
- Azure Database is not a full SQL Server instance, but rather a “relational database” that is very close to SQL Server. RDS appears to be a full SQL Server instance.
- From what I could tell, RDS is a single instance that is deployed. Compared to Azure Database, which is a cluster, this seems limited in scalability, comparatively speaking.
Create DynamoDB instance for Session
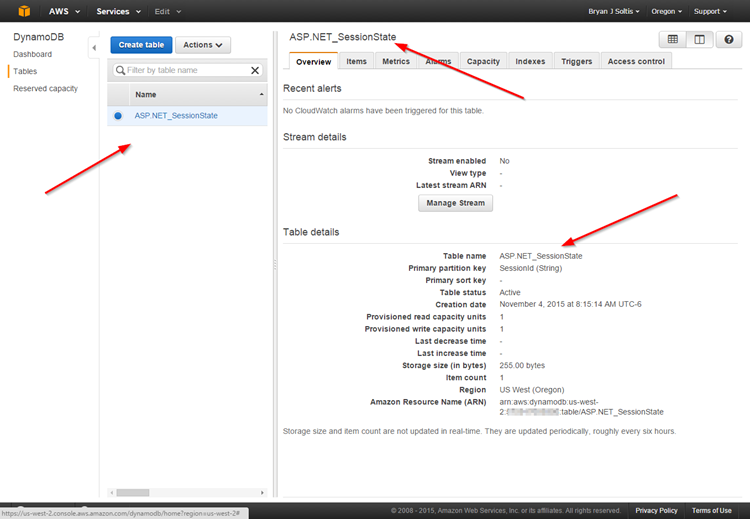
In order to handle a session in a web farm, I elected to use DynamoDB for session management. I found a few articles detailing this process and thought it would work well. Creating the database was simple enough, however, understanding which version of the SDK/DLLs to include in my project was a challenge.
    <sessionState timeout="20" mode="Custom" customProvider="DynamoDBSessionStoreProvider">
      <providers>
        <add name="DynamoDBSessionStoreProvider"\
            type="Amazon.SessionProvider.DynamoDBSessionStateStore"
            AWSAccessKey="XXXXXXXXXXXXXXXXXXXX"
            AWSSecretKey="XXXXXXXXXXXXXXXXXXXXXXXXXXXXXXXXXXXXXXXX"
            Region="us-west-2" />
      </providers>
    </sessionState>
Main Takeaways
- I found some issues when trying to decide which version of DynamoDB to include in my project. Some articles referenced v2, however, others referenced v3. Ultimately, I went with v2 and that seemed to work properly.
- I had to bring in the AWS.SessionProvider NuGet package, as well.
Comparison to Azure
- Compared to REDIS Cache (which I am big fan of), I found this step a lot more laborious and manual. Not only did I have to create the table manually in DynamoDB, I had to decipher the SDK version issue. With REDIS cache, it’s a simple NuGet package that then updates the web.config with the proper settings.
- I didn’t notice any “fault-tolerance” settings/configurations with DynamoDB, like there are in REDIS cache.
Creating an S3 Bucket
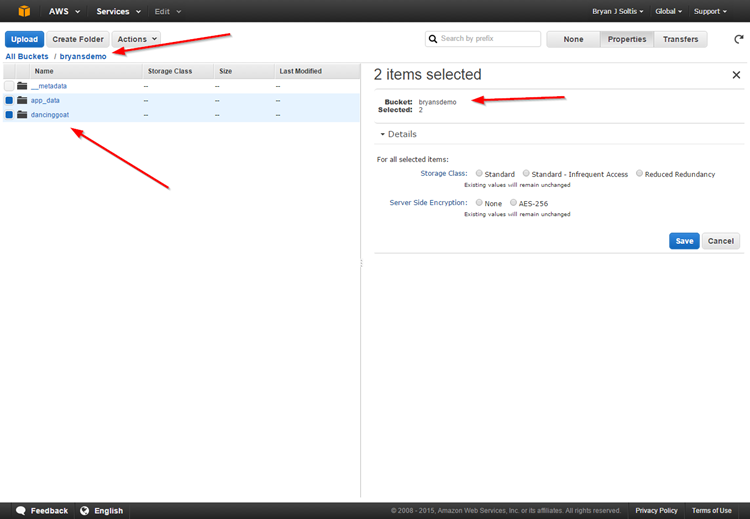
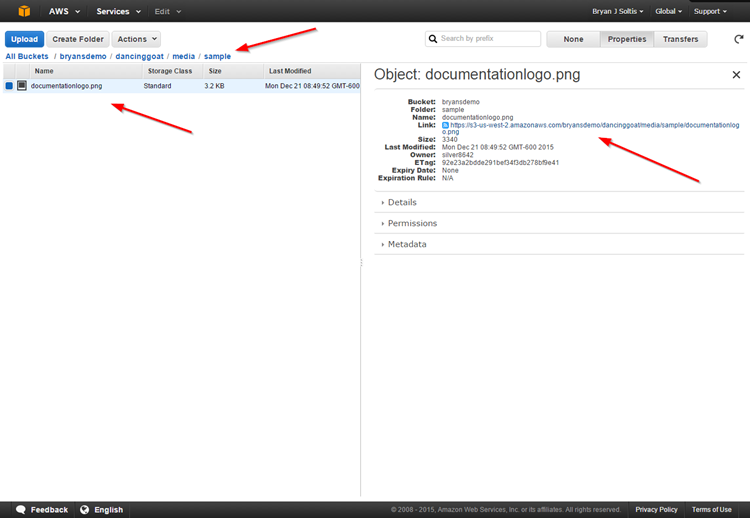
I created an Amazon S3 bucket to hold my media library files and index files. This process was fairly straightforward and I was able to complete it without issue. After creating the bucket, I updated my Kentico project with the appropriate web.config settings.
Main Takeaways
- The Amazon S3 web interface allows you set the “Storage Class”, which is a nice feature in case you have varying storage needs.
- The web interface allows the creation of buckets and folders, which allows you to build out your storage structure quickly.
Comparison to Azure
- Creating the S3 bucket was a little different from Azure Storage. While both use “containers”, the S3 experience seemed more granular, allowing more control over foundational parts of the system.
- Allowing the creation of folders from the web is a bit easier than with Azure. Being REST-based, most people utilize a third-party tool for creating the Azure container/folder structure.
Configuring CloudFront CDN
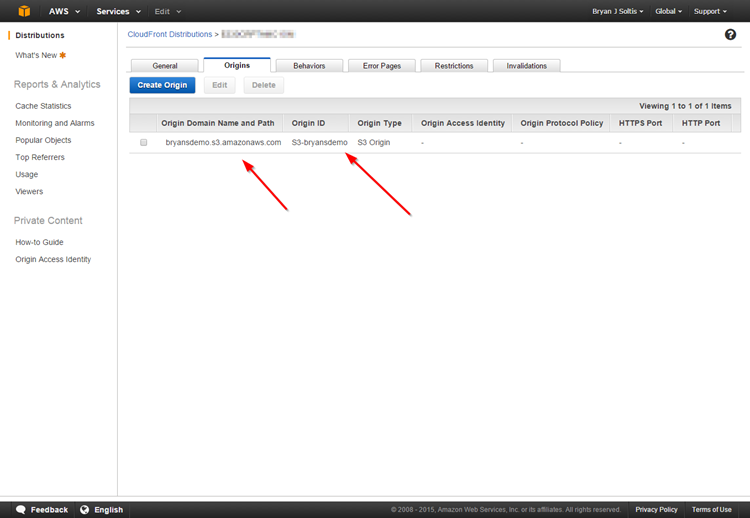
After creating my S3 bucket, the next step was to enable CloudFront for CDN access to the files. This process was also very straightforward and I was able to create a CDN endpoint for files easily. After creating the endpoint, I updated my web.config with the CMSAmazonEndPoint value.
    <add key="CMSExternalStorageName" value="amazon" />
    <add key="CMSAmazonBucketName" value="bryansdemo" />
    <add key="CMSAmazonAccessKeyID" value="XXXXXXXXXXXXXXXXXXXXX" />
    <add key="CMSAmazonAccessKey" value="XXXXXXXXXXXXXXXXXXXXXXXXXXXXXXXXXXX" />
    <add key="CMSAmazonEndPoint" value="http://d3q380cddxahe3.cloudfront.net" />
    <add key="CMSAmazonPublicAccess" value="true" />
Main Takeaways
- Much like the S3 interface, the CloudFront portal is simple and easy to understand.
- The interface allows for specific errors and behaviors to be defined, which is very powerful for customizing an experience for a user requesting the files.
Comparison to Azure
- Like the S3 differences, the Amazon portal provides much more granular control over the configuration than Azure.
- Amazon allows for multiple origins for a CDN endpoint, while Azure only allows for a single storage account path.
Testing
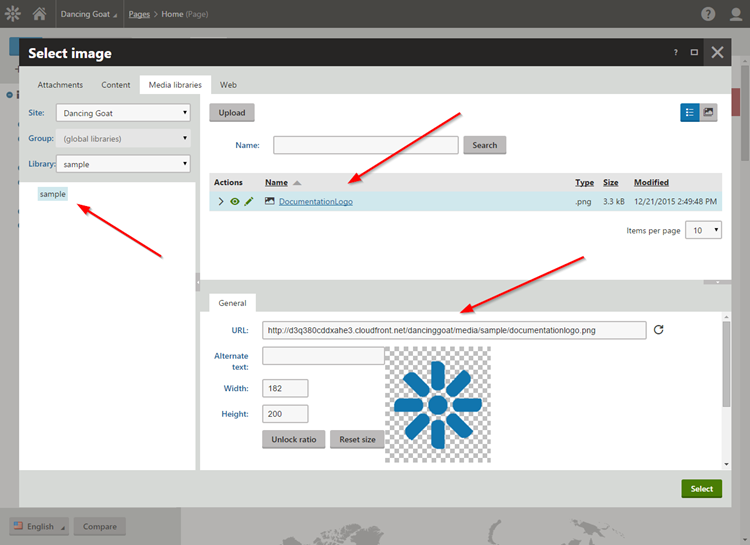
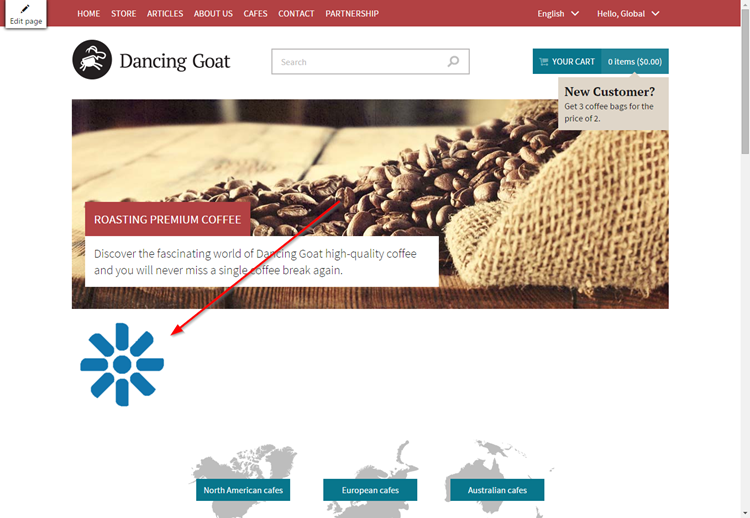
Once I had everything deployed, I tested the site to see if it all worked. By all accounts, everything seemed to work just fine. I was able to access the site, upload files to the media library, and request files via the dynamic CDN paths without issue. The built-in Azure integration in the CMS.IO namespace allowed me to save files to S3 easily and reference them within the site.
Wrapping Up
In the end, deploying to Amazon was not much different to any other deployment. Like many competing products, Amazon and Azure both offer a similar offering for deploying and hosting. The differences come in the particular interfaces, some customization options, and how much control a company needs over the physical hardware. Both are more than capable of hosting robust, enterprise applications.
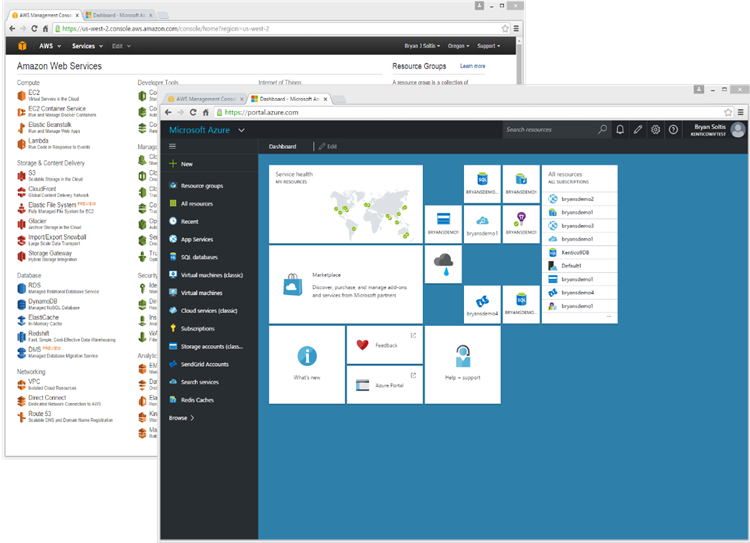
One of the biggest differences I see in the platforms is in how developers can configure and interact with the architecture. Amazon gives much more granular control over the separate parts (S3, CDN, etc.) by allowing developers to specify origins, errors, and many other settings on an individual basis for each component. Azure tends to take an easy-to-configure approach, by limiting the number of options for the developer to choose but rather configuring things for them using the best settings. Azure also has a much more intuitive and graphical interface over Amazon’s minimalist approach.
For me, I will probably still favor Azure, if only because of my experience with the platform. But I will go on record officially endorsing Amazon, as well (let the ridiculing being). The main point is that companies need to deploy to a cloud platform somewhere. It will simplify your lives and allow you to focus on making great applications and solutions. Kentico, as a product, is designed to run great, regardless of where it is deployed. Both Amazon and Azure offer a great, scalable architecture for hosting sites.
I’d love to hear your comments. I’m sure I got a few things wrong about Amazon and my deployment, so let me know below. Good luck!