Creating a Campaign Programmatically in Kentico EMS
Hello everyone my name is Brian McKeiver, Co-Owner of BizStream and Kentico MVP. As some of you may know, Thom Robbins is busy this week at the Kentico Partner Conference in Sydney, Australia. So my fellow Kentico MVPs and I are taking over this blog in his absence. By the time he gets back he may not even recognize it!
My Background
Before I knew about Kentico CMS I was your typical ASP.NET Developer. I was very happy creating my own web applications and websites from scratch. I even had some pretty decent reusable code libraries and modules developed by myself and my team at BizStream, that made making web applications relatively easy. Then I laid my eyes on Kentico CMS. I was blown away at how easy it was to quickly deliver fully functional websites that looked great. Now Ihave been using the Kentico platform for over 4 years and couldn’t be happier. At BizStream we have delivered more than 40 Kentico websites, and our clients absolutely love using it.
Down to Business: The Challenge of On-Line Marketing
One of the main challenges of on-line marketing is knowing what message to say to your prospective audience and when to say it. Timing really is everything. After the original message is decided upon, which is never easy by the way, an automatic follow up question always arises; “how well did it work?”.
One reason I really like Kentico EMS as a solution to this problem is that nearly all aspects of an on-line marketing campaign can be traced, measured, and tested with the platform. This very fine level of control gives you the ability to to react quickly to actual data and not have to just guess, or change direction with no plan on where to go. For instance, is your main product landing page hitting your goal at a 50% rate or a 95% rate? If that rate is not good enough, you should be able to have something that gives you the visibility you need to tweak, refine, and enhance your landing pages’ content to better meet your goal.
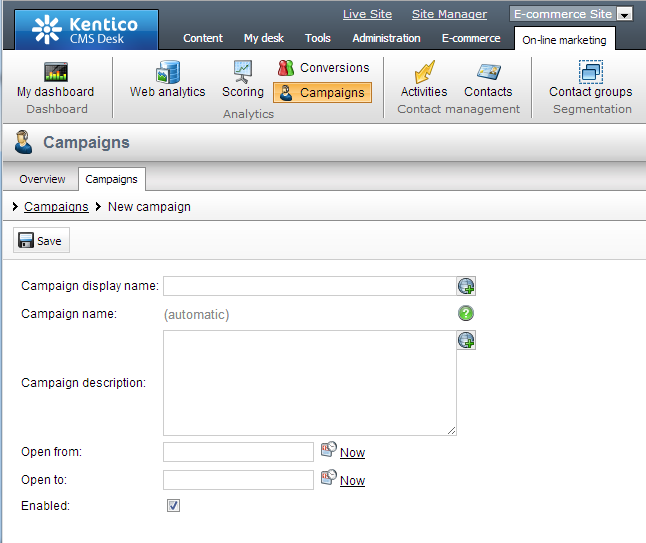
Kentico EMS provides a great way to create marketing campaigns that allow website owners and authors to measure the effectiveness of their different marketing activities. Here’s how. From CMSDesk you can navigate to the On-line Marketingtab, click the Campaignsbutton in the top ribbon, and be at a screen that lets your create your on-line marketing campaign.

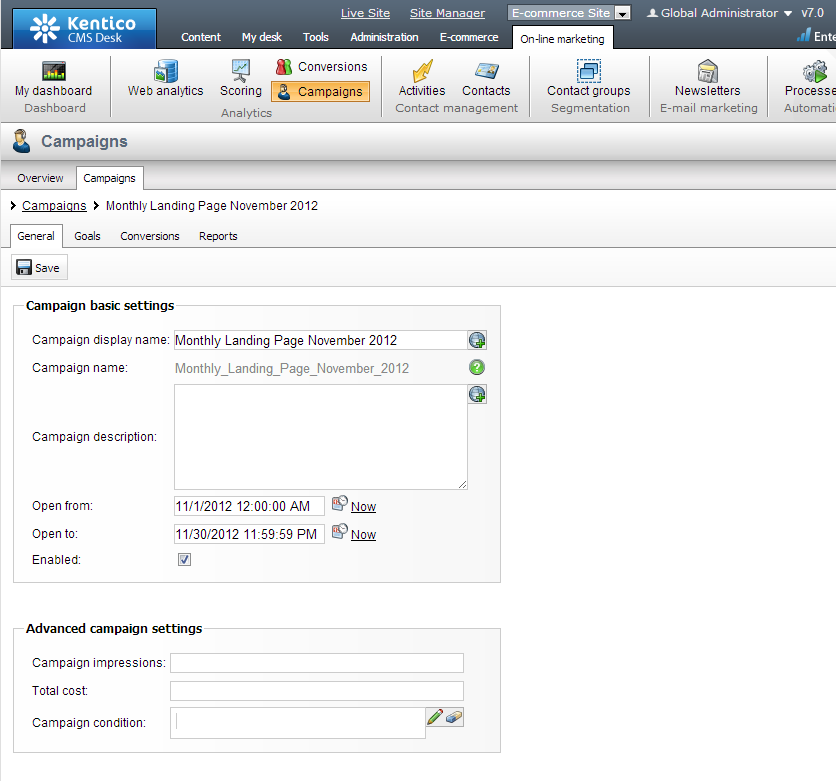
As you can see the Campaign editor defines various Campaign properties such as Campaign name, Campaign description, an Open fromdate, and an Open to date. Once your Campaign is created, more advanced options open up. You can configure the Campaign’s goals easily and most importantly you can then tie specific conversions to a campaign.

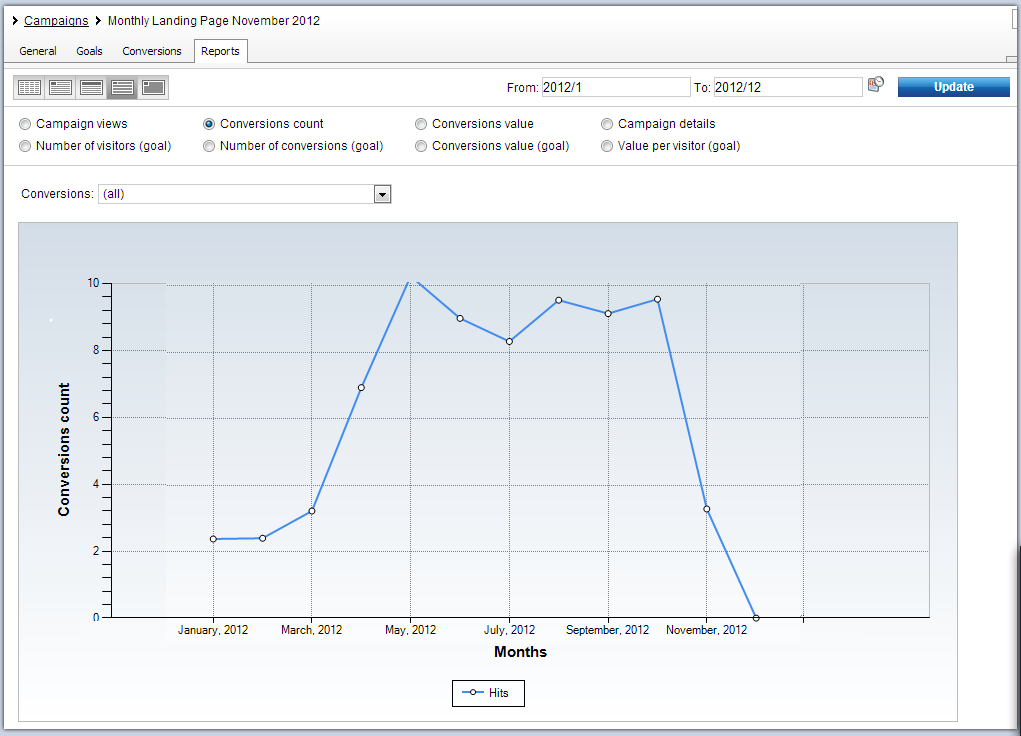
In a typical scenario you would configure your entire campaign and tie at least one conversion to it. At any point during or after the campaign, Kentico EMS can show you the actual results of how well you are meeting those goals. If you need any help configuring these settings, I highly recommend the On-line Marketing guide from Kentico,
Once it is all rolling, EMS really is a powerful system. Most on-line marketing campaigns have a specific duration so that their impact can be measured and reported on. Some campaigns can run for a year, quarter, or month, it really depends on business needs. Let’s pretend for the rest of this blog post that your company wanted to implement recurring monthly campaigns that tracked how well a certain landing page was doing, so that they could see real tangible results of the marketing investment.

But what if you didn’t want to do this manually each month. What if you wanted an automated process to create the Campaign for you ? That is where the API in Kentico EMS can really shine. We can easily write to code to accomplish this task.
Creating a Campaign Programmatically in Kentico EMS
To do this I am going to use a custom Scheduled Task. To start, follow this guide on how to create a custom scheduled task in Kentico EMS . After you have the empty task setup, add the following code into the Execute method of your class.
public string Execute(TaskInfo ti)
{
//Create a new Campaign
CampaignInfo ci = new CampaignInfo();
ci.CampaignDisplayName = string.Format("Monthly Landing Page {0:MMMM yyyy}", DateTime.Now);
ci.CampaignName = ci.CampaignDisplayName.Replace(" ", "");
ci.CampaignEnabled = true;
ci.CampaignOpenFrom = new DateTime(DateTime.Now.Year, DateTime.Now.Month, 1);
ci.CampaignOpenTo = ci.CampaignOpenFrom.AddMonths(1).AddDays(-1).AddHours(23).AddMinutes(59).AddSeconds(59);
ci.CampaignDescription = "Creates a Campaign that runs from the first day of the current month to the last";
ci.CampaignSiteID = CMSContext.CurrentSiteID;
ci.CampaignUseAllConversions = false;
ci.CampaignGoalConversions = 100; //target number of expected conversions
ci.CampaignGoalVisitors = 1000; //target number of expected visitors
ci.CampaignImpressions = 10000; //how many people were targeted by this campaign
ci.CampaignTotalCost = 42.00; //cost of running the campaign
CampaignInfoProvider.SetCampaignInfo(ci);
////Create a Conversion example
//ConversionInfo vi = new ConversionInfo();
//vi.ConversionDisplayName = "New Conversion Example";
//vi.ConversionName = vi.ConversionName.Replace(" ", "");
//vi.ConversionSiteID = CMSContext.CurrentSiteID;
//vi.ConversionDescription = "This is an example only";
//ConversionInfoProvider.SetConversionInfo(vi);
//Get the existing conversion that we have setup to track Landing Page hits
ConversionInfo vi = ConversionInfoProvider.GetConversionInfo("LandingPageConversion", CMSContext.CurrentSiteName);
if (vi != null)
{
//Associate our new Campaign and Conversion to it
ConversionCampaignInfo cci = new ConversionCampaignInfo();
cci.CampaignID = ci.CampaignID;
cci.ConversionID = vi.ConversionID;
ConversionCampaignInfoProvider.SetConversionCampaignInfo(cci);
}
// Logs the execution of the task in the event log.
EventLogProvider.LogInformation("CampaignGenerator", "Execute", "Created New Campaign");
return null;
}
There is really only 2 main points to the code above. The first step is to create a CampaignInfo object. Once instantiated you can fill in all the relevelant properties, such as name, description, and set the duration via the Open fromand Open todates. Next don’t forget to to tie the right Site to the Campaign, that’s fairly important. After the basic properties are filled out there are a few trickier ones to deal with.
The boolean property for CampaignUseAllConversions decides whether or not to use all the Conversions in the system under this campaign, or just specific ones. I have set this to false because most Campaigns usually have specific Conversion goals and not every single one.
The two goal properties, CampaignGoalConversions and CampaignGoalVisitors, let you specify how many people you are hoping to visit your landing page as a result of the Campaign, and how many of those visitors will actually turn into a Conversion, i.e. buy a product or fill out a contact us form.
The final two properties I am setting are associated with the baseline for the Campaign. The CampaignImpressions property lets me set up how many people that my message went out to initially, and the CampaignTotalCost property lets me enter how much was spent on the Campaign. These last two are important for calculating the ROI of the Campaign.
The last major action of the code is to tie the newly created Campaign object, after it is saved, to an existing conversion. That is done through the ConversionCampaignInfoProvider object and it’s SetConversionCampaignInfo method. You have two options at this point really, you can create a brand new conversion and tie it up to the Campaign, or just query the API for an existing Conversion which is the method I have chosen.
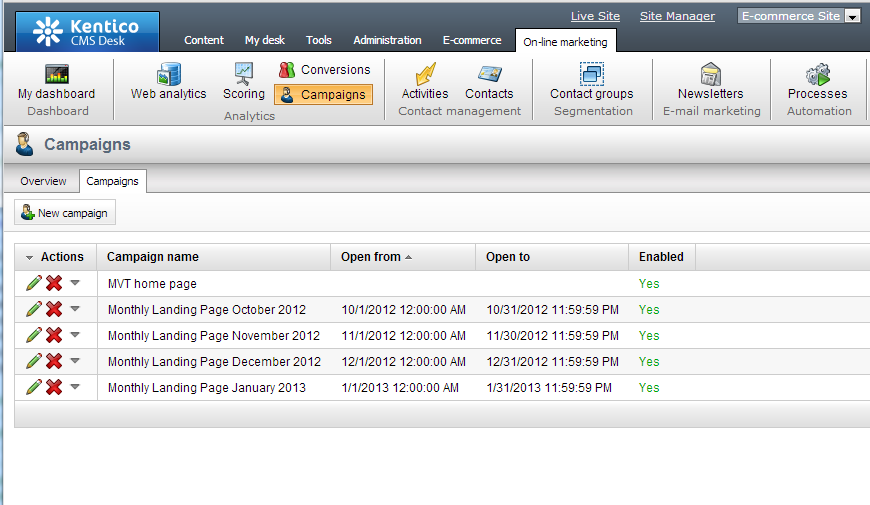
If you let this code run for awhile, you would have new campaigns created automatically, with a result that looks something like this:

One more thing to remember. If you wanted to, you could also use the TaskInfo’s TaskData member to pass through data to the Campaign from the Scheduled Task UI (ie. Impressions, TotalCost, ConversionGoals). That way, your goals wouldn’t be hard coded.
Conclusion
This is just a simple example of how to create a Campaign in Kentico EMS via the API. I have tried to really simplify the example for this blog post so that the code could easily be understood. In a real world scenario you may need to create a Campaign based of a few Newsletter issues that go out on a regular basis, or possibly a recurring advertisement on a site like LinkedIn or Facebook. For each of those you have may have different goals, costs, and ROI calculations. The important thing is that all of that is easily doable through the API of Kentico EMS.
I hope you have enjoyed my blog takeover post. If you have any questions or comments please leave them below in the comments section of the page. For more tips and best practices for Kentico CMS and Kentico EMS don’t forget to check out my blog at http://www.mcbeev.com