Adding Application Insights to a .NET Core Site in Azure
Once you select Azure as your hosting platform, a vast world of resources becomes available. From CDNs to Load Balancers, Microsoft’s cloud has loads of great services to help you develop and maintain your applications. Because performance is king, adding Application Insights to your site is a great way to stay on top of issues and understand how your application is performing. In this article, I’ll show you how to add this great monitoring tool to your .NET Core applications.
Note that I will be using Visual Studio 2017 for this article, so some of the screens may look different if you are using a different version.
Adding the service
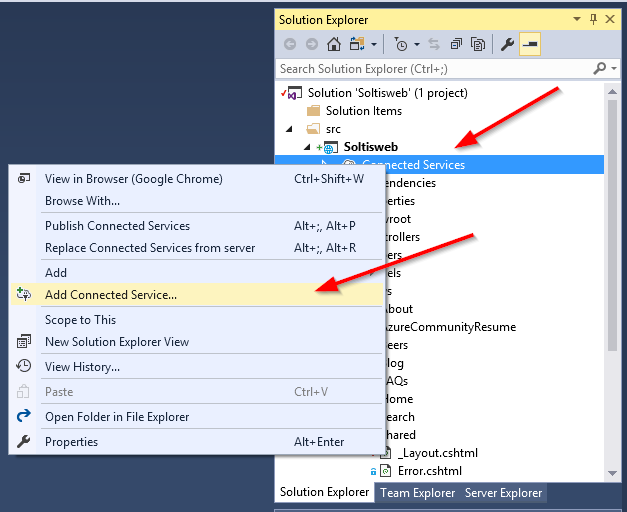
The first step in the process is to add Application Insights as a Connected Service. In Visual Studio, you can right click your ConnectedServices folder and select Add Connected Service.
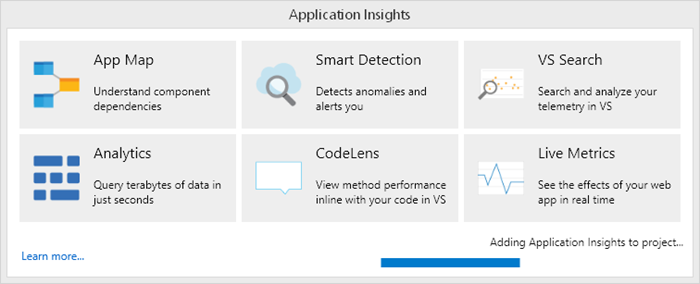
This action starts the configuration process for your Azure account. You will be prompted for your subscription credentials and resource group settings. Once you get everything set, you will see a message detailing the progress.
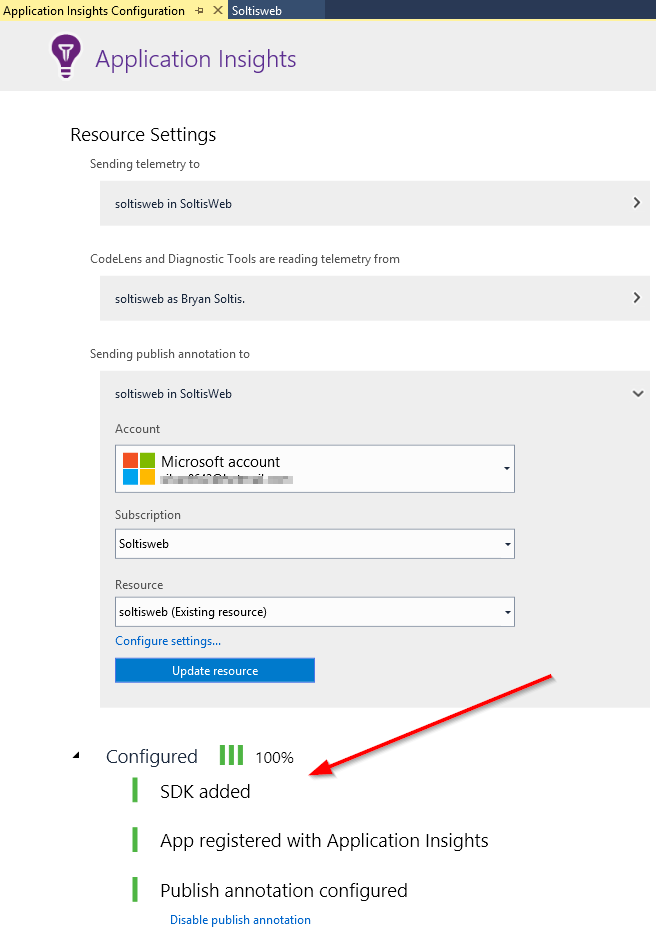
After the install is complete, you should see a completed configuration screen, showing everything is set correctly.
Confirming the code changes
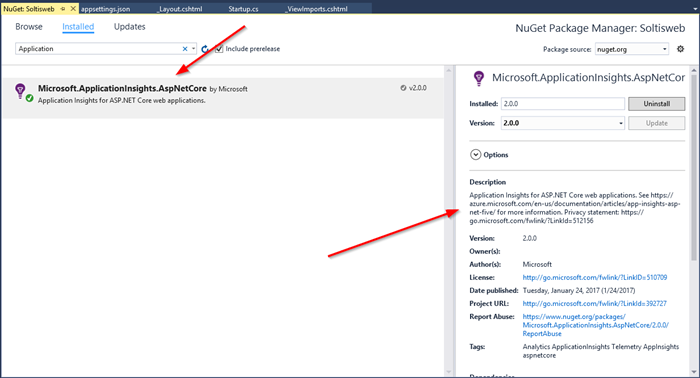
By going through the installation process, you are updating your project with the necessary NuGet packages and dependencies. This means there will be changes to your project configuration. Here is the Nuget package that gets installed.
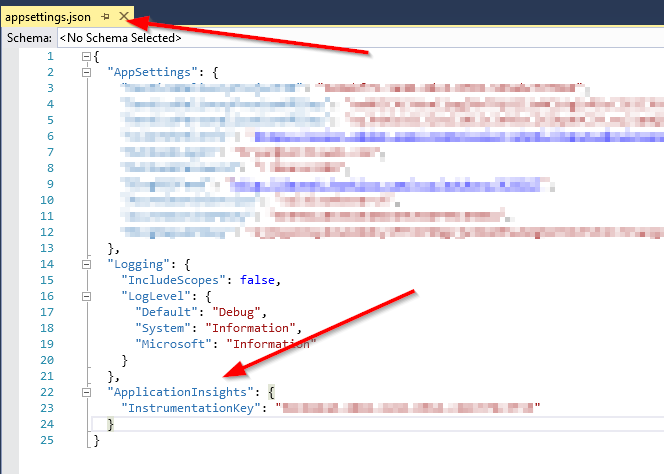
Additionally, your appsettings.json file will be updated with your AI InstrumentationKey. This key lets Azure know which AI service to track your website activity to.
Local testing
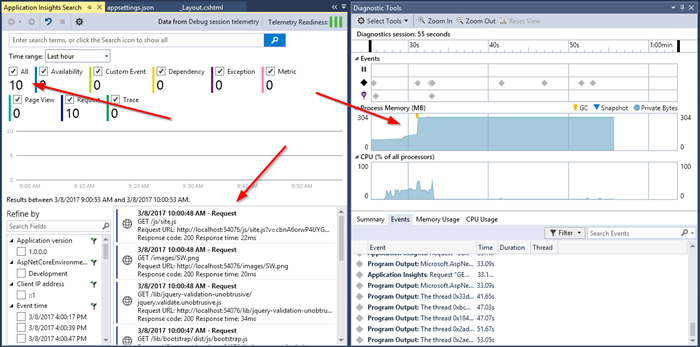
Once you have the packages installed and configured, fire up your site locally to test. You should see a new ApplicationInsights option in your toolbar.

In my case, I got an error as soon as I tried to launch my site. Oh snap!

You may get this error if you don’t have the right code in your Startup.cs file and your layout. You can easily add the following code to resolve it:
Startup.cs
        public Startup(IHostingEnvironment env)
        {
	….
            if (env.IsDevelopment())
            {
                builder.AddApplicationInsightsSettings(developerMode: true);
            }
        }

        public void ConfigureServices(IServiceCollection services)
        {
…

            // Add Application Insights
            services.AddApplicationInsightsTelemetry(Configuration);
        }
And then in your _Layout.cshtml file, you need to add your JavaScript.
@Html.Raw(JavaScriptSnippet.FullScript)
With those code changes, you should be able to launch your site and see your telemetry data.
Viewing on your live site
After adding your code changes and configurations, you can deploy your changes. After deploying your updated site to Azure, click on the Application Insights option within your App Service.
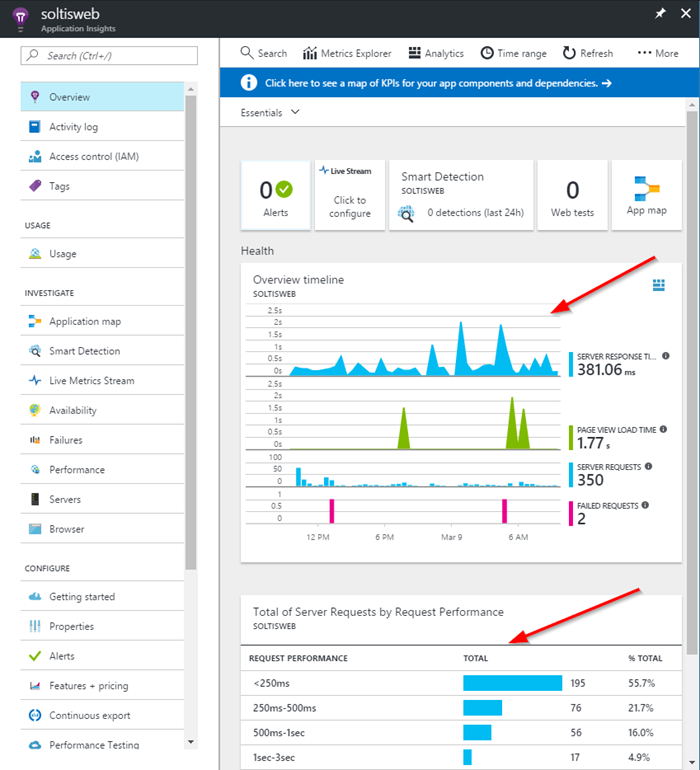
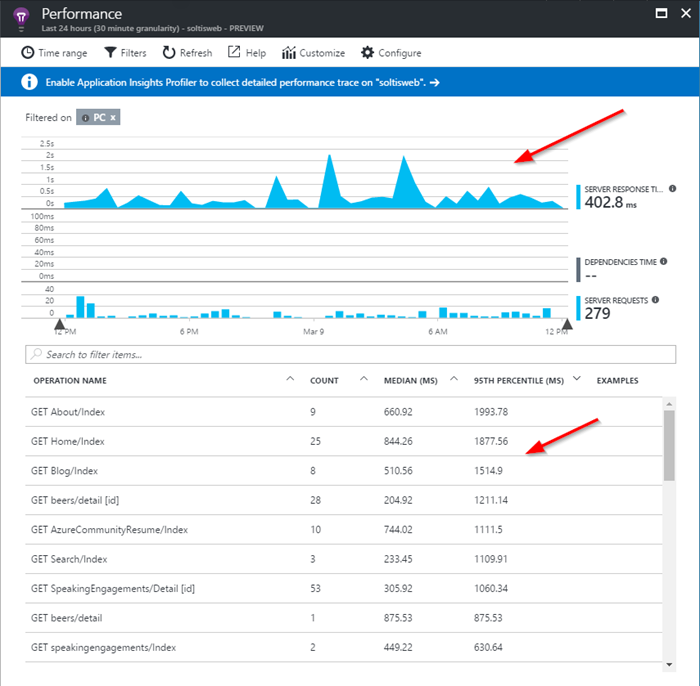
On this screen, you can view how your server is performing, average page loads times, which pages are taking the longest, and much more. You can drill down into any of the stats and see detailed information, as well.
Moving Forward
Adding Application Insights to your applications is a great way to get a detailed understanding of how your site is performing. Because everything is Azure hosted, you have access to all aspects of the project, including server stats, response times, and even dependencies. And the best part? It’s free for the first gigabyte of telemetry data stored per month, so you can add AI to your existing Azure sites and start gathering data. Good luck!