Adding a Bootstrap Button plugin to the CKEditor in Kentico 10
The CKEditor toolbar has been a long-time staple of the Kentico interface. As an open-source editor, it’s extremely flexible and allows users to update their content quickly, using a variety of built-in features. While the utility provides a lot of functionality out-of-the-box, did you know it was possible to add additional plugins? In this blog, I’ll show you how to add a Bootstrap button plugin to insert formatted controls into your content.
With Kentico 10, we expanded several areas of the platform to make them much more flexible and configurable. As editable content is the cornerstone of any good CMS, the CKEditor is a critical component to allow editors to add information in an intuitive and efficient way. While the CKEditor has a lot of options when it comes to formatting, companies often need to have a specific action they would like users to be able to do as part of their editing.
Because the CKEditor is an open-source utility, there are tons of great plugins and add-ons that you can include within your Kentico interface. To show you how, I’ll add a new plugin that allows a Bootstrap-themed button to be added quickly through the toolbar.
Understanding the editor
Before adding a plugin, it’s best to understand Kentico’s implementation of the utility. The CKEditor is a standalone WYSIWYG editor that is used in countless sites. Kentico decided years ago that this tool was a great fit for the platform, mainly because of its licensing (can’t beat free!) and customization options. Because we wanted to ensure editors could insert Kentico-specific components into their content, we customized the toolbars to insert forms, polls, and macros.
Because of the specific needs of the platform, there are some aspects about the CKEditor that you should familiarize yourself with prior to customizing. Most of these changes deal with how parameters and options are set, as there are many scripts that are executed when the toolbar is initialized. In the case of plugins, this is especially important because they need to be defined in a specific way to work properly.
You can learn more about customizing the CKEditor in Kentico here.
Choosing a plugin
The first step of the process was to add the plugin to the Kentico project. On the CKEditor site, there are loads of submitted plugins that people have developed to choose from.
You can see the available CKEditor plugins here.
For my demo, I opted for the Bootstrap Button plugin. This plugin allows for a Bootstrap-themed button to be added quickly to the content.
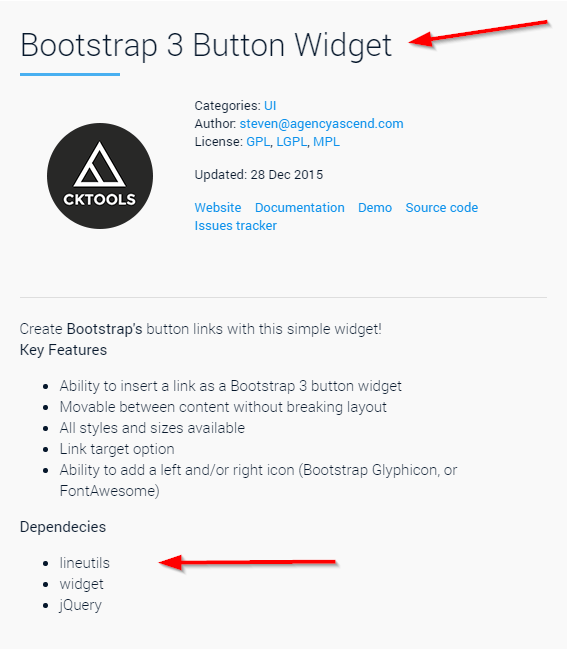
You can view the Bootstrap Button plugin here.
Adding the plugin files
After selecting a plugin, I was ready to add the files to my Kentico project. I copied the unzipped plugin files to my \CMS\CMSAdminControls\CKEditor\plugins folder, maintaining the plugin-specific folder structure.
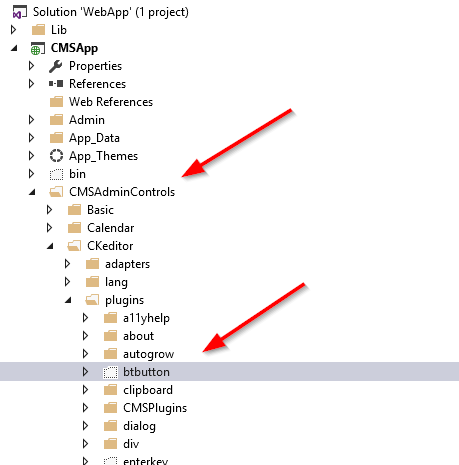
Note: An important aspect about this particular plugin is its dependencies. I had to include the additional plugins (lineutils, widget) in order for the Button one to work.
Registering the plugin
After copying the folder(s) to my project, I was ready to register them within Kentico. This required the following code block to be placed in the \CMS\CMSAdminControls\CKEditor\config.js file.
CKEDITOR.editorConfig = function (config) {

    config.plugins += ",btbutton";
This code registers the plugin with the CKEditor library. Note that this code has been modified from the standard way of doing so (config.Extraplugins =…) because of other scripts that are setting some default plugins for the system to use.
Next, I added the plugin to the Full toolbar.
config.toolbar_Full = [
    [sourceName, '-'],
    ['Cut', 'Copy', 'Paste', 'PasteText', 'PasteFromWord', 'Scayt', '-'],
    ['Undo', 'Redo', 'Find', 'Replace', 'RemoveFormat', '-'],
    ['Bold', 'Italic', 'Underline', 'Strike', 'Subscript', 'Superscript', '-'],
    ['NumberedList', 'BulletedList', 'Outdent', 'Indent', 'Blockquote', 'CreateDiv', '-'],
    ['JustifyLeft', 'JustifyCenter', 'JustifyRight', 'JustifyBlock', '-'],
    '/',
    ['InsertLink', 'Unlink', 'Anchor', '-'],
    ['InsertImageOrMedia', 'QuicklyInsertImage', 'Table', 'HorizontalRule', 'SpecialChar', '-'],
    ['InsertForms', 'InsertPolls', 'InsertRating', 'InsertYouTubeVideo', 'InsertWidget', '-'],
    ['Styles', 'Format', 'Font', 'FontSize'],
    ['TextColor', 'BGColor', '-'],
    ['InsertMacro', '-'],
    ['Maximize', 'ShowBlocks'],
    ['btbutton']
];
Testing
With the plugin installed and registered, I was ready to the test the functionality. I created a new page and added an Editable Text webpart to the design. I set the toolbar to Full.
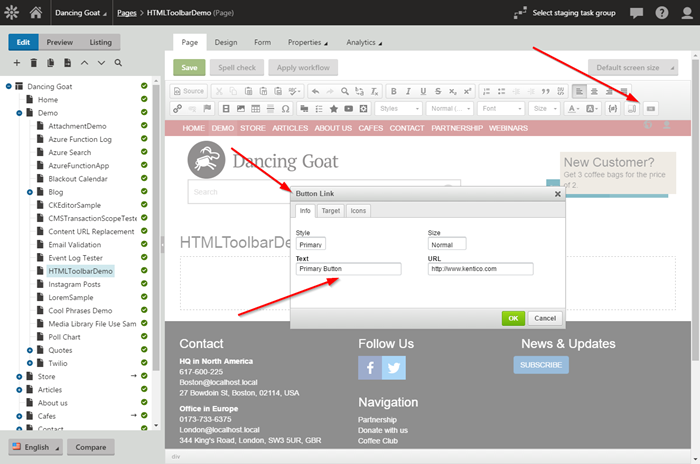
Clicking the new button opened a modal window where I could set the button properties. After adding the button, I viewed the Source to verify it was set correctly.
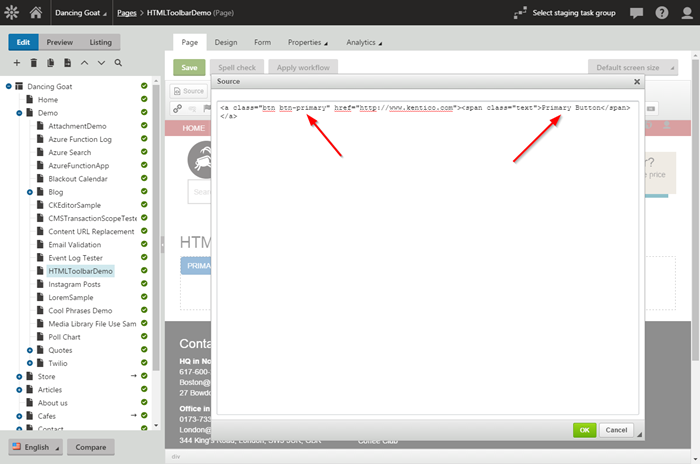
I added a few of the buttons to confirm they looked correct.
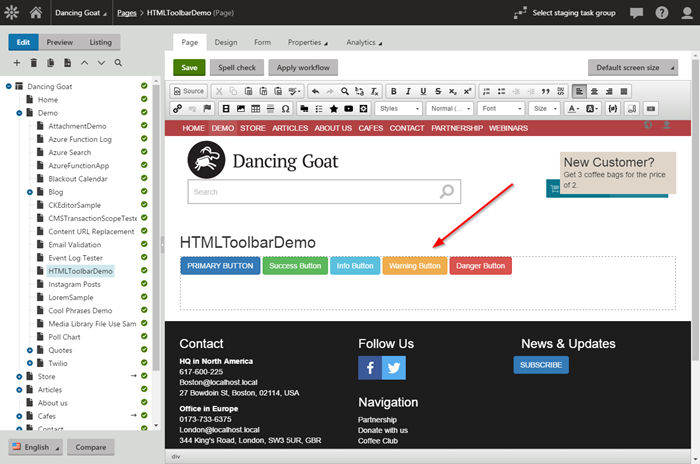
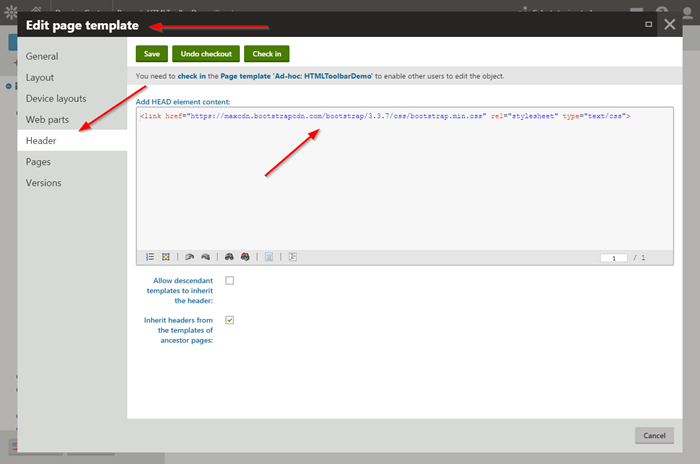
Note that I had to pull in the Bootstrap CSS to the page template in order to get my styling to display correctly. This is because the Dancing Goat demo site already has some default styling that would override my Bootstrap styles.
Moving Forward
Hopefully this blog showed you just how easy it is to customize the CKEditor for your projects. Adding plugins is a great way to extend the functionality of the platform and provide your users a great editing experience. With the vast library of plugins available, you are sure to find some that meet your project’s needs. And if not, you can always develop your own plugin and submit it to the community! Good luck!
This blog is intended for informational purposes only and provides an example of one of the many ways to accomplish the described task. Always consult Kentico Documentation for the best practices and additional examples that may be more effective in your specific situation.