How the 'Automatic resize' comes handy
You have might come across the situation when there is some kind of limitation related to the amount of space available for your site. It doesn't really matter if we'd talk about the file system or the data base. Either way, it simply requires you to get a chance to control the size of the files uploaded to the system by the CMS users. To handle such situation effectively, you can use built-in support for automatic image resizing, that can eventually save you quite a bunch of bytes of your memory.
The automatic image resizing in its current form was introduced along with a new file management features included in the release of Kentico CMS 4.1. Automatic resizing can be set for the uploader form controls (used let's say for the custom document fields) and the HTML area fields, both completely separately. It means that based on the type of the filed different configuration applies.
If you want to set the automatic image resizing on the site global level you do that through the Site Manager-> Settings-> . At the bottom of this page you can see a group of options related to the resize feature.
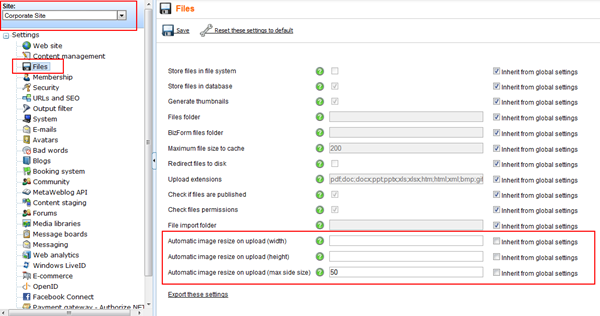
The 'Automatic image resize on upload (max side size)' value is specified as 50 (in pixels) in this example. It means whenever a new image will be uploaded into the site using some of the uploader controls the longest side size should be resized accordingly (keeping the aspect ratio).
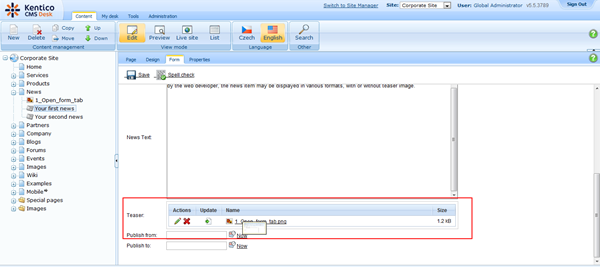
In the CMS Desk select some news document, switch to the 'Form' tab and scroll to the bottom of the editing form. Use the uploader to upload a file that you may say for sure has the dimension longer than 50 pixels. After the upload finish you'll notice the size and thumbnail indicates the image has got resized.
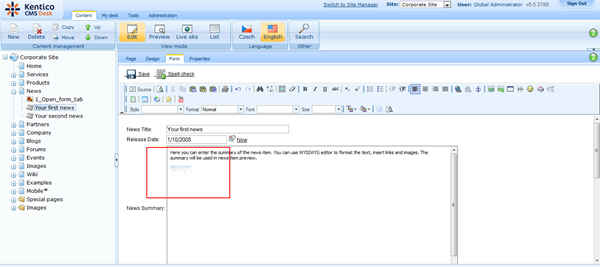
If you go to the 'News Summary' field now and try to use the 'Quick insert image' button from the editor toolbar, you'll see that uploaded file wasn't resized at all. It's because the site global settings weren't applied for the HTML area by default, however, you can easily alter this behavior.
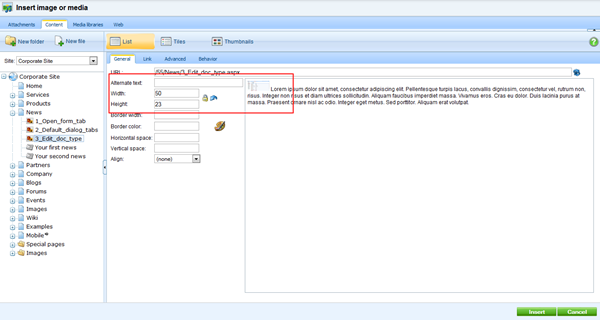
Go to the
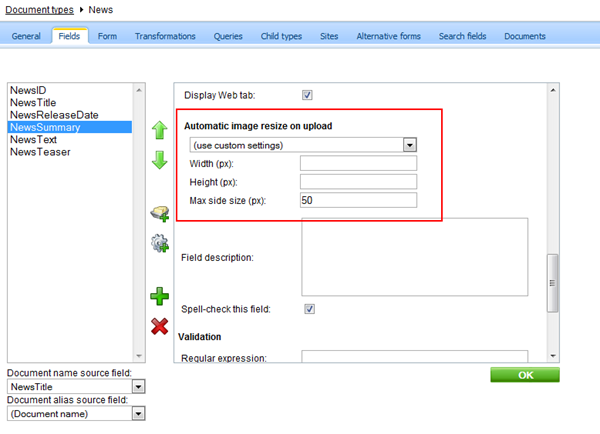
Site Manager-> Development-> Document types-> News-> Edit. On the 'Fields' tab select the 'NewsSummary' field, expand the 'Field advanced settings' by hitting the 'Configure' link and keep scrolling down till you reach the 'Automatic image resize on upload' section. You can specify various size options here in the similar manner as you did with the global settings.
This setting influents all the selection dialogs invoked from within the HTML area field. Even the 'Quickly insert image' upload will inherit from this setting causing the image to resize.
When you open selection dialog (Insert image or media, Insert link) and try to upload an image to the 'Content' using the 'New file' button, you'll notice the image gets resized as well.
 NOTE:
NOTE: If you change the setting of the 'Automatic image resize on upload' for the particular field, you need to reload editing form in order to apply new settings. The resize information is part of the query string that needs to be updated; therefore the form must be refreshed first.
-kj-
See also: Dialogs configurationApplies to: 4.1, 5.x