|
|

Customizing workgroups |

|

|

|

|
|
Customizing workgroups |
|
|

|
|
|
|
Customizing workgroups |
|
|
|
|
|
Customizing workgroups |
|
|
|
|
|
|
||
It is possible to customize the website sections dedicated to workgroups by adding new documents, deleting unwanted documents or modifying existing ones. This can be done at two levels:
•Customizing one specific workgroup
|
Relocating and renaming default workgroup sub‑pages
The configuration of many web parts and widgets used within the sections dedicated to workgroups and certain other settings are dependent on the alias paths of particular workgroup sub‑pages. Therefore, it is not recommended to change the default alias paths.
In case that this is absolutely necessary, please refer to the Customizing the portal -> Modifying structure of the website topic for more details on how this can be achieved.
|
If you wish to customize a document for all workgroups, you can perform the required change by adding, removing or configuring the web parts of the given document on the Content -> Edit -> Design tab of CMS Desk. The default documents of all workgroups share common page templates, so changes made to a document under any existing workgroup or to the documents under the Workgroups/Template node will immediately affect every workgroup.
When altering the workgroup document structure by adding or deleting a document, the change needs to be carried out under the Template node. This will ensure that all new workgroups are created with the updated document structure. Customization of this type does not affect existing workgroups and must be performed for each one individually to ensure uniformity across all workgroups.
The following example will demonstrate how to add a simple FAQ page to the workgroup Template:
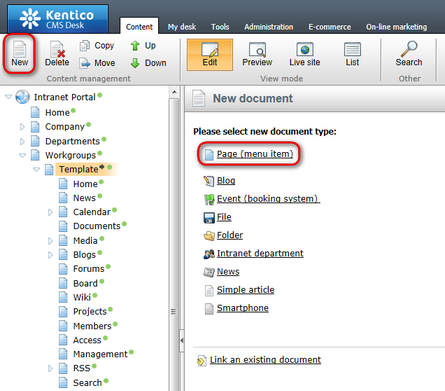
1. Log on to CMS Desk and on the Content tab, select the Workgroups/Template document in the content tree. Click the New button above the tree. When the New document dialog appears, select the Page (menu item) document type.
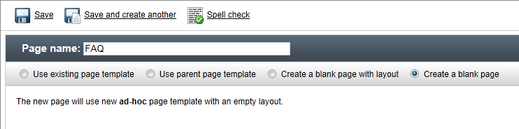
2. In the following dialog, enter FAQ into the Page name field and choose the Create a blank page option (in a real-world scenario, you may also use one of the pre-defined page templates according to your needs). Finally, click Save to save the changes.
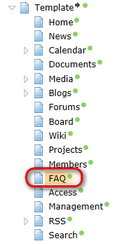
3. The document will be added as the first item under the Template node. Because the document order in the content tree determines the position of the given page in the workgroup navigation menu, you will probably want to move the FAQ document further down. Drag and drop it to the desired position in the content tree.
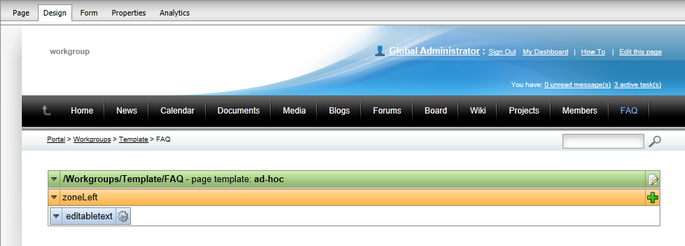
4. Now switch to the Design tab of the editing interface and add (![]() ) a Text & Images -> Editable text web part to the only zone on the page. Leave the properties of the new web part in their default state.
) a Text & Images -> Editable text web part to the only zone on the page. Leave the properties of the new web part in their default state.
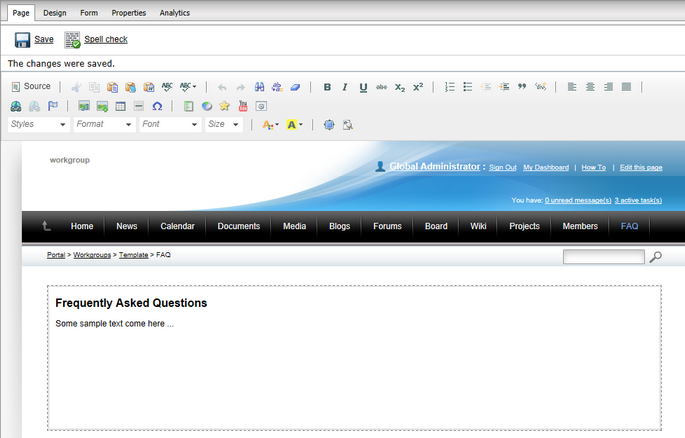
5. Go to the Page tab and add the actual text content to the page. For the purposes of this example, you can just add some sample text as shown below. Click Save when you are done.
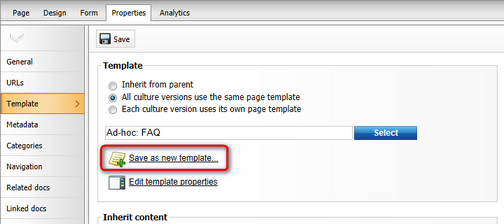
6. At this point, the document uses an ad-hoc page template. To ensure that modifications made to a single FAQ page will be reflected on the FAQ pages of other workgroups, the ad‑hoc template needs to be saved as a new regular page template. To do this, go to the Properties -> Template tab and click the ![]() Save as new page template action.
Save as new page template action.
In the Save as new page template dialog which pops-up, enter the following details:
•Template display name: Intranet Portal - Workgroup FAQ
•Template code name: IntranetPortal.WorkgroupFAQ
•Template category: Intranet Portal
•Template description: enter some text describing the page template.
Click OK. This ensures that future workgroups all use the same template for the FAQ page.
7. Now the document is complete. All new workgroups will now be created with a FAQ page. If you want this page to be present in all workgroups, the document will have to be added to all existing workgroups individually. However, the process is now easier since the page template created in the previous step can be selected directly when creating the document.
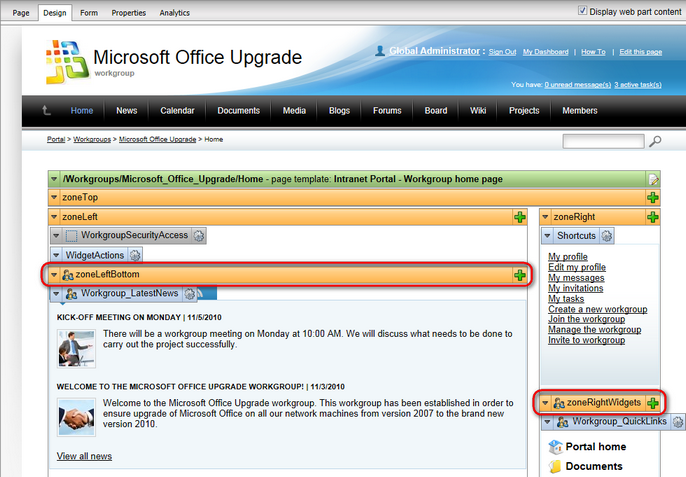
A special type of customization may be performed on the Home document of every workgroup. If you select this document under one of the sample workgroups and switch to the Design tab, you will see that it contains two widget zones: zoneLeftBottom and zoneRightWidgets.
These zones are customizable directly on the live site by workgroup administrators, as described in Intranet User's Guide -> Workgroups -> Modifying a workgroup home page. On the Design tab, the widgets in these two zones may be handled in the same way as web parts. However, any changes made in the widget zones will only affect the default layout of the widgets. Modifications made for a specific workgroup by a workgroup administrator will not be overridden and will still be displayed on the live site.
A full widgets reference may be found in Developer's Guide -> Development -> Widgets.
When modifying only one specific workgroup, documents may be added or deleted without influencing other workgroups. However, if you need to alter one of the existing default documents, certain additional steps need to be taken due to the fact that workgroups share page templates. This is demonstrated in the following example:
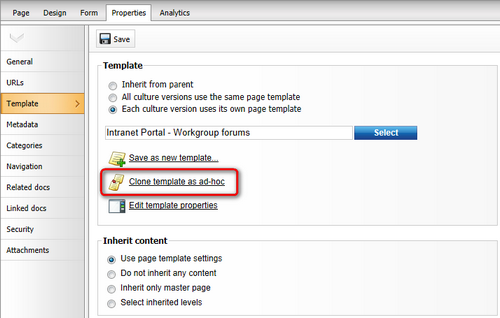
1. Log on to CMS Desk and on the Content tab, select the Workgroups/Microsoft_Office_Upgrade/Forums document in the content tree. Switch to the Properties -> Template tab and click ![]() Clone template as ad‑hoc. This creates a separate copy of the page template used by the Forums page and any modifications will now only affect the document under the given workgroup.
Clone template as ad‑hoc. This creates a separate copy of the page template used by the Forums page and any modifications will now only affect the document under the given workgroup.
2. Now switch to the Design tab and add (![]() ) a Text & Images -> Editable text web part. In the Web part properties dialog, select the Intranet content box option for the Web part container property and enter Forum Guidelines as the Container title.
) a Text & Images -> Editable text web part. In the Web part properties dialog, select the Intranet content box option for the Web part container property and enter Forum Guidelines as the Container title.
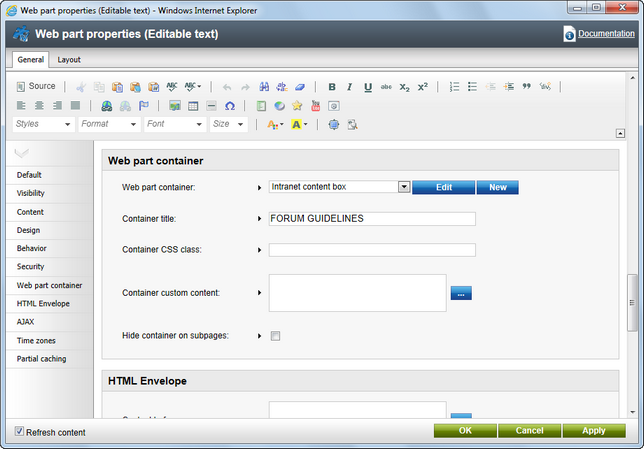
Click OK and move the new web part above the existing WorkgroupForumList web part.
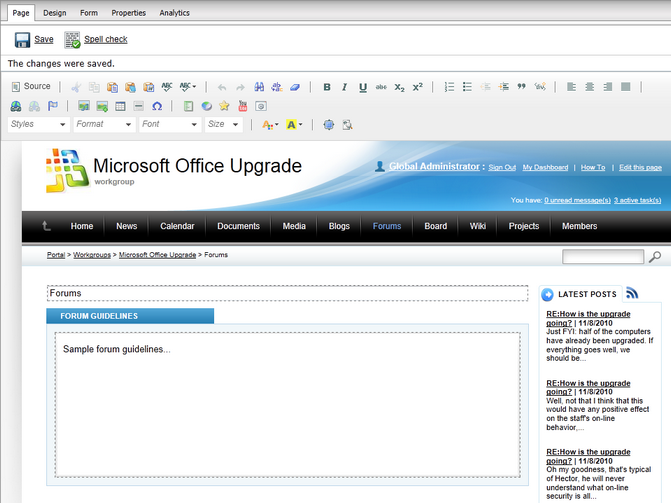
3. Go to the Page tab and add some text content into the region above the displayed forums. For the purposes of this example, you can just add some sample text as shown below. Click Save when you are done.
4. Once you are finished, go to the live site, open the Microsoft Office Upgrade workgroup's website section and view the Forums page. You should see the text that you entered displayed above the forums, enclosed in the specified container.
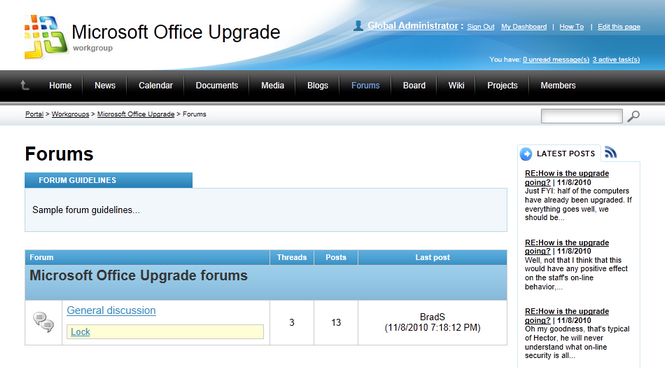
If you check the Forums page of any other workgroup, you will see that it is not modified.
5. In case you wish to re‑use this modified page template for other workgroups, go back to CMS Desk -> Content, select the Workgroups/Microsoft_Office_Upgrade/Forums document again and return to the Properties -> Template tab. This time, click ![]() Save as new template, which will allow you to create a new permanent page template identical to the one used by this document that can be assigned to any other document.
Save as new template, which will allow you to create a new permanent page template identical to the one used by this document that can be assigned to any other document.
