|
|

Example: Creating a sample contact group |

|

|

|

|
|
Example: Creating a sample contact group |
|
|

|
|
|
|
Example: Creating a sample contact group |
|
|
|
|
|
Example: Creating a sample contact group |
|
|
|
|
|
|
||
The following steps demonstrate how to create a contact group with a dynamic condition:
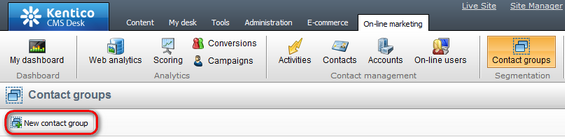
1. Sign in to CMS Desk and go to On-line marketing -> Contact groups.
2. Click ![]() New contact group.
New contact group.
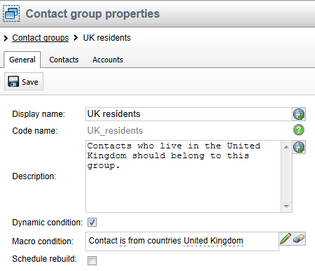
3. In the New contact group dialog, enter the following properties:
•Display name: UK residents
•Description: Contacts who live in the United Kingdom should belong to this group.
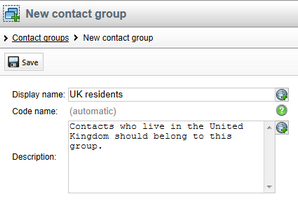
4. Click ![]() Save.
Save.
oThe General tab of the new contact group opens.
5. Check the Dynamic condition box and click edit (![]() ) next to the Macro condition field.
) next to the Macro condition field.
6. In the Edit macro condition dialog:
a. Select the Contact is from country rule.
b. Click Add rule (![]() ).
).
c. Click the select countries parameter in the text of the rule clause.
d. In the Set parameter value window, click Select, choose United Kingdom and click OK.
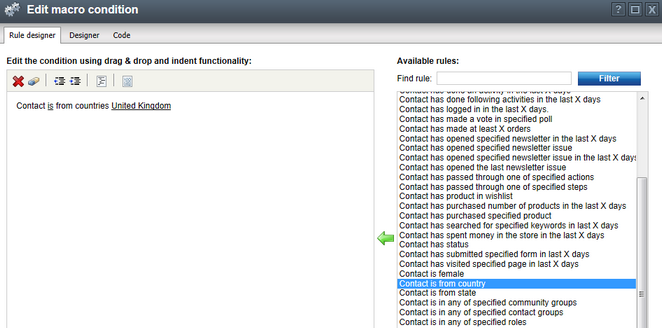
This condition ensures that all contacts who have United Kingdom specified in the Country field of their properties are added automatically to the contact group.
7. Click OK.
oThe editor closes and inserts the condition.
8. Click ![]() Save.
Save.
The contact group is now ready.
You can add contacts to groups in three different ways:
•Automatically based on a dynamic conditions
•Manually add members of specific accounts
•Manually add individual contacts
To try out adding of contacts based on the dynamic condition, make sure that you have at least one contact with United Kingdom specified in the Country field.
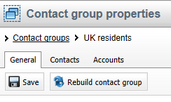
1. Open the General tab of the contact group.
2. Click ![]() Rebuild contact group next to the
Rebuild contact group next to the ![]() Save button.
Save button.
oThe system adds all contacts that match the group's condition.
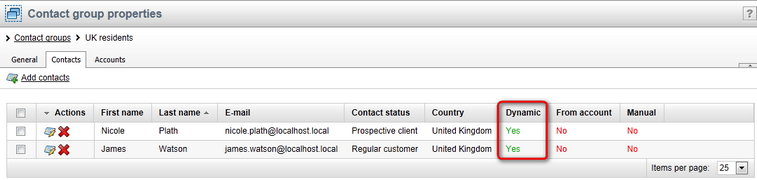
3. Switch to the Contacts tab.
You should see that the matching contacts were added to the contact group. The Yes value in the Dynamic column indicates that the contacts were added to the contact group based on a dynamic condition.
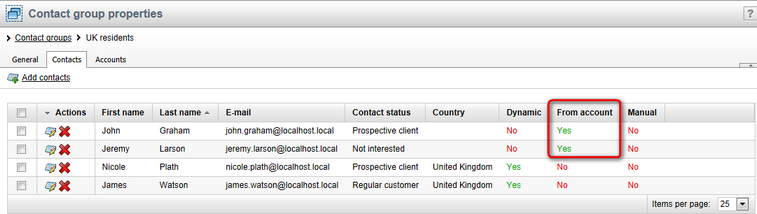
Adding an account to the contact group assigns all contacts that belong into the account. Before proceeding, make sure that you have at least two contacts assigned to one account in the system.
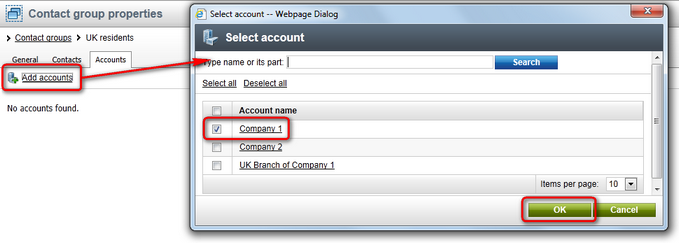
1. Open the Accounts tab of the contact group.
2. Click ![]() Add accounts.
Add accounts.
3. Select the account and click OK.
4. Switch back to the Contacts tab.
You can see that all contacts associated with the previously added account are listed. The Yes value in the From account column indicates that the contacts were added automatically because they belong to the added account.
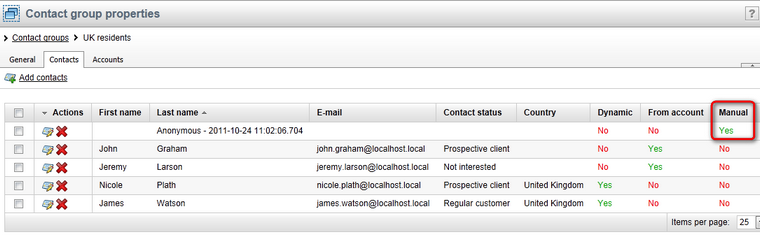
You can manually add specific contacts to contact groups.
1. Open the Contacts tab of the contact group.
2. Click ![]() Add contacts above the list of contacts.
Add contacts above the list of contacts.
3. Select a contact that has not been added to the contact group yet and click OK.
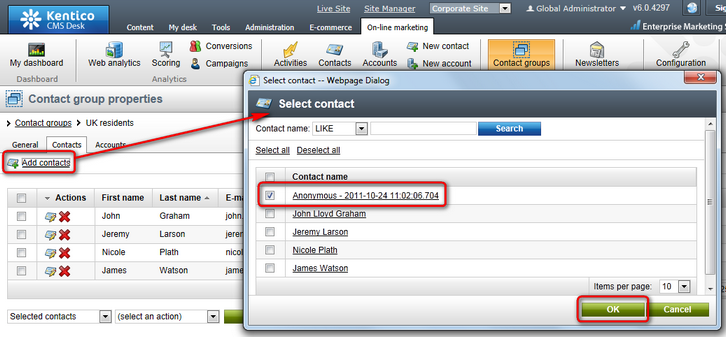
4. Switch back to the Contacts tab.
You should see the last contact listed with the Yes value in the Manual column, indicating that it was added to the contact group manually.