Managing data in custom tables |

|

|

|

|
|
Managing data in custom tables |

|

|

|

|
|
|
||
As a content editor, you can manage data stored in custom tables in CMS Desk -> Tools -> Custom tables. As an administrator, you can access the same interface through Site Manager -> Development -> Custom tables -> edit (![]() ) -> Data as well.
) -> Data as well.
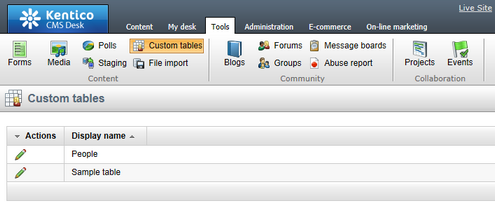
This example uses the People custom table that you have created if you followed the Creating custom tables chapter. The procedure is the same for any other custom table (except for the fields, which are always specific for a particular table).
1. Navigate to CMS Desk -> Tools -> Custom tables.
2. Click the Edit (![]() ) icon next to the People table.
) icon next to the People table.
3. Click the ![]() New item button.
New item button.
4. Fill in any values.
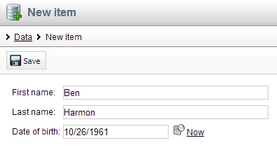
5. Click ![]() Save to store the data into the custom table.
Save to store the data into the custom table.
6. Use the ![]() Create another button and create at least two more records.
Create another button and create at least two more records.
This example uses the People custom table that you have created if you followed the Creating custom tables chapter. The procedure is the same for any other custom table (except for the fields, which are always specific for a particular table).
1. Navigate to CMS Desk -> Tools -> Custom tables.
2. Edit (![]() ) the People custom table. The system displays the list of entries in the custom table.
) the People custom table. The system displays the list of entries in the custom table.
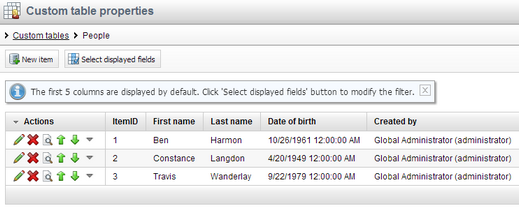
3. Click the ![]() Select displayed fields button. The system displays the Select displayed fields dialog box.
Select displayed fields button. The system displays the Select displayed fields dialog box.
4. Turn the check-boxes on for the fields that you want to display.
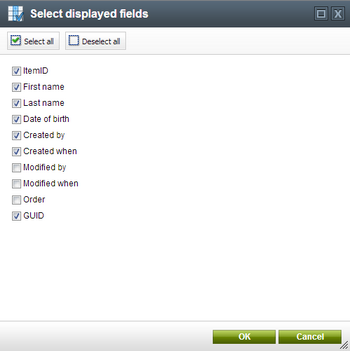
5. Click OK. You can now see the modified view of the entries.
![]()
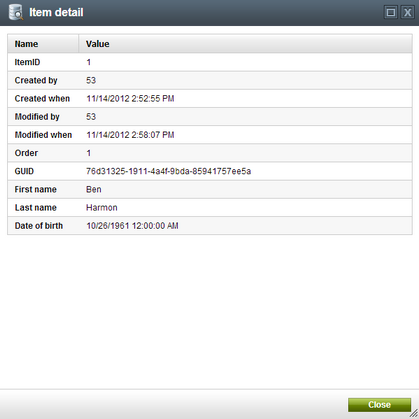
6. Click the View (![]() ) icon next to any of the data records. The system displays a dialog box with detailed information about the entry.
) icon next to any of the data records. The system displays a dialog box with detailed information about the entry.
Note that you can also create custom filter for listing custom table data using alternative forms.