Displaying custom table data using web parts |

|

|

|

|
|
Displaying custom table data using web parts |

|

|

|

|
|
|
||
The Custom tables module comes with three web parts that you can use for displaying custom table data. This page gives just a brief overview of these web parts. Detailed description of each web part and its properties can be found in Kentico CMS Web Parts Reference. Live site examples of these web parts can be found on the sample Corporate Site, under Examples -> Webparts -> Custom tables.
The custom table web parts that are available to you:
This web part displays a grid with selected columns of data records from a custom table. You can modify the design of the web part using standard ASP.NET skins. If you want to handle the data by transformations, use one of the web parts below.

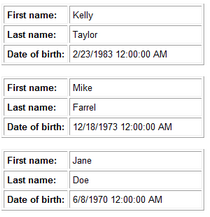
In the following picture, you can see the basic appearance of the Custom table datalist web part. The web part displays the custom table data in a multi-column/multi-row list. You can change the appearance using transformations. You can find more information about using transformations with custom tables web parts in the Transformations for custom tables topic.

In the following picture, you can see the basic appearance of the Custom table repeater web part. You can change the appearance using transformations. You can find more information about using transformations with custom tables web parts in the Transformations for custom tables topic.

Renders data retrieved from a custom table you specify according to the assigned transformations and applies an additional javascript effect to the displayed records. You have to specify the effect through the web part's properties. You can find more information about using transformations with custom tables web parts in the Transformations for custom tables topic.
1. Navigate to CMS Desk -> Content -> Edit.
2. Choose the page on which you want to place the web part.
3. Switch to the Design tab.
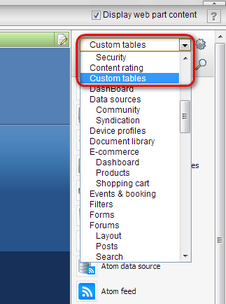
4. In the Web part toolbar, select Custom tables.

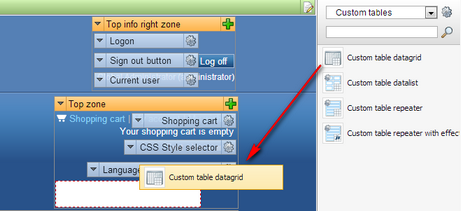
5. Drag and drop the web part that you want to use to a content area of your choice.

The Web part properties dialog box opens.
1. Specify the following properties:
•Web part control ID - Enter a unique identifier for the web part.
•Web part title - Enter the title for the web part that is displayed on the Design tab and during on-site editing.
•Custom table - Select the custom table from which you want to display the data.
2. Learn more about the rest of the properties that you can specify for each of the web parts in Kentico CMS Web Parts Reference.
3. Click on OK to save the changes.

Note that when on the Design tab, you can always drag and drop the web part elsewhere.
1. Navigate to CMS Desk -> Content -> Edit.
2. Choose the page on which you want to place the web part.
3. Switch to the Design tab.
4. Click the Add web part (![]() ) button in the content area of your choice. The Select web part dialog box opens.
) button in the content area of your choice. The Select web part dialog box opens.
5. Select Custom tables in the left content tree.
6. Select the web part that you want to place.

7. Click on OK. The Web part properties dialog box opens.
1. Specify the following properties:
•Web part title - Enter a unique identifier for the web part.
•Web part title - Enter the title for the web part that is displayed on the Design tab and during on-site editing.
•Custom table - Select the custom table from which you want to display the data.
2. Learn more about the rest of the properties that you can specify for each of the web parts in Kentico CMS Web Parts Reference.
3. Click on OK to save the changes.
Note that when on the Design tab, you can always drag and drop the web part elsewhere.