|
|

Creating filter forms |

|

|

|

|
|
Creating filter forms |
|
|

|
|
|
|
Creating filter forms |
|
|
|
|
|
Creating filter forms |
|
|
|
|
|
|
||
By creating an alternative form named filter for a form or custom table, you can create a filter that will be used when a large number of records is displayed in:
•CMS Desk -> Tools -> Forms -> edit (![]() ) a form -> Data
) a form -> Data
•CMS Desk -> Tools -> Custom tables -> edit (![]() ) a custom table
) a custom table
•Site Manager -> Development -> Custom tables -> edit (![]() ) a custom table -> Data
) a custom table -> Data
The number of records required for the filter to be displayed is 25 by default. You can change this value by adding the following key into the appSettings section of your web.config file:
<add key="CMSDefaultListingFilterLimit" value="10" /> |
Filtering is possible based on all fields that store the following types of values:
•Text
•Boolean (Yes/No)
•Integer numbers
•Long integer numbers
•Decimal numbers
•Date & time
The required fields need to be displayed in the alternative form and an appropriate form control must be assigned to each field. A filter form control is available for each data type, including the following options:
•Text filter
•Boolean filter
•Number filter
•Date & time filter
The following example will show you how to create a filter for the Contact Us form on the sample Corporate Site. The procedure demonstrated in the example can be used for any other form. Creation of custom table filters is also performed the same way.
Please note that in a standard installation, the Contact Us form already has a pre-defined filter alternative form. If you are an experienced user, you can inspect its setting instead of going through the following example.
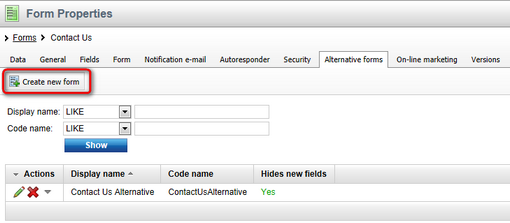
1. Sign in to CMS Desk and go to the Tools -> Forms section. Edit (![]() ) the Contact Us form and switch to the Alternative forms tab of its editing interface. As mentioned in the previous paragraph, there should already be a pre-defined filter form. Click the Delete (
) the Contact Us form and switch to the Alternative forms tab of its editing interface. As mentioned in the previous paragraph, there should already be a pre-defined filter form. Click the Delete (![]() ) action next to it so that you can go through the rest of this example and create your own filter from scratch.
) action next to it so that you can go through the rest of this example and create your own filter from scratch.

2. Once you have the form deleted, click ![]() Create new form to create a new one.
Create new form to create a new one.
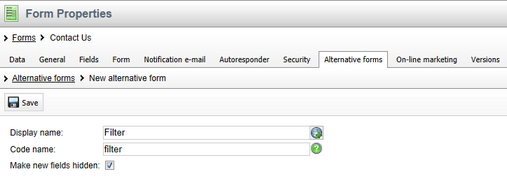
3. In the New alternative form dialog, enter the following details:
•Display name: Filter
•Code name: filter
•Make new fields hidden: yes (checked)
Click ![]() Save.
Save.
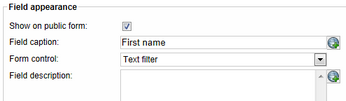
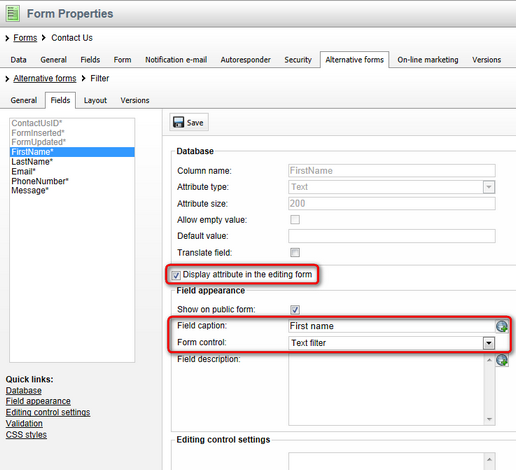
4. Now that the form is created, let's go to the most essential part of its configuration — switch to the Fields tab. In the listbox on the left, you should see all fields defined for the form. The first three of them are system fields that we do not want in the filter, so select the fourth one - FirstName. In the right area, scroll down to the Field appearance section and adjust the following values:
•Display attribute in the editing form: enabled; ensures that the field will be included in the filter's form.
•Field caption: First name; caption displayed next to the filtering field.
•Form control: Text filter; this is the filter form control available for text fields.
Click ![]() Save when you are finished.
Save when you are finished.
5. Repeat the configuration explained in step 4 for the LastName, Email, PhoneNumber and Message fields. This ensures that all the fields are included in the filter.
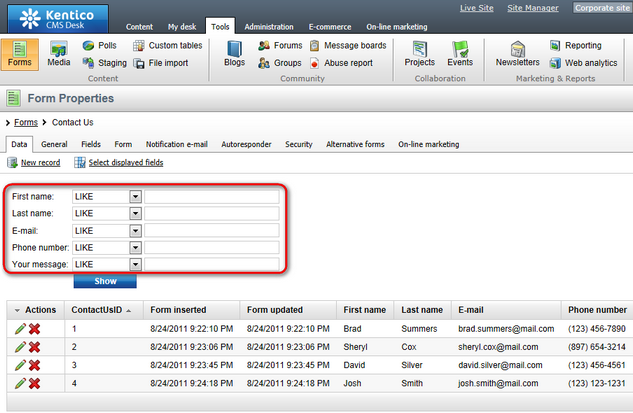
6. Once you have the filter created, you can go back to the Data tab of the form's editing interface to verify that it really works. A filter should be displayed on the Data tab as can be seen in the screenshot below. Try filtering based on various parameters.
|
Please note
The default number of 25 records has to be present in the list in order for the filter to be displayed.
Therefore to see the filter, you either need to create the required number of records, or use the CMSDefaultListingFilterLimit web.config key to lower the filter limit accordingly. |