Converting a web site project to an Azure application
Installation and deployment:
Converting a web site project to an Azure application
Converting a web site project to an Azure application
In cases where your application is heavily modified or contains large amounts of custom code, you may find it easier to manually convert it to a Windows Azure application, rather than using the recommended approach described in Deploying an existing website to Windows Azure. This way, you can be sure that nothing is left out, since you will only be adding extra items to your project.
You can use the following steps to perform the conversion process:
1. If needed, perform the upgrade procedure to the latest version of Kentico CMS. You can download the upgrade package from the Support section of the Kentico.com website.
2. Before you can continue, it is necessary to have your Kentico CMS project in the web application format. If your project was not installed this way, you can convert it according to the instructions in the How to convert a Kentico CMS web site to a Web Application article published on our DevNet portal.
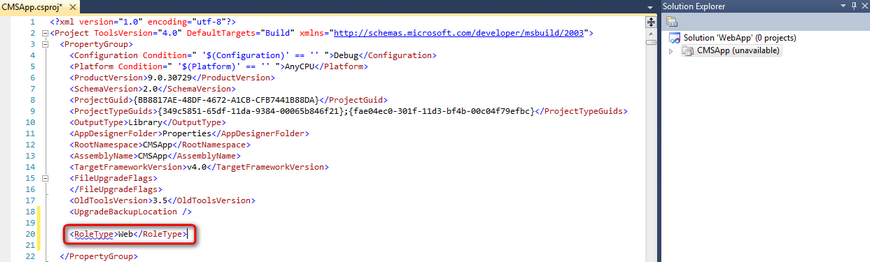
3. Open your solution in Visual Studio, right‑click the project file in the Solution Explorer and select Unload Project. If the solution only contains a single project, you may have to go to Tools -> Options -> Projects and Solutions -> General and check Always show solution to make this option available. Now right‑click the project again and select Edit <project name>. Add <RoleType>Web</RoleType> into the first <PropertyGroup> element of the project file.
Save the change, right click the project in the Solution Explorer and choose Reload Project.
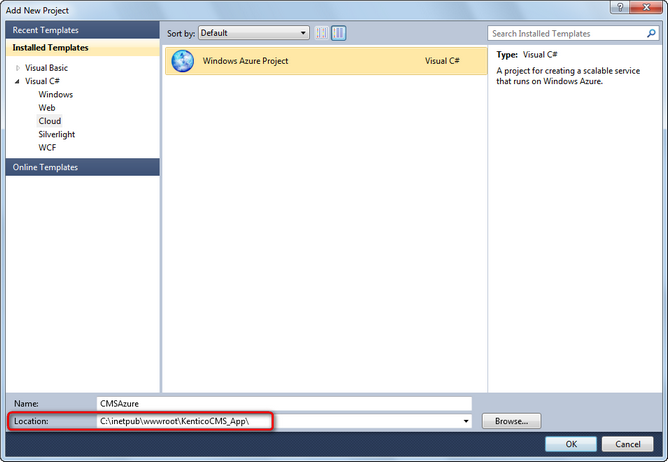
4. Next, Add a New Project to the solution and select the Windows Azure Project template from the Cloud category. Specify the path of the directory containing your project files as the Location and click OK.
Confirm the role selection dialog that appears next without adding any roles to the Windows Azure solution. The necessary roles will be added manually later. When managing your application, always make sure that this is the start up project of your solution (right click it and click Set as StartUp Project).
5. Now install a new instance of Kentico CMS as an Azure project to another directory using the Web installer. This will be used as a source for the files required to run on Windows Azure.
6. Copy the SmartSearchWorker folder into your project directory, return back to Visual Studio, right click your solution, select Add -> Existing project and choose the SmartSearchWorker.csproj file in the given folder. You can skip this step if you are certain that you will not need the Smart search module. This reduces the number of roles that need to be hosted, so the costs of running your application on Windows Azure will be lower. In this case, you can ignore any further instructions related to this project (and worker role).
7. Next, copy the content of the Azure project's bin folder (dlls and other files) into the bin folder of your web application and overwrite the previous versions of the files (if you are using the source code version of Kentico CMS, you only need to add the CMS.AzureStorage assembly to your solution).
8. You also have to add the appropriate references to your original Kentico CMS project. Right click it in the Solution Explorer, select Add Reference and perform the following actions:
•Projects tab - add a reference to the SmartSearchWorker project.
•Browse tab - expand your application's bin folder and select CMS.AzureStorage.dll.
•.NET tab - add references to the items listed below:
•Microsoft.WindowsAzure.CloudDrive
•Microsoft.WindowsAzure.Diagnostics
•Microsoft.WindowsAzure.ServiceRuntime
•Microsoft.WindowsAzure.StorageClient
9. There are also some additional files that must be included in your project to ensure that it works correctly on Windows Azure. Copy WebRole.cs from the root of the CMSApp project of the new Azure installation and the GetAzureFile.aspx page from its CMSPages directory and insert them to the corresponding location under your application using Add -> Existing item. Also, replace your existing ~/Old_App_code/CMSModules/WindowsAzure/AzureInit.cs file with the one from the Azure project.
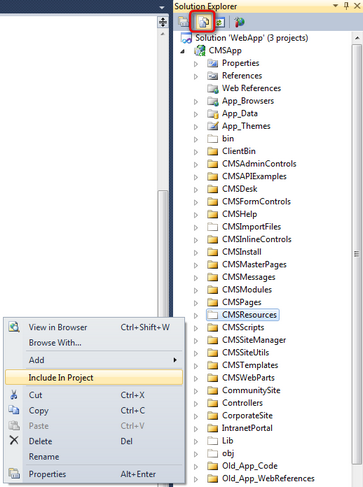
Then enable the Show all files button at the top of the Solution Explorer, find the Global.asax file under the root of the project and make sure that it is included. If this is not the case, right click it and select Include In Project.
Do the same for the CMSResources and CMSHelp folders, and the content of the App_Data/Templates folder (even if you do not need the sample website templates, it is necessary to include at least the BlankSite sub‑folder).
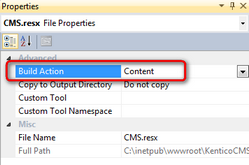
Also check the Properties window (Right click -> Properties) of all files that were included into the project and make sure that the value of their Build Action property is set to Content.
Keep in mind that any other custom files or folders that are used by your website must be included in the project in this way to ensure that they are part of the application once it is deployed to Windows Azure.
10. Create a copy of the web.config file from the instance installed as an Azure project and carry over any changes that you made to the web.config of your existing application. Once this new file contains both the configuration for your application and the sections required to run on Windows Azure, use it to replace your original web.config.
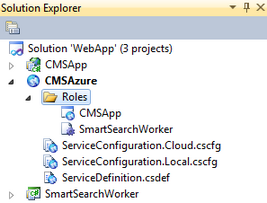
11. The next step is to define your projects as roles in the Windows Azure application. To do this, right‑click the Roles folder under the Azure project, select Add -> Web Role Project in solution and choose your Kentico CMS web application project. Next, add another role, but select Add -> Worker Role Project in solution instead and choose the SmartSearchWorker project. Your solution should now look like the one in the image below.
12. Edit the service definition file (ServiceDefinition.csdef) of the Azure project and modify the definition of your web role (the name must match the name of your Kentico CMS project):
The <Sites> section ensures that the application is deployed in Full IIS mode (recommended). You can delete or comment it out if you wish to run under Hosted Web Core. The <ConfigurationSettings> section declares the settings that will be available in the service configuration file.
Next, modify the definition of the SmartSearchWorker role as shown below:
Also add the same settings under the SmartSearchWorker role, but without the DiagnosticsConnectionString (it should already contain the default setting for this purpose).
You may have multiple service configuration files for your application, which can be used for different deployment types. These files may contain different values, but all of them must include the settings declared in the service definition.