|
|

Using Wikis |

|

|

|

|
|
Using Wikis |
|
|

|
|
|
|
Using Wikis |
|
|
|
|
|
Using Wikis |
|
|
|
|
|
|
||
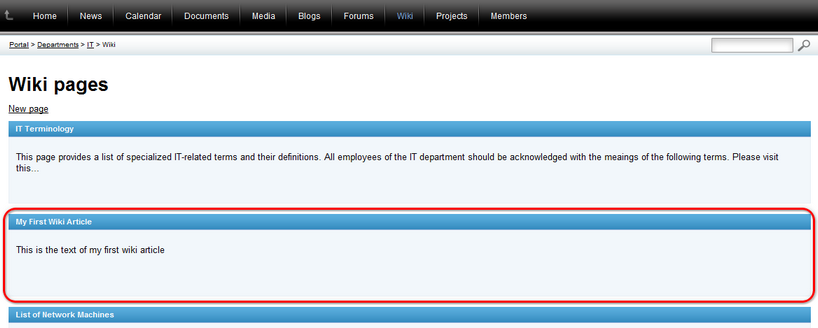
Each department and workgroup has the Wiki section. This section is intended for publishing of articles within the context of the department or workgroup. Only users with appropriate permissions can add new articles in this section or edit the existing ones, while the rest of the department or workgroup members can only view the published articles.To demonstrate the Wiki section's functionality, we will use the IT department, which has some sample content, including two wiki articles.
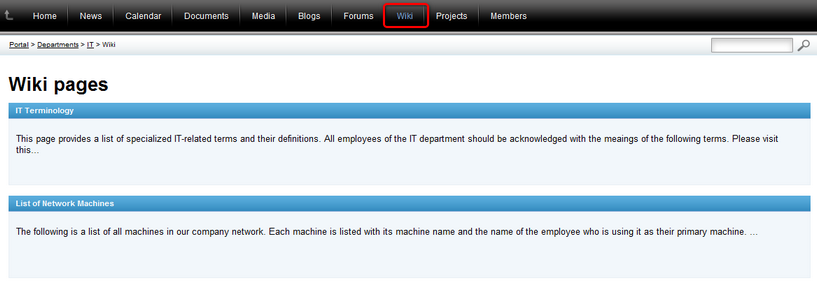
Log on to the portal as Ruth Baker (username RuthB with blank password), who is one of the sample users shipped with the portal and also an ordinary member of the IT department. Once logged on, select Departments in the main menu and click the IT department in the displayed list of departments, which redirects you to the department's Home page. There, select Wiki in the main navigation. You should see a list of published articles, as depicted in the screenshot below.
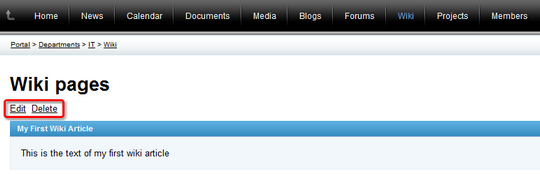
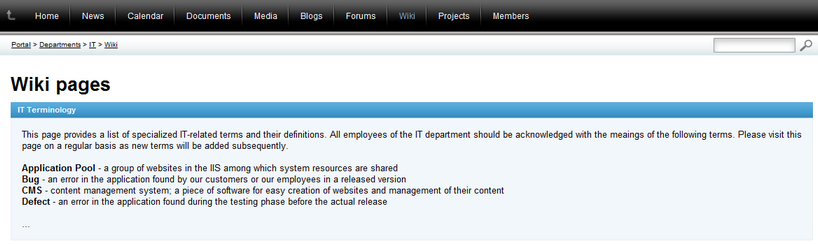
Ordinary members of the department or workgroup who do not have necessary permissions can only view the published article. To view an article, click its name in the article listing.

The full text of the article will be displayed, as you can see in the following screenshot.
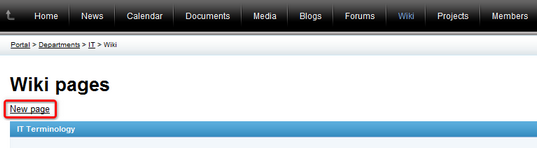
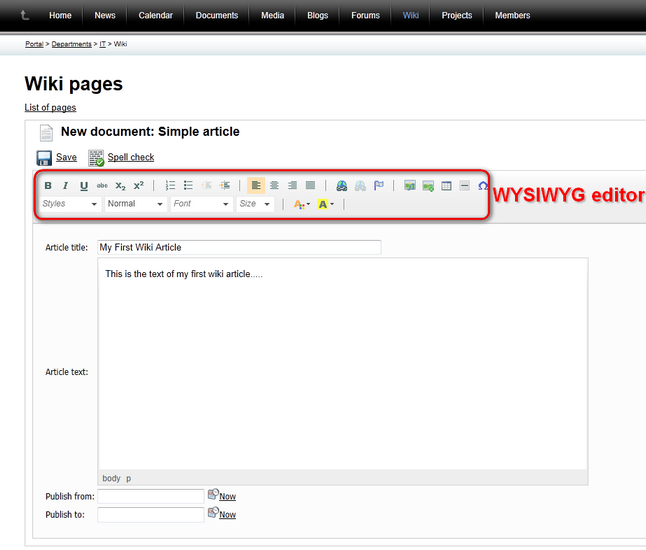
Only users with appropriate permissions can create new wiki articles. To demonstrate this in practice, log out of the portal and log back in as Brad Summers (username BradS with blank password), who is the head of the IT department and has the necessary permissions to create new articles. Once logged in, navigate to the Wiki section of the IT department and click the New page link above the list of articles.
You will be redirected to the New document dialog where you need to fill in the following fields:
•Article title - the title of the article displayed in the articles listing; a required field.
•Article text - the actual text of the article; a required field.
•Publish from - the date and time when the article will be published on the portal; an optional field. Current date can be used by clicking the Now link, or you can pick a date from a calendar after clicking the ![]() icon. If you leave this value blank, the article will be published right after its saving.
icon. If you leave this value blank, the article will be published right after its saving.
•Publish to - the date and time until when the news will be published on the portal; an optional field. Current date can be used by clicking the Now link, or you can pick a date from a calendar after clicking the ![]() icon. If you leave this value blank, the article will be published permanently until it is deleted or its configuration modified.
icon. If you leave this value blank, the article will be published permanently until it is deleted or its configuration modified.
You can use the built-in WYSIWYG editor to edit content of the Article Text field. The WYSIWYG editor is used in various parts of the portal and you can learn more about it in Other features -> WYSIWYG editor.
When you have the field filled, click the ![]() Save icon to save the article. Before saving, you may check if correct spelling was used in the text by clicking the
Save icon to save the article. Before saving, you may check if correct spelling was used in the text by clicking the ![]() Spell check icon.
Spell check icon.
Now if you navigate back to the list of articles, you should see that the new article is present in the list (unless you configured the Publish from value to some future date and time).
Users with appropriate permission (just as BradS, who we are using at this part of the example) can also edit or even delete the listed articles. To try this out, view the new article that you created in the preceding part of this topic. In its detail, you should see the following two links above the article's title:
•Edit - clicking this action opens the same dialog that is was used to create the article (as described in the preceding part of this topic). In the dialog, you may change values of particular fields of the article and click ![]() Save to save the changes.
Save to save the changes.
•Delete - clicking the link opens a dialog where you need to confirm deletion of the article. If you leave the Destroy document and its history option enabled, the article will be deleted permanently, i.e. it will not be possible to restore it.