|
|

Managing my user profile |

|

|

|

|
|
Managing my user profile |
|
|

|
|
|
|
Managing my user profile |
|
|
|
|
|
Managing my user profile |
|
|
|
|
|
|
||
This topic describes how a portal user can edit their own profile and the tools that are available on it.
To demonstrate, log on as Brad Summers (user name BradS with a blank password), one of the sample portal users. To access the current user's profile, click the name of the current user (Brad Summers) located on the main header.

This opens the public employee profile that is described in the Employees overview topic.
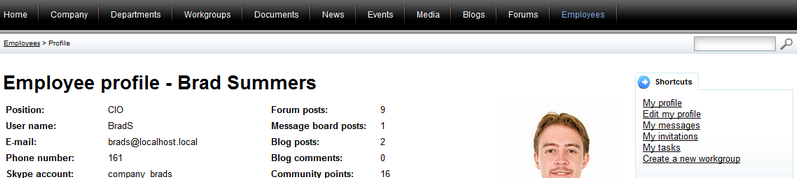
You can click the links in the Shortcuts menu on the right side of the page to access the following profile sections:
The menu is present on all sections of the profile and can be used to navigate between them.
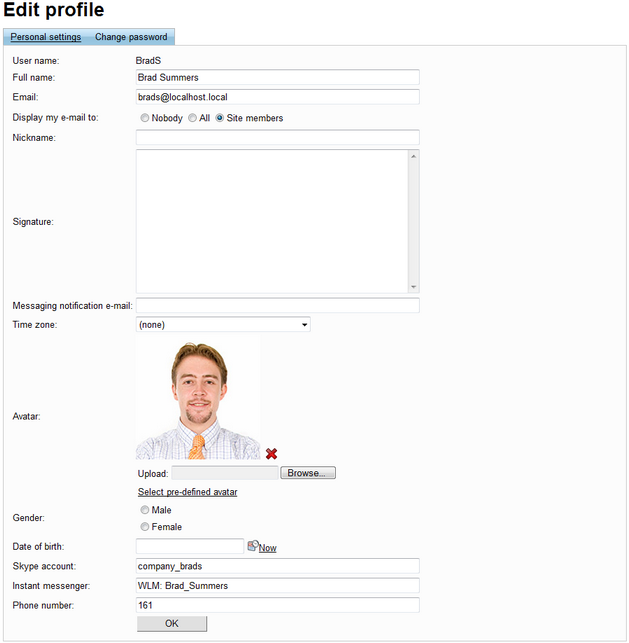
This section contains a dialog that allows you to change the information displayed on your public profile and configure other general settings of your user account. The dialog is divided into two tabs.
On the Personal settings tab, you can edit the following data fields:
•User name - displays the unique name that identifies the user and is used to log on. This field cannot be edited.
•Full name - the full name of the user.
•Email - the e‑mail address of the user.
•Display my e‑mail to - can be used to set what type of users can see the e‑mail address of the user on the public profile.
•Nickname - nick name of the user shown on forums, on the user's profile, etc.
•Signature - text that will automatically be added as a signature to the end of messages that are sent by the user.
•Messaging notification e-mail - the e‑mail address to which notifications about new received messages will be sent.
•Time zone - can be used to select a time zone to reflect the geographical location of the user. If set, this time zone will be used instead of the time zone set for the portal to convert displayed time.
•Avatar - allows an image to be uploaded from the local file system to serve as the graphical representation of the user. A photo of the employee is typically used.
•Gender - the user's gender.
•Date of birth - the user's date of birth. The Choose date (![]() ) button may be used to select a specific date from a calendar.
) button may be used to select a specific date from a calendar.
•Skype account - the name of the user's Skype account
•Instant messenger - the name of the user's instant messenger account. The value of the field does not have to follow any format and can be filled in with any string of characters as required, e.g. WLM: Brad_Summers
•Phone number - the user's phone number or extension. The number may be entered in any format, no validation is applied.
The Change password tab allows you to specify a new password used to log on to the portal with this user account. The current password must first be entered into the Your existing password field, and the new password must be typed into both the New password and Confirm password fields. The portal may be configured to use a password policy. In this case, the new password will have to fulfill certain requirements, such as character length. The relative strength of the entered password will be calculated and displayed by the indicator below the New password field.
The process can be finished by clicking the Set password button. Please be aware that this tab is not available if the portal is configured to use Windows authentication.

This section allows you to work with the internal messaging system, which provides a way to communicate with other users via personal text messages. The following tabs are available:
This tab is where you can see a list of all received messages. If there is an address specified in the Messaging notification e‑mail field of your user profile, a notification will be sent to this address whenever you receive a new message. New unread messages in the inbox are marked bold for emphasis.
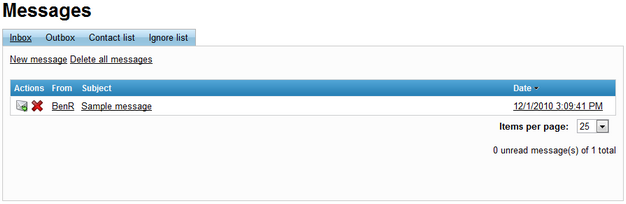
The following actions are available for each message:
•![]() Reply - prepares a message reply to be sent back to the author of the selected message. The options available when sending a message are described below.
Reply - prepares a message reply to be sent back to the author of the selected message. The options available when sending a message are described below.
•![]() Delete - deletes the particular message. The Delete all messages link above the message list removes all messages.
Delete - deletes the particular message. The Delete all messages link above the message list removes all messages.
The full contents of a message can be viewed simply by clicking on it in the list.
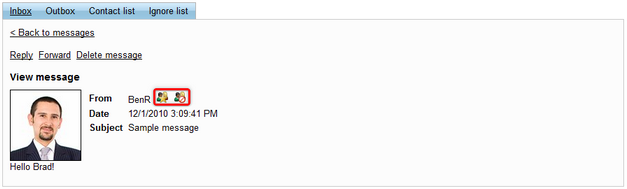
The Reply and Delete message links shown above the message function exactly like the corresponding actions from the message list. The Forward link prepares a new message containing the text of the selected message. The Add to contact list (![]() ) and Add to ignore list (
) and Add to ignore list (![]() ) action buttons can be used to add the author of the message to the respective list. More information can be found below in the section dedicated to the appropriate tabs.
) action buttons can be used to add the author of the message to the respective list. More information can be found below in the section dedicated to the appropriate tabs.
A new message can be created either using the New message link above the inbox message list, or by forwarding or replying to a received message. In all of these cases, an interface similar to the following is used.
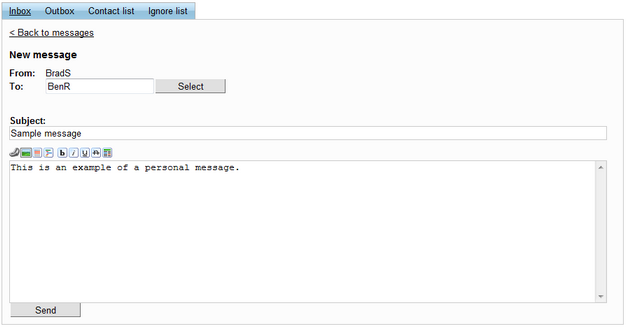
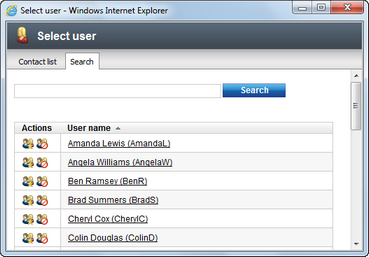
When creating a message, you first need to select its recipient by clicking the Select button next to the To field. This opens a window where the message recipient can be selected either from your Contact list or by searching among all users on the portal.
Then, the Subject field and the actual text of the message need to be filled in. The buttons above the message editing area can be used to add content to the message and format its text. The following are available:
•![]() Insert link - inserts a link into the post. The URL and description must be specified.
Insert link - inserts a link into the post. The URL and description must be specified.
•![]() Insert image - inserts an image into the post. The URL of the image must be specified.
Insert image - inserts an image into the post. The URL of the image must be specified.
•![]() Insert quote - places the selected text into a gray box that is used for quotations.
Insert quote - places the selected text into a gray box that is used for quotations.
•![]() Insert code - places the selected text into a yellow box and sets a monospaced font.
Insert code - places the selected text into a yellow box and sets a monospaced font.
•![]() Bold - sets the selected text to be bold.
Bold - sets the selected text to be bold.
•![]() Italics - sets the selected text to be in italics.
Italics - sets the selected text to be in italics.
•![]() Underline - sets the selected text to be underlined.
Underline - sets the selected text to be underlined.
•![]() Strikethrough - sets the selected text to use strikethrough.
Strikethrough - sets the selected text to use strikethrough.
•![]() Font color - sets the color of the selected text. The code of the used color must be specified.
Font color - sets the color of the selected text. The code of the used color must be specified.
When complete, the message can be sent out using the Send button.
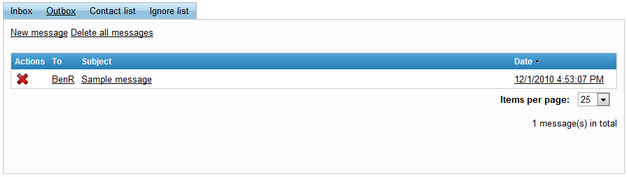
This tab lists all outgoing messages. The same actions are available as on the Inbox tab, except for replying to messages for obvious reasons.
The list on the Contact list tab contains users that are easily selected as a message recipient when creating a new message. These are typically user that you communicate with often.
If a user is added on the Ignore list tab, any messages from them will not be delivered.
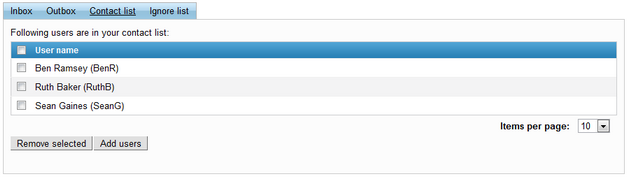
The interface for managing both lists is the same. Clicking the Add users button opens a window where you can select users to be added to the list. The Remove selected button removes the users marked by the check boxes on the left.
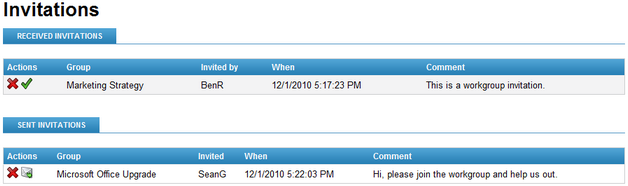
This section allows you to manage workgroup invitations. The Received invitations list shows all invitations sent to you by other users and allows you to Accept (![]() ) or Delete (
) or Delete (![]() ) them.
) them.
The Sent invitations list contains all pending invitations sent out by you that have not yet been accepted or rejected. The Resend (![]() ) action can be used to send a new notification e‑mail informing the invited user about the invitation, while Delete (
) action can be used to send a new notification e‑mail informing the invited user about the invitation, while Delete (![]() ) cancels the invitation entirely.
) cancels the invitation entirely.
This section of the user profile is described in the Project management overview topic.