|
|

Importing completed translations |

|

|

|

|
|
Importing completed translations |
|
|

|
|
|
|
Importing completed translations |
|
|
|
|
|
Importing completed translations |
|
|
|
|
|
|
||
Because of the waiting period involved in human translation, the system provides an import mechanism that checks the status of translations and retrieves the required data when it is ready. Most human translation services support automatic loading of completed translations.
The translation retrieval process consists of two steps:
1. Importing the translation data - loads the XLIFF data of the finished translation from the service and transfers it into the matching submission. This does not affect the website's content.
2. Processing the submission - inserts the translated content into the actual documents. This overwrites the appropriate language version of the documents that were submitted for translation.
|
Note
You can combine both steps of the translation retrieval process by enabling the Automatically import translated submissions setting in Site Manager -> Settings ‑> Content -> Translation services. In this case, the system automatically inserts translated content into documents when the data is imported into submissions.
Warning: This overwrites documents immediately when a service finishes the translations, without the approval of the content administrators.
|
To import the content of translated submissions:
1. Go to CMS Desk -> Tools -> Translations. All untranslated submissions are in the Waiting for translation status.
2. Click ![]() Update statuses above the list of submissions. This imports all completed translations and switches the corresponding submissions to the Translation ready status.
Update statuses above the list of submissions. This imports all completed translations and switches the corresponding submissions to the Translation ready status.
You can automate the translation status updates by enabling and configuring the Translation retrieval scheduled task for your site. With this task running, the system regularly updates all translation submissions according to a predefined time interval.
3. Click the ![]() Process translations action for submissions that are in the Translation ready status.
Process translations action for submissions that are in the Translation ready status.
The system transfers the translated content into the corresponding document(s) and changes the submission status to Translation imported.
The system allows you to directly upload the XLIFF translation data into submissions. You can use this approach if you encounter any problems with the translation retrieval, or if your service does not support automatic loading of finished translations.
1. Edit (![]() ) the given translation submission in CMS Desk -> Tools -> Translations.
) the given translation submission in CMS Desk -> Tools -> Translations.
2. Load the translated data into the submission. You have two options:
•To upload an .xlf file containing the translated data of a specific document, use the ![]() Upload translated XLIFF file action next to the matching item in the list.
Upload translated XLIFF file action next to the matching item in the list.
•If you have the completed translation for the entire submission in a zip archive, upload it by clicking the Import all from ZIP button.
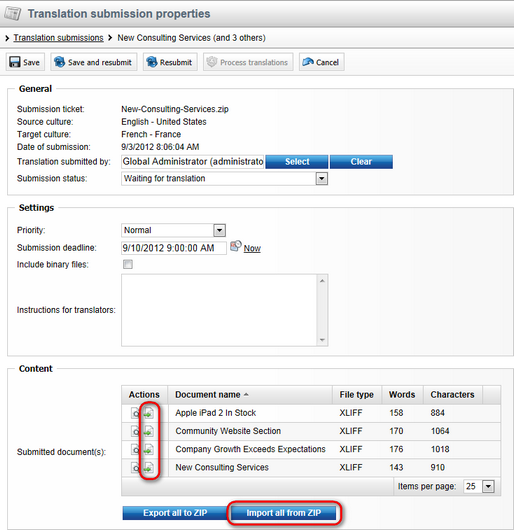
If the upload is successful, the submission switches to the Translation ready status. You can then process the submission to transfer the translated content into the website's documents.
