Uploading multiple files at once |

|

|

|

|
|
Uploading multiple files at once |

|

|

|

|
|
|
||
Files in Kentico CMS can be uploaded either one by one or as multiple files. This can be useful if you need to upload a greater number of files at once or if you need to perform the task in the quickest possible way. Upload of multiple files at once is available for:
•media files - files in a media library (e.g. CMS Desk -> Tools -> Media -> Edit (![]() ) media library -> Files tab).
) media library -> Files tab).
•meta files - files related to a specified object (e.g. e-mail template attachments in CMS Desk -> Administration -> E-mail templates -> Edit (![]() ) e-mail template -> Attachments).
) e-mail template -> Attachments).
•document attachments - files attached to a document (e.g. CMS Desk -> Content -> document -> Properties tab -> Attachments tab).
To enable upload of multiple files in the whole CMS the following conditions must be met concurrently:
1. The value of the CMSUseSilverlightUploader key is set to TRUE or the key is not added in the appSettings section of the web.config file (because the upload of multiple files is the default option).
2. The CMS application has the write-to-disk permission for the temporary files repository, i.e. for web project\App_Data\CMSTemp\MultiFileUploader.
3. Microsoft Silverlight is installed on your client computer.
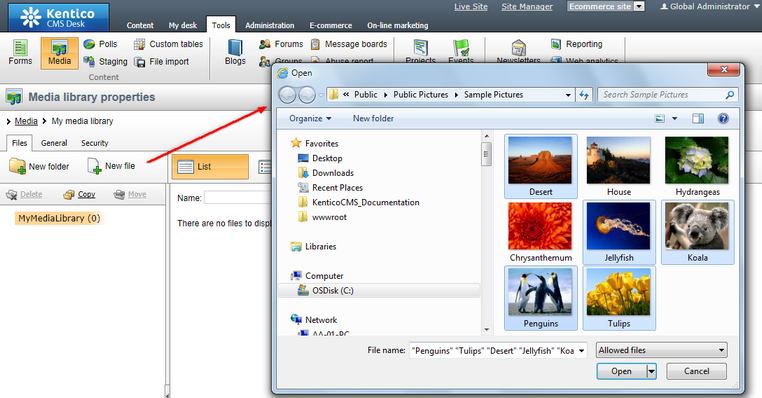
1. First you need to select one or more files from a given location.

2. The files are downloaded as temporary files to a temporary repository (App_Data\CMSTemp\MultiFileUploader). However, to upload the files successfully, you need to avoid POST BACK on the current page during the upload.
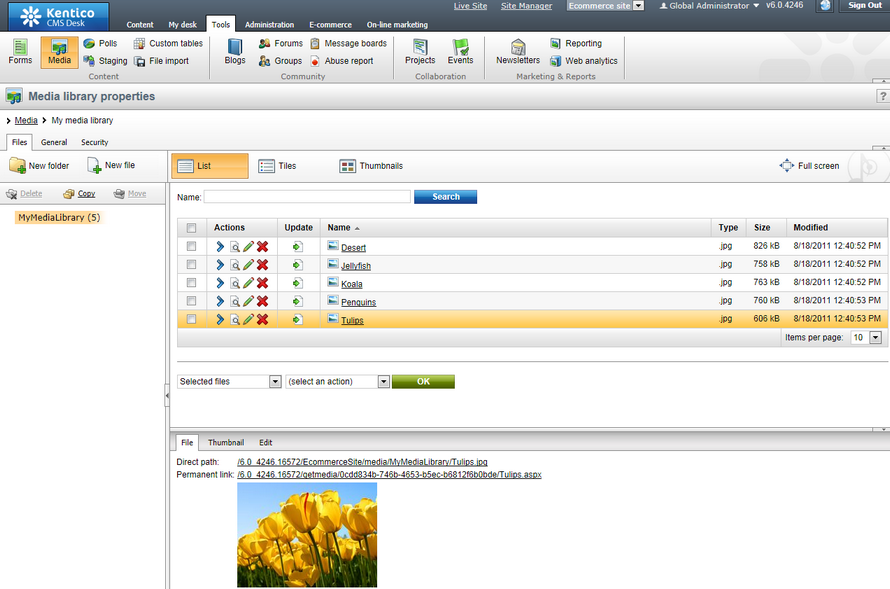
3. When the upload is finished, the temporary files become the requested files:

|
Please note
If you don't avoid POST BACK during the upload of multiple files or some other error occurs, the temporary files remain in the temporary repository. That's why there is the Delete old temporary upload files scheduled task (configurable in Site Manager -> Administration -> Scheduled tasks), which deletes these temporary files, by default older than 24h. However, you can change this setting by changing the value of the CMSDeleteTemporaryUploadFilesOlderThan key (please note that you need to manually add the key into the web.config file in the current web project folder).
|