The Insert image dialog can be used to insert the following types of files:
| • | Images: bmp, gif, ico, png, wmf, jpg, jpeg, tiff, tif |
| • | Audio: wav, wma, mp2, mp3, mid, midi, mpga |
| • | Video: avi, mp4, mpg, mpeg, wmv, qt, mov, rm |
| • | Flash: swf |
Custom types can be added as described in this topic.
The Insert image or media dialog can be opened by clicking the ![]() icon, as highlighted in the screenshot below.
icon, as highlighted in the screenshot below.

After clicking the icon, the following dialog will be displayed:
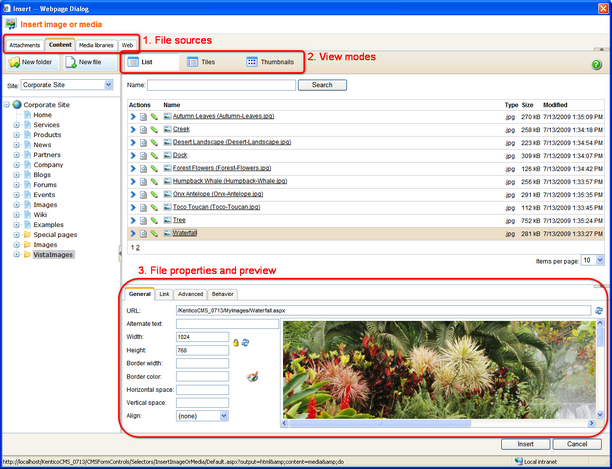
The highlighted parts of the dialog have the following functions. Their position may vary based on the selected file source:
| 1. | File sources - using these four tabs, you can select where the inserted files should be taken from; more info here |
| 2. | View modes - using these buttons, you can switch between different ways how listed files are displayed in the dialog; more info here |
| 3. | File properties - in this section, you can define properties of the file inserted into the text; the properties are different for images, audio/video and flash |
General process of inserting image or media
| 1. | Place the cursor in the appropriate position in the WYSIWYG editor. |
| 2. | Click the Insert image or media ( |
| 3. | The dialog window opens. Select the appropriate file source tab according to where you want to add the file from. |
| 4. | Locate and select the file on the tab. |
| 5. | Appropriate properties according to the file type are displayed. Specify the required properties and click the Insert button. |
| 6. | The required code gets inserted into the WYSIWYG editor. |