Managing files in document libraries |

|

|

|

|
|
Managing files in document libraries |

|

|

|

|
|
|
||
In the previous topic, you have learned where document libraries are located in the portal and how they can be used by ordinary company employees without document management permissions. This topic provides information on the various management possibilities that are available to users with certain permissions.
To demonstrate the document management possibilities, we will use Brads Summers (user name BradS with blank password), one of the sample users who has full management permissions for the global document libraries.
|
Permissions for particular actions
In this topic, document management possibilities are explained using Brad Summers. This account has full permissions for all actions that can be performed in the libraries.
Please note that in a real-world scenario, not all actions explained in this topic may be available to you based on permissions assigned to your account by the system administrator.
|
When a new document library is created, there are no files in it, so live site users can only see the following two links at the top.
Once some files are uploaded in the document library, live site users can perform the following actions with the documents:
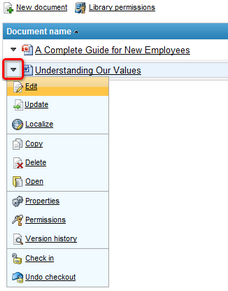
•![]() Edit
Edit
•![]() Update
Update
•![]() Localize
Localize
•![]() Copy
Copy
•![]() Delete
Delete
•![]() Open
Open
These actions can be executed from a context menu, which is accessible by right-clicking anywhere in a document's row, or by left-clicking the down-arrow to the left of a document's name (as highlighted in the screenshot below).
The following text explains particular actions that can be performed in a document library:
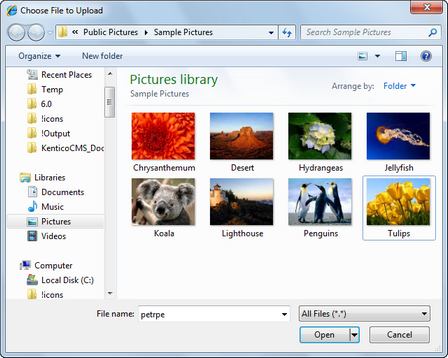
Clicking the ![]() New document link in Internet Explorer or Mozilla Firefox directly opens the browser's file selection dialog. By selecting a file from a local disk and clicking Open, the file will be uploaded into the document library.
New document link in Internet Explorer or Mozilla Firefox directly opens the browser's file selection dialog. By selecting a file from a local disk and clicking Open, the file will be uploaded into the document library.
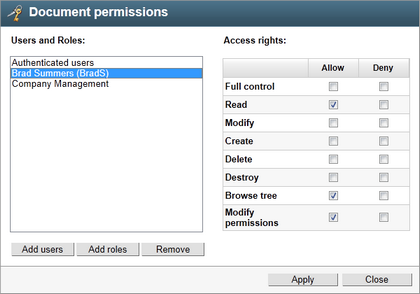
Clicking the ![]() Library permissions link opens a dialog for document library permissions configuration. Using the Add users and Add roles buttons, you can add users or roles into the Users and Roles listing. After selecting a user or role in the listing, you can grant or deny particular permissions to them using the check-boxes in the Access rights section. Please refer to the Configuring permissions topic for more details on particular permissions.
Library permissions link opens a dialog for document library permissions configuration. Using the Add users and Add roles buttons, you can add users or roles into the Users and Roles listing. After selecting a user or role in the listing, you can grant or deny particular permissions to them using the check-boxes in the Access rights section. Please refer to the Configuring permissions topic for more details on particular permissions.
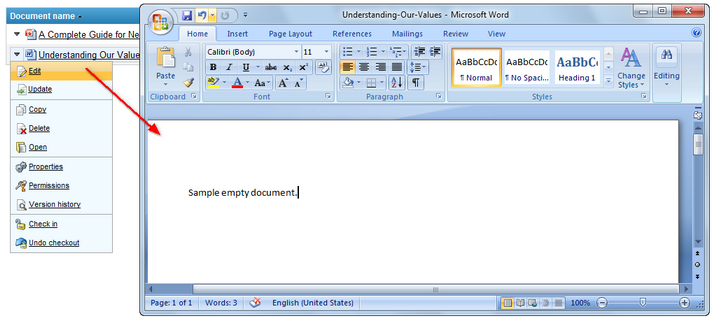
The ![]() Edit action is only available if WebDAV integration is enabled by the system administrators. It opens the file in a client application for direct editing (for example, .docx documents get opened in MS Word, as you can see in the screenshot below). WebDAV editing is only possible if there is an application installed on the client machine that supports WebDAV editing of the particular file type.
Edit action is only available if WebDAV integration is enabled by the system administrators. It opens the file in a client application for direct editing (for example, .docx documents get opened in MS Word, as you can see in the screenshot below). WebDAV editing is only possible if there is an application installed on the client machine that supports WebDAV editing of the particular file type.
Selecting the ![]() Update action opens the browser's file selection dialog. Selecting a file from a local disk and clicking Open in the dialog replaces the original file with the selected one. In Apple Safari and Opera, there is one extra dialog displayed before the browser's file selection dialog. Please refer to the New document paragraph above for more details.
Update action opens the browser's file selection dialog. Selecting a file from a local disk and clicking Open in the dialog replaces the original file with the selected one. In Apple Safari and Opera, there is one extra dialog displayed before the browser's file selection dialog. Please refer to the New document paragraph above for more details.

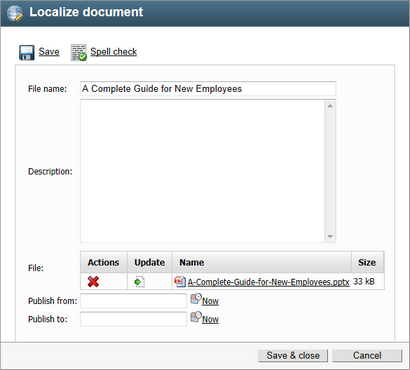
The ![]() Localize option is only displayed on multilingual sites when the document library is configured to display documents from the default website culture if there is no version of the document in the current culture. The action is only displayed with these default-culture documents. Clicking the action opens the dialog depicted in the screenshot below, which serves for creation of a new language version of the selected document in the current culture.
Localize option is only displayed on multilingual sites when the document library is configured to display documents from the default website culture if there is no version of the document in the current culture. The action is only displayed with these default-culture documents. Clicking the action opens the dialog depicted in the screenshot below, which serves for creation of a new language version of the selected document in the current culture.
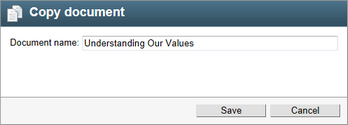
The ![]() Copy action creates a copy of the file in the same document library. As only flat structure of document libraries is currently possible, a different file name needs to be entered for the copy, while the " - Copy" suffix is offered to be added to the file name automatically. When copying a linked document (marked with the
Copy action creates a copy of the file in the same document library. As only flat structure of document libraries is currently possible, a different file name needs to be entered for the copy, while the " - Copy" suffix is offered to be added to the file name automatically. When copying a linked document (marked with the ![]() flag), the copy will be a standard document, not a linked one.
flag), the copy will be a standard document, not a linked one.
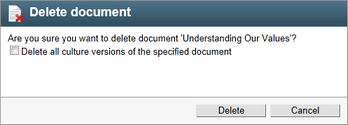
Clicking the ![]() Delete action opens the dialog depicted below. Using the dialog, you can remove the document from the document library. On multilingual websites where more that one language version of the document exists, the Delete all culture versions of the specified document check-box is displayed in the dialog. If you delete the document with the check-box enabled, all cultural versions of the document will be deleted.
Delete action opens the dialog depicted below. Using the dialog, you can remove the document from the document library. On multilingual websites where more that one language version of the document exists, the Delete all culture versions of the specified document check-box is displayed in the dialog. If you delete the document with the check-box enabled, all cultural versions of the document will be deleted.
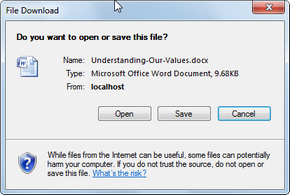
The ![]() Open action works similarly as a standard file download link. The web browser's standard file download dialog is displayed and you can either open the document or save it to a local disk. The same behavior can be expected when you click the document's name in the library listing.
Open action works similarly as a standard file download link. The web browser's standard file download dialog is displayed and you can either open the document or save it to a local disk. The same behavior can be expected when you click the document's name in the library listing.
The ![]() Properties action opens a dialog where properties of the document can be configured. The following fields are available in the dialog:
Properties action opens a dialog where properties of the document can be configured. The following fields are available in the dialog:
•File name - name of the file displayed in the document library listing.
•Description - text description of the document.
•File - the actual document file. The following actions are available with the documents:
•![]() Edit - available only with image files. Opens the image for editing in a built-in image editor.
Edit - available only with image files. Opens the image for editing in a built-in image editor.
•![]() Update - the same as the Update action described above.
Update - the same as the Update action described above.
•![]() Edit in client application - the same as the Edit action described above.
Edit in client application - the same as the Edit action described above.
•Publish from - date and time from when the document will be visible in the library.
•Publish to - date and time until when the document will be visible in the library.
Values entered into the File name and Description fields can be checked for typos using the ![]() Spell check button above the form. Clicking the
Spell check button above the form. Clicking the ![]() Save button saves changes made to the document in the dialog. Standard workflow actions are also displayed above the form.
Save button saves changes made to the document in the dialog. Standard workflow actions are also displayed above the form.
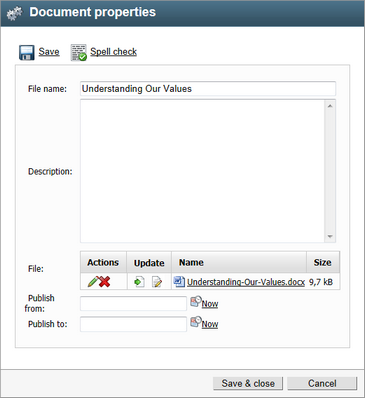
The text filled in the Description field is displayed in a tooltip when the mouse pointer is placed above the document.

The ![]() Permissions action opens a dialog for configuration of permissions for the particular document. Using the Add users and Add roles buttons, you can add users or roles into the Users and Roles listing. After selecting a user or role in the listing, you can grant or deny particular permissions to them using the check-boxes in the Access rights section. Please refer to the Configuring permissions topic for more details on particular permissions.
Permissions action opens a dialog for configuration of permissions for the particular document. Using the Add users and Add roles buttons, you can add users or roles into the Users and Roles listing. After selecting a user or role in the listing, you can grant or deny particular permissions to them using the check-boxes in the Access rights section. Please refer to the Configuring permissions topic for more details on particular permissions.

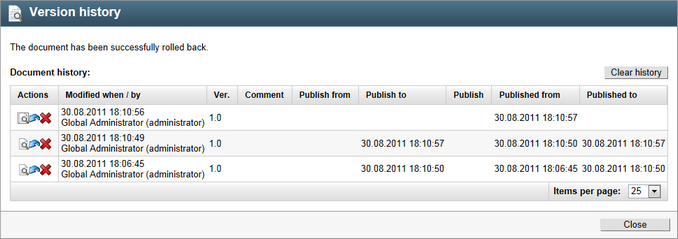
Clicking the ![]() Version history action displays an overview of the document's versions. The following actions are available with each of the listed versions:
Version history action displays an overview of the document's versions. The following actions are available with each of the listed versions:
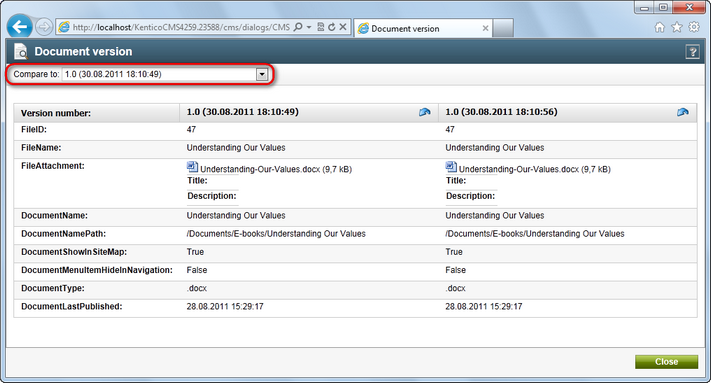
•![]() View - displays an overview of the document's content with the possibility of side-by-side comparison of versions.
View - displays an overview of the document's content with the possibility of side-by-side comparison of versions.
•![]() Rollback - rolls back any changes made since the particular version of the document.
Rollback - rolls back any changes made since the particular version of the document.
•![]() Delete - deletes the old version.
Delete - deletes the old version.
You can also use the Clear history button to clear all versions except the latest one. For the action to be available, the Destroy permission for this document must be granted to the user.
The following screenshot shows the side-by-side comparison of two document versions that is accessible by clicking the ![]() View icon and selecting a version with which you want to compare in the highlighted Compare to drop-down list.
View icon and selecting a version with which you want to compare in the highlighted Compare to drop-down list.
If there is a workflow configured for documents in a document library, standard workflow actions are displayed at the bottom of the context menu, depending on workflow configuration and the current workflow step of the document:
•![]() Submit to approval - Submits the document for approval to the sub-sequent workflow step.
Submit to approval - Submits the document for approval to the sub-sequent workflow step.
•![]() Approve1 - Approves the document and switches it to the sub-sequent workflow step.
Approve1 - Approves the document and switches it to the sub-sequent workflow step.
•![]() Reject1 - Rejects the document and switches it back to the previous workflow step.
Reject1 - Rejects the document and switches it back to the previous workflow step.
•![]() Archive - Switches the document to the Archived step.
Archive - Switches the document to the Archived step.
•![]() Check out2 - Checks the document out for editing. While checked out, the document can not be edited by other users. Checked-out documents are marked with the
Check out2 - Checks the document out for editing. While checked out, the document can not be edited by other users. Checked-out documents are marked with the ![]() icon in the document library listing (as can be seen in the screenshot below).
icon in the document library listing (as can be seen in the screenshot below).
•![]() Check in2 - Checks the modified document in after editing, so that other users can edit it again.
Check in2 - Checks the modified document in after editing, so that other users can edit it again.
•![]() Undo checkout2 - Takes back the check-out, while changes made to the document are not saved.
Undo checkout2 - Takes back the check-out, while changes made to the document are not saved.
1 for these actions to be available, the user must also be in one of the roles that are allowed to approve/reject the document in the current workflow step or have the Manage workflow permissions for all content
2 these actions are only available if the workflow applied to the document is configured to use check-in/check-out
