|
|

Inserting an image |

|

|

|

|
|
Inserting an image |
|
|

|
|
|
|
Inserting an image |
|
|
|
|
|
Inserting an image |
|
|
|
|
|
|
||
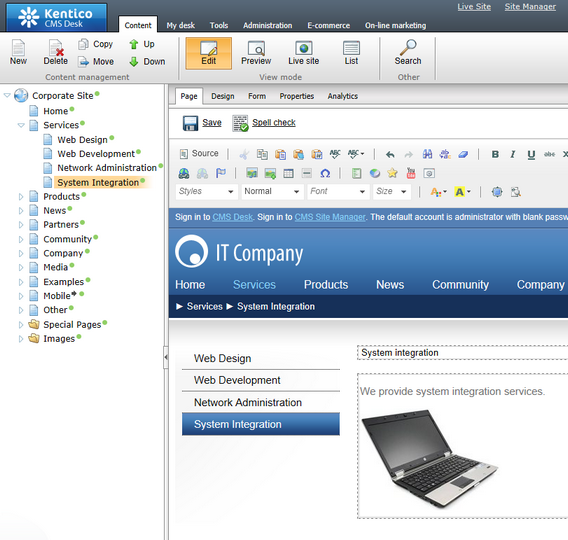
Now we will upload and insert a new image to our new page. Click Services -> System Integration in the content tree. Switch to the Edit -> Page mode. Place the cursor into the main editable region, just below the text, and click the Quickly insert media (![]() ) in the WYSIWYG editor toolbar.
) in the WYSIWYG editor toolbar.
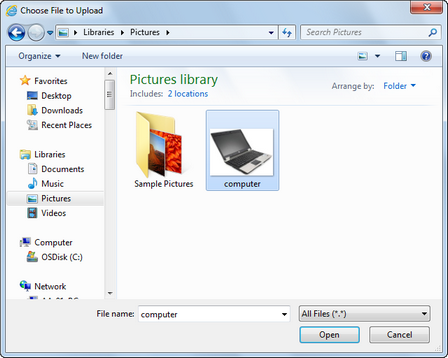
The browser's Choose file dialog opens. Locate some suitable image file and click Open.
The image will be pasted to the editable region so that the page looks like this:
Click ![]() Save to save the changes. Click Live site to see the new version of your page.
Save to save the changes. Click Live site to see the new version of your page.
You have learned how to upload an image and insert it into the text.
|
Allowing pop-ups for the website
If you are using a pop-up blocker, you may need to allow pop-up windows in your browser so that the Web part properties dialog as well as some other dialogs work correctly. This applies only to the administration interface, so the site visitors are not affected by this. |
