|
|

Customizing pages using widgets |

|

|

|

|
|
Customizing pages using widgets |
|
|

|
|
|
|
Customizing pages using widgets |
|
|
|
|
|
Customizing pages using widgets |
|
|
|
|
|
|
||
View the Home page on the Design tab. You may have noticed that the Left zone and Right zone zones are marked with an additional icon (![]() ).
).
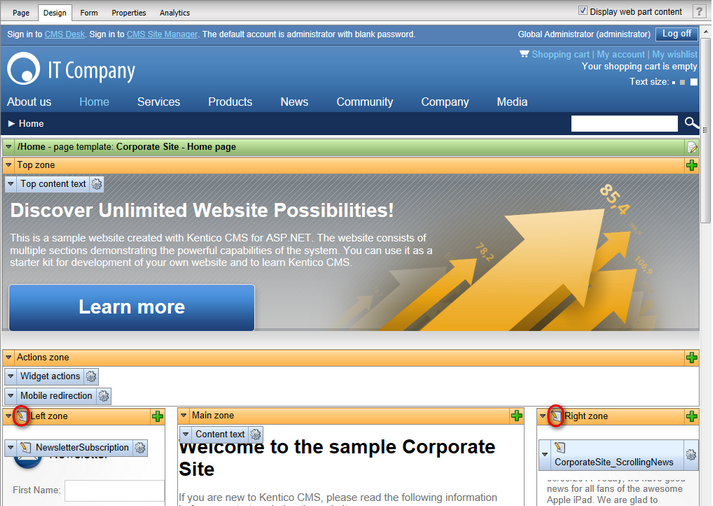
This identifies them as zones that contain widgets of a certain type rather than web parts. Widgets are components placed into page template zones just like web parts, but they provide the option of page customization for various kinds of website users, not just administrators or designers. These two zones are configured to allow customization by page editors, which means their content can be managed on the Page tab of CMS Desk.
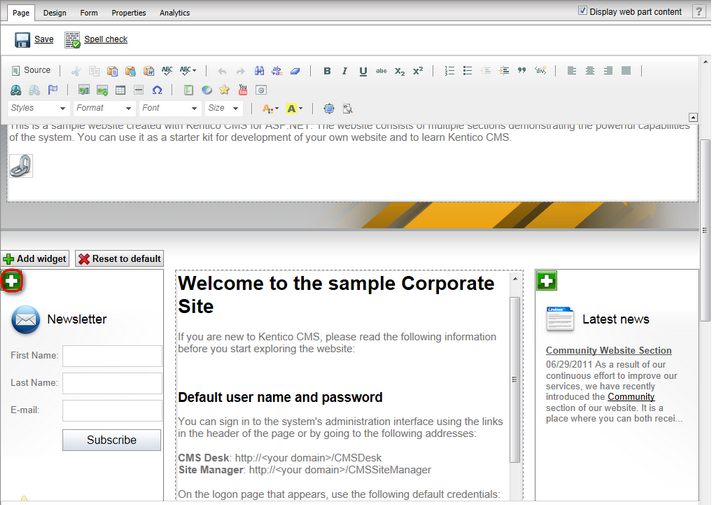
Switch over to the Page tab and click the Add widget (![]() ) button in the top left corner of the outlined widget zone to place another widget onto the page.
) button in the top left corner of the outlined widget zone to place another widget onto the page.
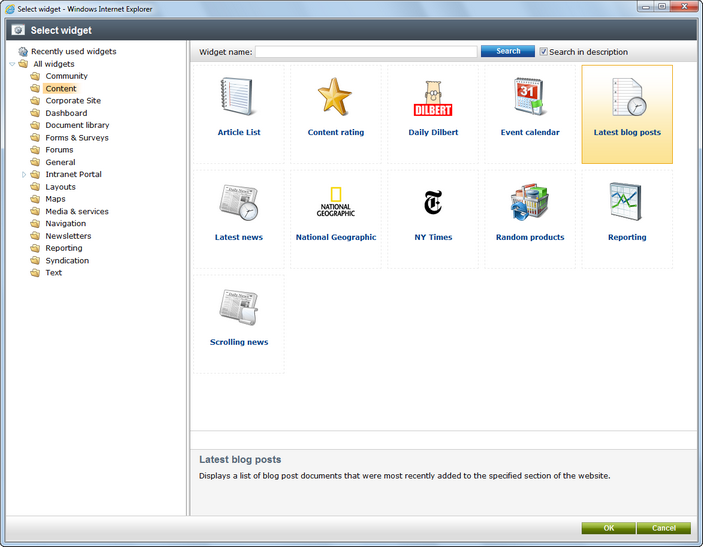
The Select widget dialog will be opened. You may notice that the content is similar to the web part selection dialog, but with less items available. This is because every widget is based on an existing web part. Select the Content -> Latest blog posts widget and click OK.
Enter the following values into the widget's properties:
•Widget container: Black box
•Widget container title: Latest blog posts
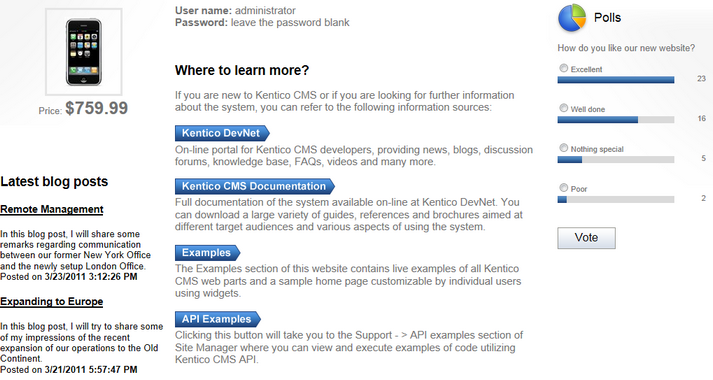
Leave the remaining properties in their default state and click OK to add the widget to the page. Switch to Live site mode using the main toolbar to view the modified design of the home page. As you can see, pages with widget zones may be easily altered by content editors.
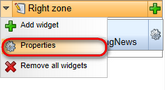
Now we will try out a different type of widget zone. Switch back to Edit mode and the Design tab. Expand the menu (![]() ) of the Right zone and select
) of the Right zone and select ![]() Properties to configure the zone.
Properties to configure the zone.
Set the Widget zone type property to User personalization.
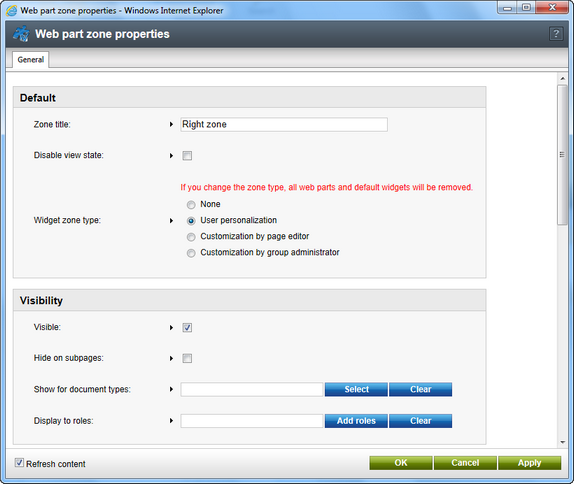
Click OK. The zone will now be editable by registered users directly on the live site. Please be aware that the content of a zone is removed when its zone type is changed.
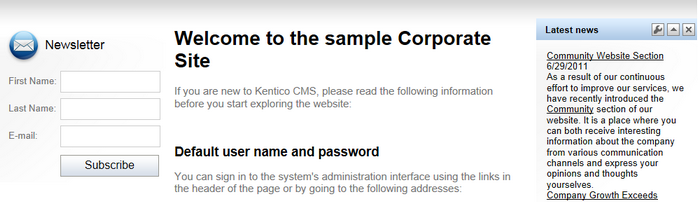
Switch to the live site, hover over the location of the right zone and click the Add widget (![]() ) button.
) button.
Select the Content -> Latest news widget and click OK. In the properties dialog, leave the default values and click OK again. The widget will be displayed on the page.
However, changes made to user widget zones do not affect the global design of the page. These types of zones are used to create personalized versions of the page only for the specific user. Sign out and log in as a different user (enter the username Andy with a blank password). View the home page on the live site and you will see that the zone is displaying its default content (empty in this case) and the widget previously added under the administrator account is not visible. Every user can choose their own content for the zone from the available selection of widgets.
Sign out and log back in as the global administrator.
|
Managing widgets on the Design tab
Widgets of all types may also be added or configured directly on the Design tab in the same way as web parts. There, the default content of widget zones can be set for the template, which may often be different from the currently displayed content.
|
