|
|

Container for home page text |

|

|

|

|
|
Container for home page text |
|
|

|
|
|
|
Container for home page text |
|
|
|
|
|
Container for home page text |
|
|
|
|
|
|
||
Now we will create gray and blue containers for our home page text. You can reuse containers for any other web parts later. If you do not wish to use web part containers, you can alternatively insert the surrounding code directly into the HTML layout of your page template.
1. Go to Site Manager -> Development -> Web part containers and click ![]() New container.
New container.
2. Enter the following values:
•Display name: My website gray box
•HTML code:
<table cellspacing="0" cellpadding="0" border="0" class="ContainerWithCorners" width="100%"> |
|
Working with the web part placeholder
The "□" character in the code above determines the position of the web part placeholder when you paste it into the HTML code field.
|
3. Click ![]() Save.
Save.
4. Switch to the Sites tab and assign the container to My website.
5. Return to the main container list and create another container with the following values:
•Display name: My website blue box
•HTML code:
<table cellpadding="0" cellspacing="0" style="width: 100%;" class="Blue"> |
6. Click ![]() Save and assign the container to My website on the Sites tab.
Save and assign the container to My website on the Sites tab.
Now that the containers are prepared, you can assign them to specific instances of web parts.
1. Go back to CMS Desk -> Content, select the Home page and open the Design tab.
2. Configure (![]() ) the editabletext web part in the zoneCenter zone.
) the editabletext web part in the zoneCenter zone.
3. Scroll down to the Web part container property and select My website gray box. Click OK.
4. Configure the editabletext1 web part in the zoneRight zone and set the following properties in the Web part container section:
•Web part container: My website blue box
•Container title: Contact Us
5. Click OK.
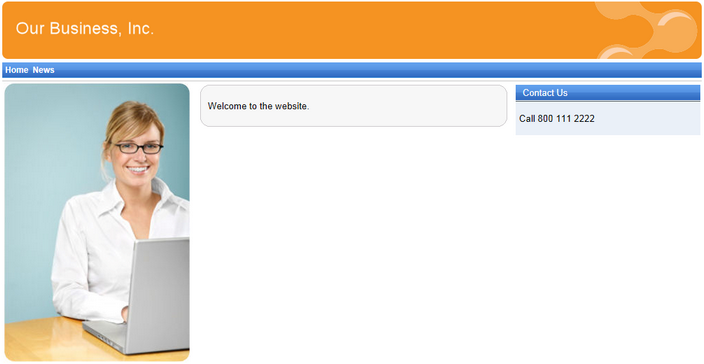
If you now view the Home page in Live site mode, you can see the gray box around the welcome text and the blue box around the contact us text.