UI profile configuration |

|

|

|

|
|
UI profile configuration |

|

|

|

|
|
|
||
In the following step-by-step example, you will learn how to define UI profile for a new role in Site Manager -> Administration -> UI personalization.
Let's presume that we want some users to be Forum administrators of our website. This means that they will not need to use the Content or Administration tabs at all, all they will be concerned about is the Forums module administration interface in the Tools menu and a few parts of the My desk section.
How to achieve it? We will create a new role and a new user who will be a member of this role only. Then we will define UI profile settings for this role and try logging in as the new user to see the simplified UI.
1. Install some of the sample sites or your own site and enable UI personalization for the site as described here.
2. Go to Site Manager -> Administration -> Roles, choose your site in the Site drop-down and click on New role (![]() ). In the following dialog, enter these details:
). In the following dialog, enter these details:
•Role display name: Forum Administrators
•Role description: text describing the role
•Is domain role: leave the field unchecked
Click ![]() Save.
Save.
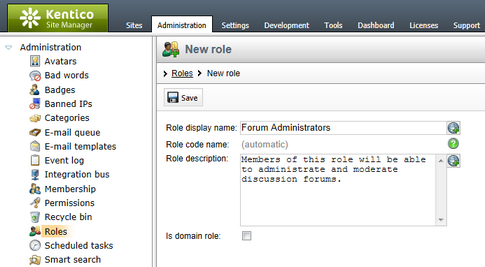
3. Now let's create the user. Go to Site Manager -> Administration -> Users and click ![]() New user. Enter the following details in the New user dialog:
New user. Enter the following details in the New user dialog:
•User name: ForumsGuy
•Full name: Jack McKay
•Enabled: enabled
•Is editor: enabled
Click ![]() Save.
Save.
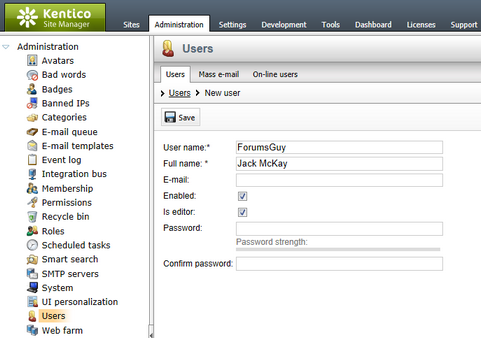
4. You will be redirected to the new user's editing interface. We first need to assign the user to our site. Go to the Sites tab and add the site using the Add sites button.
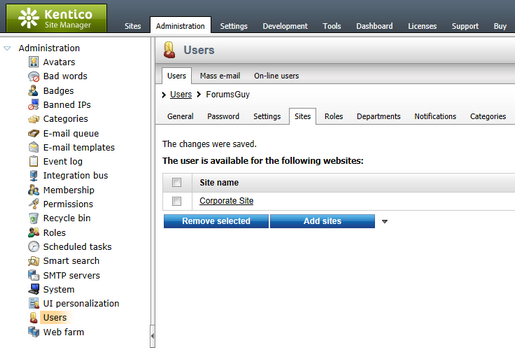
5. Now that the user belongs to our site, we can assign him to the Forum Administrators role, which also belongs to the site. Switch to the Roles tab, select your site from the Site drop‑down list and use the Add role button to add the Forum Administrators role.
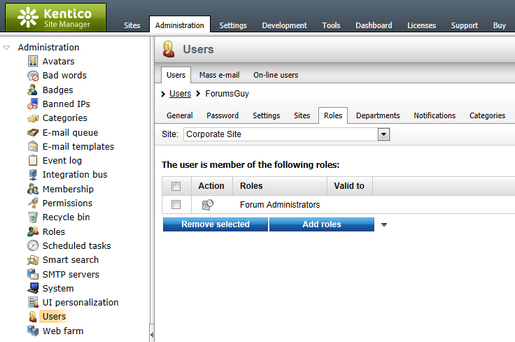
6. Now that the user belongs to our role, we can set up UI personalization for the role. Go to Site Manager -> Administration -> UI personalization and choose:
•Site: your site
•Role: Forum Administrators
Please note: UI personalization settings are site-related unless they are defined for global roles. This means that members of one site‑specific role can see a certain personalized UI when editing one site and a completely different UI when editing another site. More information on how UI personalization works can be found here.
You can choose the module whose UI elements you want to set up using the Module drop-down. Full reference on the personalizable parts of CMS Desk and the appropriate modules can be found here.
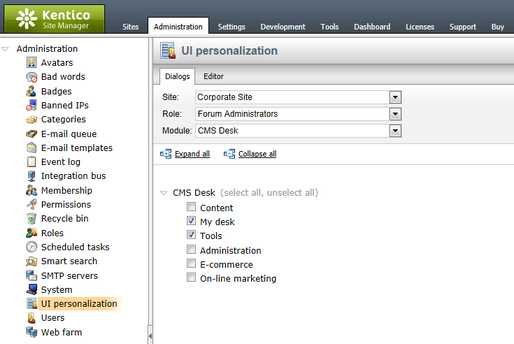
7. Let's start with the main tabs in CMS Desk, where we want only the My desk and Tools tabs visible. Choose Module: CMS Desk and make the following settings:
•Content: disabled
•My desk: enabled
•Tools: enabled
•Administration: disabled
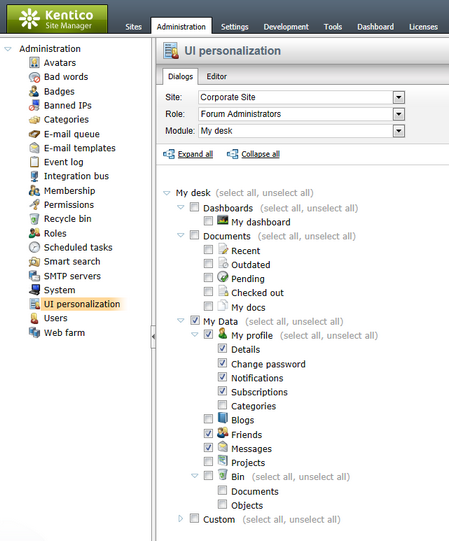
8. On the My desk tab, we will need only the Account, Messages and Friends sections, all others are not needed for forum administrators. Choose Module: My Desk and enable only the UI elements listed below, do not enable the rest.
•My data: enabled
•Account: enabled
•Details: enabled
•Change password: enabled
•Notifications: enabled
•Subscriptions: enabled
•Friends: enabled
•Messages: enabled
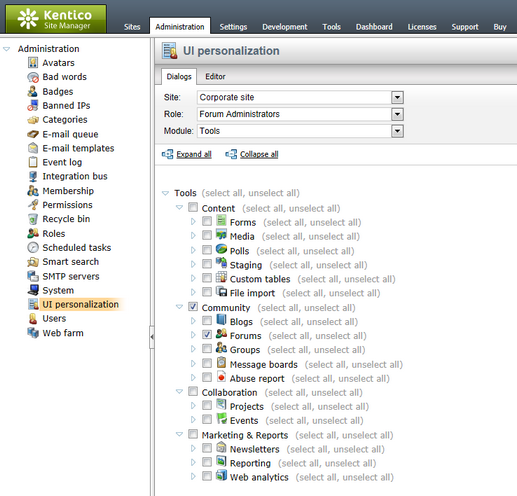
9. Finally, we need only the Forums option in the Tools menu. Choose Module: Tools and enable only the Community and Tools UI elements as you can see in the screenshot below. Leave all the remaining UI elements disabled.
10. We can now verify what we have achieved. Log out of Site Manager and log back in to CMS Desk as the ForumsGuy user created in step 3. You will see the a simplified user interface as in the following screenshot.
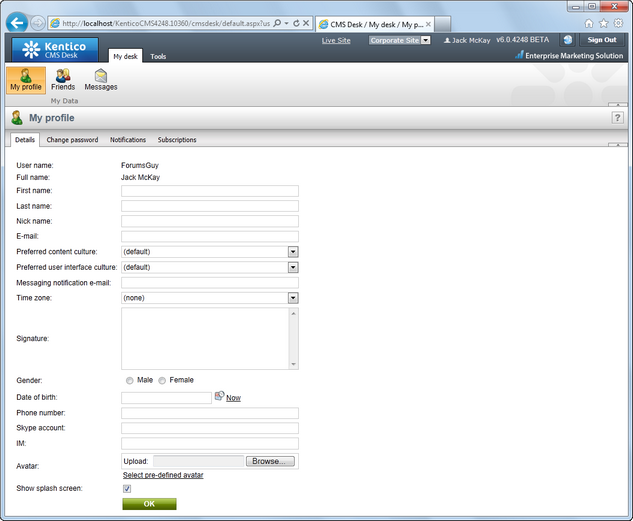
If you switch to the Tools tab, there is only the Forums menu item present. It is evident that this UI is much easier to understand for a first-time end user.
