Adding new pages |

|

|

|

|
|
Adding new pages |

|

|

|

|
|
|
||
This topic contains an example describing the typical steps that need to be performed when creating new pages (documents) through the on-site editing interface.
1. Open the sample Corporate site, log on to the live website as an editor (for example user name Andy with a blank password) and switch to on-site editing mode.
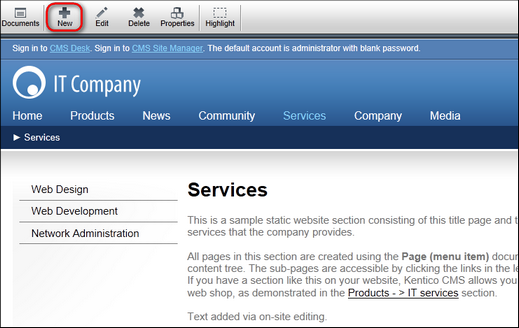
2. Select the Services page in the website's main navigation menu and then click ![]() New on the on‑site editing toolbar. This action creates a child document under the page that is currently being viewed.
New on the on‑site editing toolbar. This action creates a child document under the page that is currently being viewed.
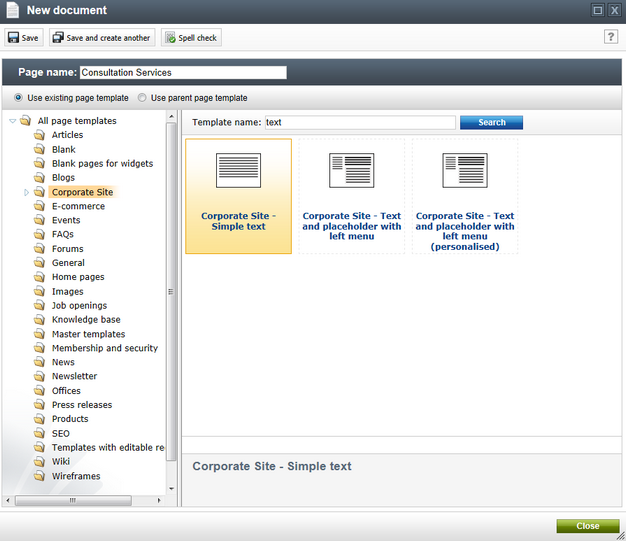
3. In the displayed document creation dialog, choose the Page (menu item) document type. You must then select a template for the new the page. Click the Corporate Site category in the tree, enter the word text into the Template name filter and then choose the Corporate Site - Simple text template.
4. Type Consultation Services into the Page name field and click ![]() Save.
Save.
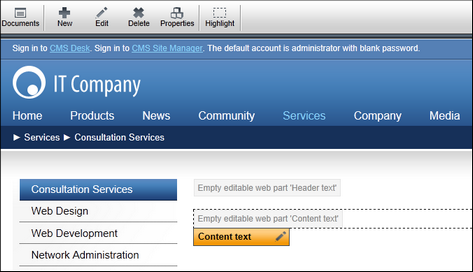
The new page is added under the Services section of the website. Visitors can now access it through the site's navigation menus.
5. The content of new pages is often empty. In this example, the page template contains two editable regions without any text. Empty editable regions are represented by placeholder boxes in on-site editing mode, so you can easily find them on the page and edit their content.
Hover over the placeholders and use the edit action to enter some text into the page's header and content areas.
1. Navigate to the Community -> Events page through the main menu. You can add structured documents to the website in the same way as standard pages.
2. Click the ![]() New action on the toolbar and select the Event (booking system) document type. Alternatively, the same could be achieved using the
New action on the toolbar and select the Event (booking system) document type. Alternatively, the same could be achieved using the ![]() New event button provided in the list of upcoming events on the right side of the page.
New event button provided in the list of upcoming events on the right side of the page.
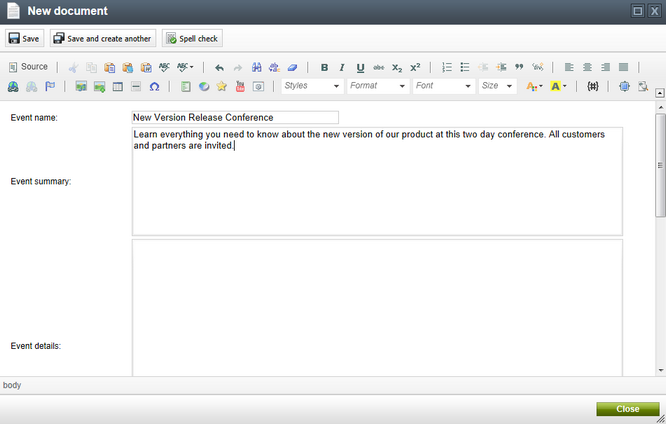
3. Instead of selecting a page template, you need to specify values for the document's fields in the creation dialog. For example, you can use the following:
•Event name: New Version Release Conference
•Event summary: Learn everything you need to know about the new version of our product at this two day conference. All customers and partners are invited.
•Start date / End date: Use the calendar (![]() ) to enter a date in the future
) to enter a date in the future
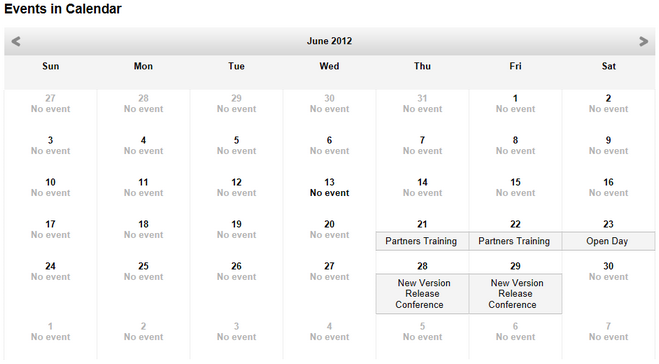
Confirm the creation of the document by clicking ![]() Save. The data displayed on the Events page is loaded from the child event documents. As a result, you can look up the specified date in the calendar and the new event is shown. It is also displayed in the upcoming event list.
Save. The data displayed on the Events page is loaded from the child event documents. As a result, you can look up the specified date in the calendar and the new event is shown. It is also displayed in the upcoming event list.
