|
|

Document management |

|

|

|

|
|
Document management |
|
|

|
|
|
|
Document management |
|
|
|
|
|
Document management |
|
|
|
|
|
|
||
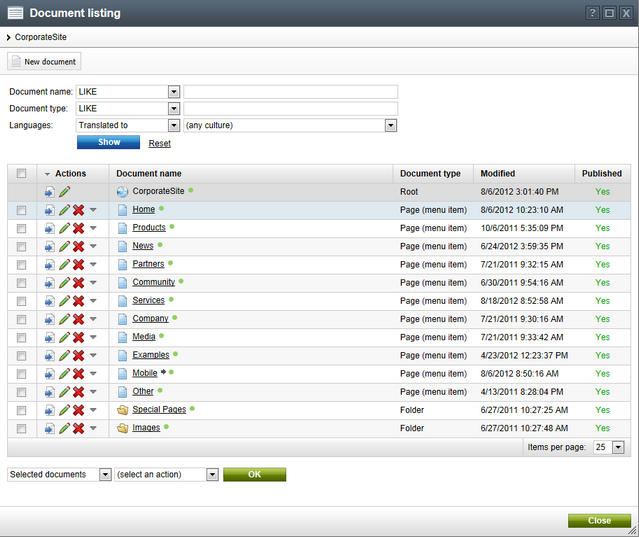
In addition to basic editing of page content, on-site editing may also be used to manage the document structure of the website. This is done via a separate dialog that can be accessed by clicking the ![]() Documents button on the on-site editing toolbar. The overall structure of the website may not always be obvious from the live site point of view and it can be difficult or even impossible to access some documents using only the natural on-site navigation. For these reasons, the dialog offers an alternative way to explore the website based on document lists.
Documents button on the on-site editing toolbar. The overall structure of the website may not always be obvious from the live site point of view and it can be difficult or even impossible to access some documents using only the natural on-site navigation. For these reasons, the dialog offers an alternative way to explore the website based on document lists.
When opened, the list initially displays all sibling documents of the page that is currently being viewed in on-site editing mode (i.e. the documents on the same content level that share the same parent).
|
Editing the website root
The Document listing dialog also provides an easy way to access the root document of the website. You can find it as a special item at the top of the list on the first level of the site's content (it is marked by the |
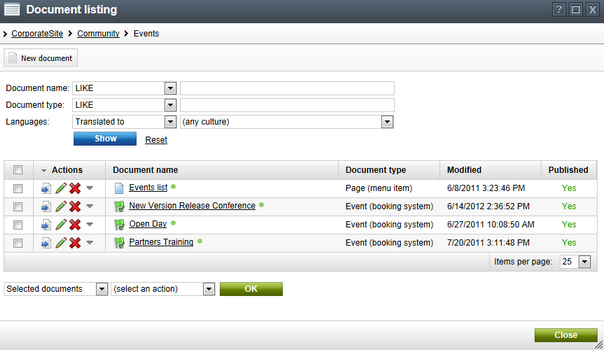
You can navigate deeper into the site structure by clicking on the name of any listed document, which displays the child documents of the given item. To return to a previous content level, click on one of the parent documents shown in the breadcrumb navigation at the top of the dialog. This way, you can quickly access any section of the website.
The following actions are available for individual documents in the list:
•![]() View - navigates to the page represented by the given document on the live site (in on-site editing mode).
View - navigates to the page represented by the given document on the live site (in on-site editing mode).
•![]() Edit - clicking this action opens a dialog where the fields of the given document can be edited.
Edit - clicking this action opens a dialog where the fields of the given document can be edited.
•![]() Delete - removes the given document from the website.
Delete - removes the given document from the website.
•The ![]() action opens a context menu with further options that may be used to change the position of the document on the given level of content:
action opens a context menu with further options that may be used to change the position of the document on the given level of content:
•![]() Top
Top
•![]() Up
Up
•![]() Down
Down
•![]() Bottom
Bottom
Additionally, the dialog may be used to perform various types of document management operations via the two drop-downs below the list. First, you need to select one of the following options:
•Selected documents - the action is performed only for the documents selected through the checkboxes (![]() ).
).
•All documents - the action is done for all documents listed on the given content level.
Then you can choose one of the available actions:
•Move - moves the documents to a new location specified through a separate dialog.
•Copy - creates copies of the selected documents at the specified location.
•Link - creates linked versions of the selected documents at the specified location.
•Delete - removes the documents from the site.
•Translate - submits the selected documents to a Translation service specified via a separate dialog.
•Publish/Archive - may be used to publish or archive documents under Workflow.
Click OK to perform the selected action.
You can also add a new document to the currently selected location by clicking the ![]() New document button above the list. This opens a creation dialog that works the same way as described in the Adding new pages topic.
New document button above the list. This opens a creation dialog that works the same way as described in the Adding new pages topic.
If the website's content is available in more than one language, the document list also provides a Languages column with additional data. It displays the status of the documents in all languages assigned to the website. The colors surrounding the flags of individual languages indicate the following possible language statuses:
•Green - Translated - the document is available in the given language and up-to-date. The actual language of the document's content has no effect on the status, the system only checks whether the language version exists.
•Orange - Outdated - the language version exists for the document, but is outdated. The system considers language versions to be outdated if the default language version of the document has been modified (or published when using workflow) more recently.
•Red - Not available - the document does not exist in the given language.
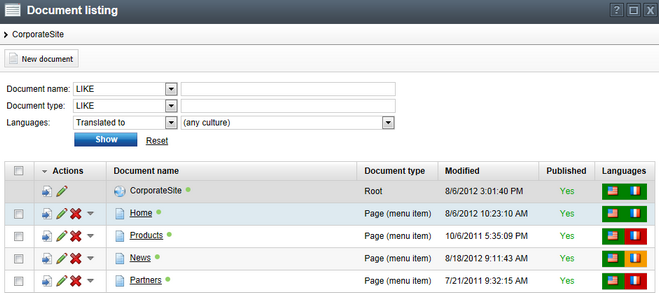
Clicking a Translated or Outdated flag redirects you to the matching language version of the document on the live site (in on-site editing mode). If you click a Not available flag, a dialog opens instead where you can create a new version of the document in the given language.
You can also switch between languages and create translated page versions directly while viewing the page content using the selector on the main toolbar.

Refer to the Multilingual content chapter to learn more about creating websites in multiple languages.
