Editing content |

|

|

|

|
|
Editing content |

|

|

|

|
|
|
||
The following steps demonstrate how to edit various types of page content through the on-site editing interface:
1. Open the sample Corporate site and log on to the live website as a user who is an editor. For example, you can use the default editor account — user name Andy with a blank password. Do not sign in to CMS Desk, simply enter the credentials into the logon form at the top right of the site's header.
2. Click the ![]() Edit page button in the corner of the page to open on-site editing mode. The system displays the button because the current user is authorized as an editor.
Edit page button in the corner of the page to open on-site editing mode. The system displays the button because the current user is authorized as an editor.

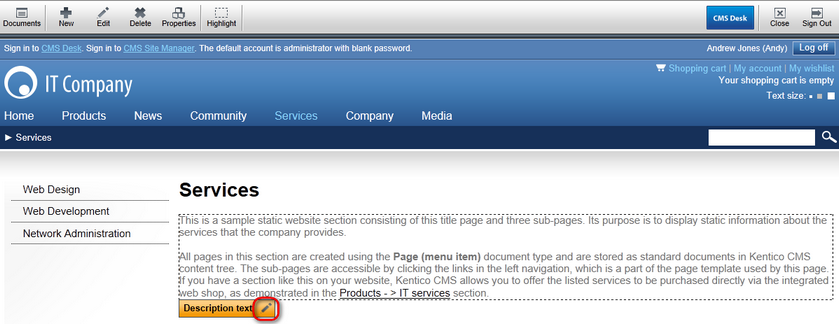
3. Navigate to the Services page through the website's main menu. Try moving the mouse over the sections of text displayed on the page. In on-site editing mode, hovering over editable text regions causes them to be highlighted by a dotted outline, with a box showing the title of the given region. Do this for the main text area and then click edit (![]() ) in the title box.
) in the title box.
|
Tip
If you encounter a situation where the highlight feature is blocking a part of the page that you wish to click, you can bypass it by holding down the CTRL key while moving your mouse. This way, you can reach the required location without triggering the highlight. |
4. A new dialog opens, where the content of the region can be edited as needed using the WYSIWYG editor. Add some new text below last paragraph and confirm the change by clicking ![]() Save & close.
Save & close.
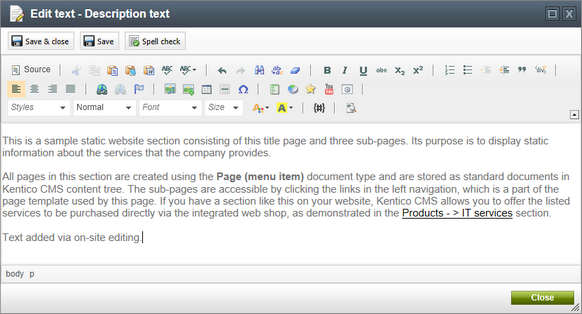
This automatically refreshes the page and displays the new content.
5. Continue by clicking the Highlight action on the on-site editing toolbar above the page. When this button is toggled on, all editable items placed on the page are highlighted at the same time. This way you can easily find all editable text regions and editable images and modify them as necessary.
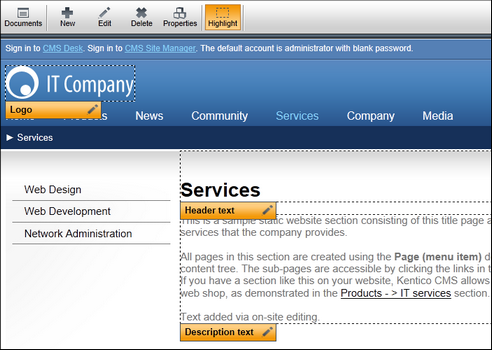
To change an editable image, click the edit (![]() ) action next to its title and then select a different image in the displayed dialog. Please note that the company logo on the Corporate site is not actually a part of the Services page. It is defined in the website's root document, which provides the header content shared by most pages. As a result, changing the image here also changes it for the entire website.
) action next to its title and then select a different image in the displayed dialog. Please note that the company logo on the Corporate site is not actually a part of the Services page. It is defined in the website's root document, which provides the header content shared by most pages. As a result, changing the image here also changes it for the entire website.
|
On-site editing with Design permissions
If the current user is also authorized to design the website, the system additionally highlights individual Web parts placed on the page. In this case, on‑site editing also offers the option to configure ( |
Now we will edit a page that loads its content from the fields of a structured document.
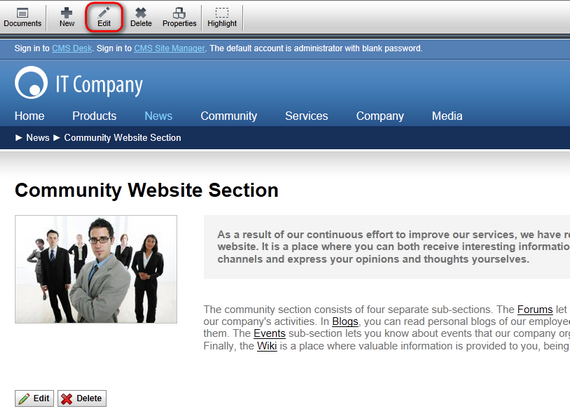
1. Go to the News section of the website and view the first news article in the list, titled Community Website Section. Once the page is loaded, click the ![]() Edit action on the on-site editing toolbar.
Edit action on the on-site editing toolbar.
|
Edit mode buttons
In many cases, document lists are configured to provide edit mode buttons, which are also visible in on-site editing mode. Such buttons are shown both on the list page next to individual items and when viewing the details of a specific document.
The |
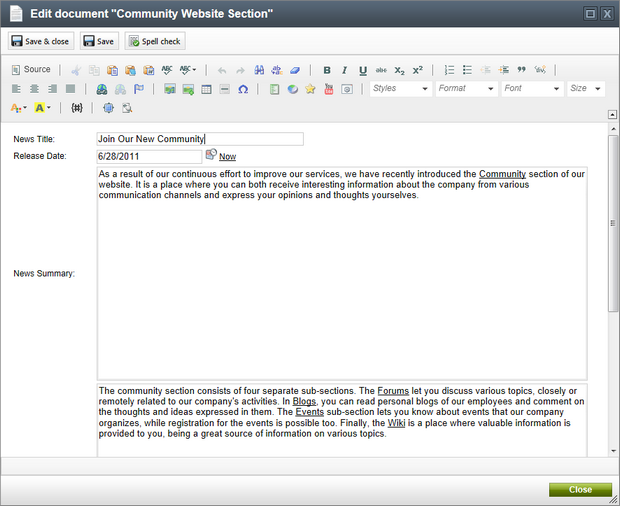
2. An editing dialog opens, where you can work with the values of the given document's fields. This is the equivalent of the Form tab in CMS Desk. You can make any required changes to the news document. For example, set the News Title field to Join Our New Community. Confirm the change by clicking ![]() Save & close.
Save & close.
The new title is shown on the detail page of the news article, as well as in the main list of items on the News page.