|
|

Example: Grouped attachments |

|

|

|

|
|
Example: Grouped attachments |
|
|

|
|
|
|
Example: Grouped attachments |
|
|
|
|
|
Example: Grouped attachments |
|
|
|
|
|
|
||
In the previous example, you learned how to add attachments to a document via the Properties -> Attachments tab. This is the easier approach, however, in some situations, you may want to have more groups of attachments.
In this example, you will learn how to add two Document attachments fields to a document type and how to use them on the live site. Again, we will use the Events section of the sample Corporate Site. So if you completed the previous example right before, please delete the Document image gallery web part from Main zone in order to get the page to the original appearance.
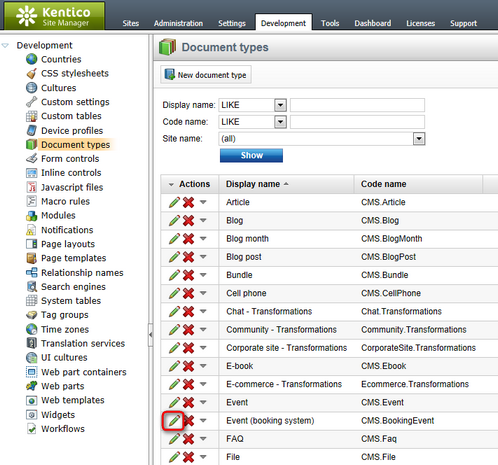
1. The events' document type is CMS.BookingEvent. We will need to add the fields to it. Go to Site Manager -> Development -> Document types and choose to Edit (![]() ) the Event (booking system) document type.
) the Event (booking system) document type.
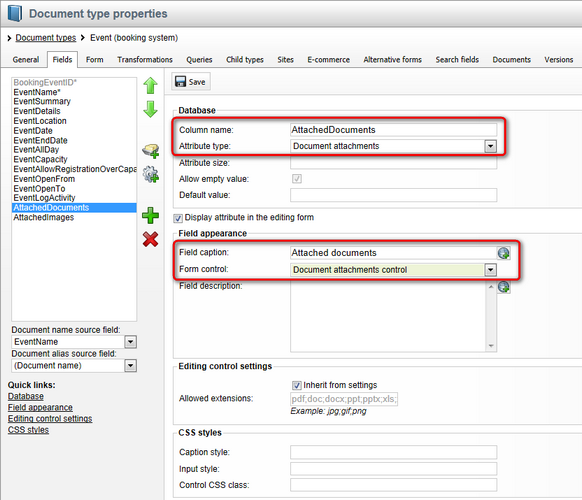
2. Switch to the Fields tab. Use the New attribute (![]() ) icon to add the following two fields. For each attribute, set only the following properties and leave the default values for the rest. Click the
) icon to add the following two fields. For each attribute, set only the following properties and leave the default values for the rest. Click the ![]() Save button to confirm the creation of each field.
Save button to confirm the creation of each field.
•Column name: AttachedImages
•Attribute type: Document attachments
•Field caption: Attached images
•Form control: Document attachments control
•Column name: AttachedDocuments
•Attribute type: Document attachments
•Field caption: Attached documents
•Form control: Document attachments control
Finally, use the Move up (![]() ) and Move down (
) and Move down (![]() ) arrows to move the two attributes to the bottom of the list so that they will be displayed at the bottom of the Form tab.
) arrows to move the two attributes to the bottom of the list so that they will be displayed at the bottom of the Form tab.
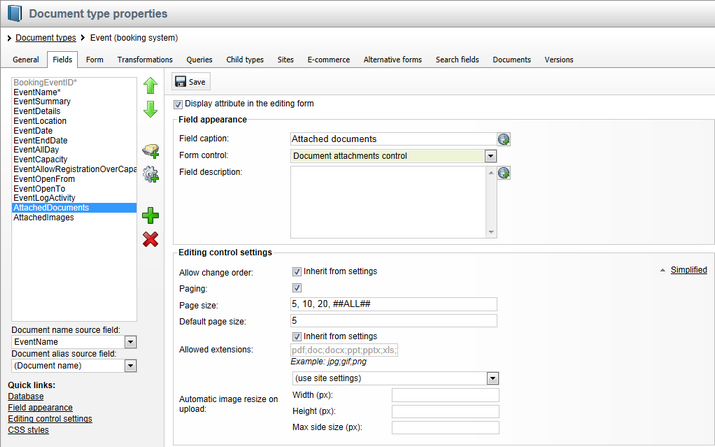
3. Optionally, you can set the following additional parameters for the fields in their Editing control settings section (most of the parameters are only available if you switch to Advanced mode using the link on the side of the section):
•Allow change order - indicates if the order of attachments can be changed.
•Paging - indicates if paging should be used for the list of attachments.
•Page size - defines the page size options that will be selectable in the attachments pager. Values must be separated by commas, e.g. 25,50,100,##ALL##.
•Default page size - sets the amount of attachments displayed per page by default (if paging is allowed).
•Allowed extensions - sets which file types can be uploaded as attachments. Uploading files that do not match the specified extensions will not be permitted. Check Inherit from settings to use the values specified in Site Manager -> Settings -> System -> Files -> Upload extensions
•Automatic image resize on upload:
•(do not resize) - uploaded images will not be resized.
•(use site settings) - uploaded images will be resized according to site settings in Site Manager -> Settings -> System -> Files -> Automatic image resize on upload.
•(use custom settings) - uploaded images will be resized according to the Width, Height and Max side size values set below.
Depending on which values you fill in the Width, Height and Max side size fields, the functionality is the following:
•Only width or only height - images will be resized so that the width/height matches the entered value. The other dimension is also resized so that the aspect ratio is kept.
•Both width and height - images will be resized so that both dimensions match the entered values. The aspect ratio will not be kept in this case
•Max side size - if one of the image's sides is larger than this value, the image will be resized so that the its larger side matches the entered value. The aspect ratio is kept and width and height settings are not applied.
4. Now that we have the two fields defined, we can upload some attachments to the existing events on the site. Switch to CMS Desk and select the Events -> Open day from the content tree. Switch to its Form tab. If you scroll down the page, you should see the two fields defined in the previous step.
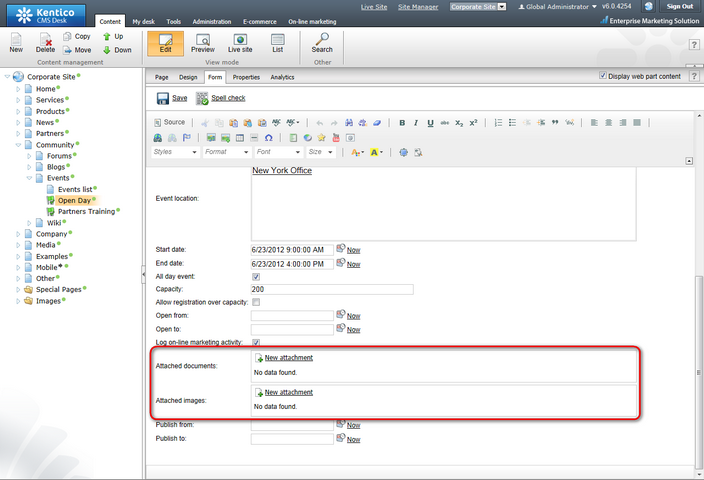
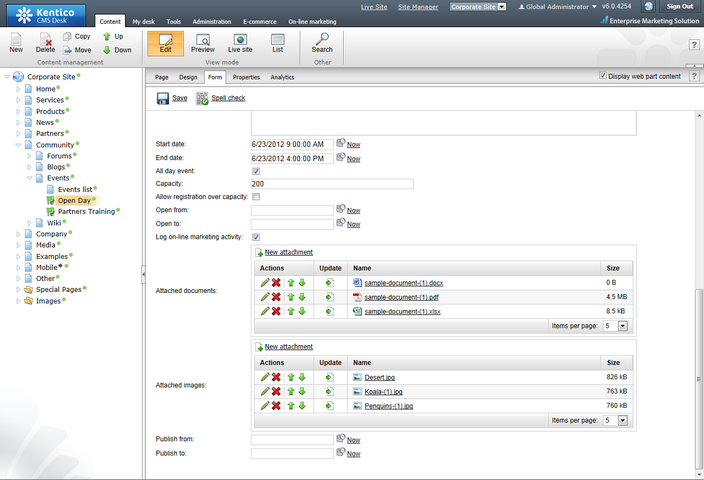
5. Use New attachment (![]() ) to add attachments into both fields. According to the name of the field, upload some documents into the first one and some images into the second one.
) to add attachments into both fields. According to the name of the field, upload some documents into the first one and some images into the second one.
Just as on the Properties -> Attachments tab, you can perform the following actions with the attachments in the lists:
•Delete (![]() ) - removes the attachment from the document.
) - removes the attachment from the document.
•Move up (![]() ) and Move down (
) and Move down (![]() ) - re-orders the attachments. The order is stored in the AttachmentOrder property of each attachment. You can enter AttachmentOrder into the ORDER BY expression property of a displaying web part to have the attachments ordered accordingly.
) - re-orders the attachments. The order is stored in the AttachmentOrder property of each attachment. You can enter AttachmentOrder into the ORDER BY expression property of a displaying web part to have the attachments ordered accordingly.
|
Please note
The order of attachments is not versioned with documents' workflow. This means that if you change the order of attachments in one version of a document, the order is changed in all other versions too.
|
•Edit (![]() ) - if the attachment is an image, clicking the icon opens it in the built-in image editor. If the attachment is not an image, the metadata editor is opened after clicking the icon.
) - if the attachment is an image, clicking the icon opens it in the built-in image editor. If the attachment is not an image, the metadata editor is opened after clicking the icon.
•Edit in client application (![]() ) - is displayed only when WebDAV integration is enabled and only next to file types supported by WebDAV. Clicking the icon opens the document for editing in an external application installed on the client computer (the application must support WebDAV for this to work). Saving the document in the client application updates the attachment with the new version automatically.
) - is displayed only when WebDAV integration is enabled and only next to file types supported by WebDAV. Clicking the icon opens the document for editing in an external application installed on the client computer (the application must support WebDAV for this to work). Saving the document in the client application updates the attachment with the new version automatically.
•Update (![]() ) - enables you to replace the original attachment with a new one.
) - enables you to replace the original attachment with a new one.
•After clicking an attachment's name, the attachment is opened.
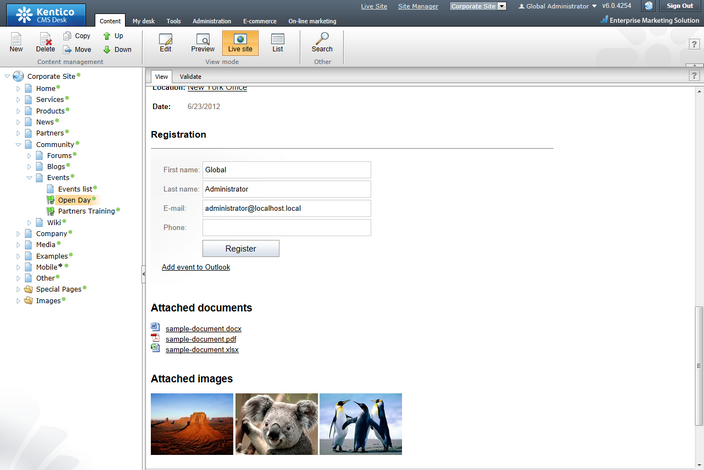
6. Now that we have the attachments uploaded, it's time to have them displayed on the live site. The events are displayed by a repeater on the Events page, so we will have to add the displaying web parts to this page. First, we will add the Document attachments web part. We will configure it so that it will display attachments from Attached documents field.
Select the Events page and switch to the Design tab. Click the Add web part (![]() ) icon of the Main zone web part zone and choose the Attachments -> Document attachments web part. Set the following properties of the web part, leave the rest at the default values.
) icon of the Main zone web part zone and choose the Attachments -> Document attachments web part. Set the following properties of the web part, leave the rest at the default values.
•Show for document types: CMS.BookingEvent
•Attachment group: Event (Booking system) -> Attached documents
•Content before: <h2>Attached documents</h2>
Click OK.
7. Below the documents, we will want the attached images to be displayed. For the images, it will be better to use the Attachment image gallery web part. Click the Add web part (![]() ) icon of the Main zone web part zone and choose the Attachments -> Attachment image gallery web part. Set the following properties of the web part, leave the rest at the default values.
) icon of the Main zone web part zone and choose the Attachments -> Attachment image gallery web part. Set the following properties of the web part, leave the rest at the default values.
•Show for document types: CMS.BookingEvent
•Attachment group: Event (Booking system) -> Attached images
•Content before: <h2>Attached images</h2>
Click OK.
8. If you switch to the live site now, you should see the two web parts displaying the attachments, each web part one group defined earlier in this example. If you add attachments to any other event, they would be displayed with the event too.