|
|

Creating the Blogs page |

|

|

|

|
|
Creating the Blogs page |
|
|

|
|
|
|
Creating the Blogs page |
|
|
|
|
|
Creating the Blogs page |
|
|
|
|
|
|
||
In this part of the guide, we will create the Blogs section. This section will allow users to read blog posts from any number of blogs. Users will also be able to create a new blog directly on the site, as well as add new blog posts.
Most of this functionality is is achieved using the User contributions module web part. For more information about the module, please refer to Kentico CMS Developer's Guide -> Module User contributions.
Detailed information about the Blogs module can be found in Kentico CMS Developer's Guide -> Module Blogs.
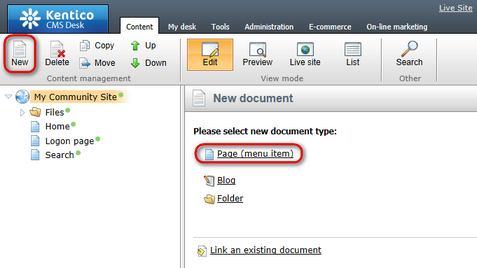
1. Go to CMS Desk, select the root of the content tree and click New. Choose the Page (menu item) document type.
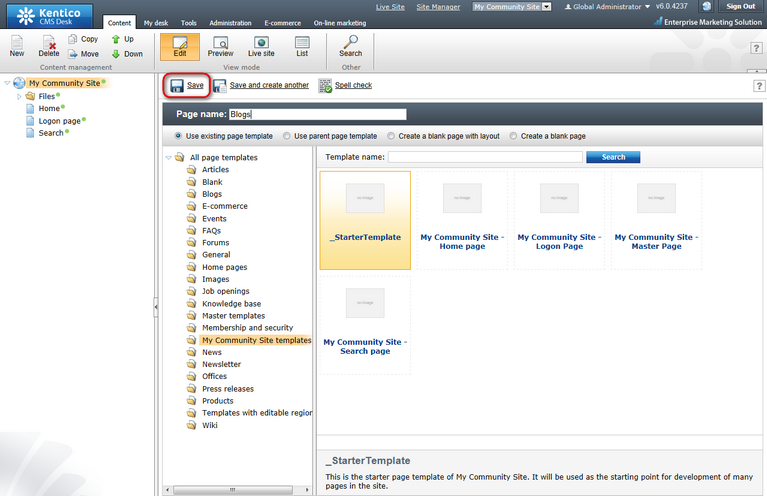
2. We will use the starter page template created in this chapter as the starting point for this page. Choose the My Community Site templates -> _StarterTemplate. For Page name, enter Blogs and click Save.
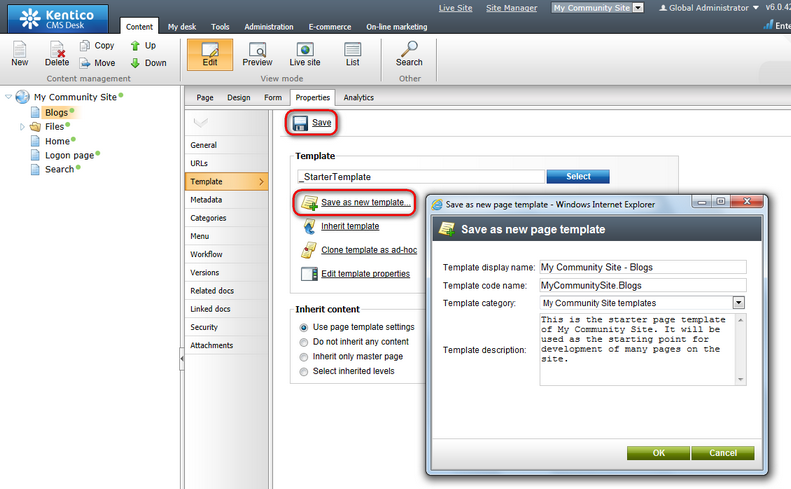
3. Go to the Properties -> Template tab and click the Save as new template link. Enter the following details in the pop-up dialog:
•Template display name: My Community Site - Blogs
•Template code name: MyCommunitySite.Blogs
•Template category: My Community Site templates
•Template description: some text describing the page template
Click OK. Click Save.
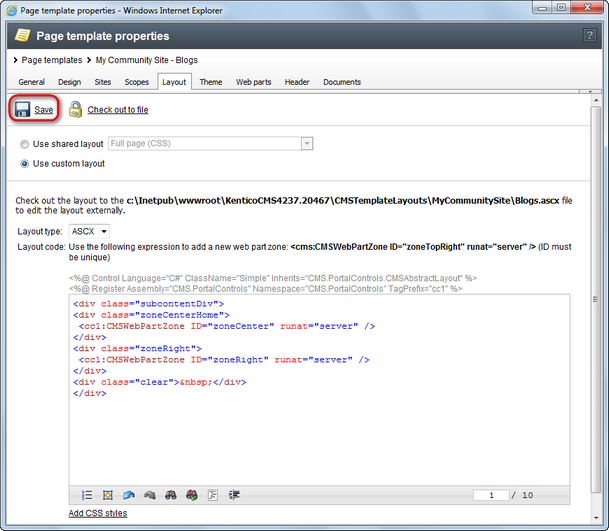
4. On the same tab, click the Edit template properties link. In the pop-up Page template properties window, switch to the Layout tab and replace the original layout with the following code:
<div class="subcontentDiv"> <div class="zoneCenterBlog"> <cc1:CMSWebPartZone ID="zoneCenter" runat="server" /> </div> <div class="zoneRight"> <cc1:CMSWebPartZone ID="zoneRight" runat="server" /> </div> <div class="clear"> </div> </div> |
Click Save.
5. Switch to the Design tab. You should see two web part zones - zoneLeft and zoneRight - just as you defined by the layout above. Let's add web parts to the zoneRight web part zone first.
First of all, we will create an RSS feed of blog posts. Click the Add web part (![]() ) icon, choose the Syndication -> Blog posts RSS feed web part and click OK. In the web part properties window, set the following properties:
) icon, choose the Syndication -> Blog posts RSS feed web part and click OK. In the web part properties window, set the following properties:
•Link text: Recent blog posts
•Feed name: blogs
•Feed title: Recent blog posts
•Feed description: Blog posts RSS feed
•Path: /Blogs/{1}/%
•Transformation name: cms.blogpost.rssitem
•Document types: cms.blogpost
Leave defaults for the remaining properties and click OK. When the web part is added to the page, drag and drop it up between the Shortcuts menu and the Logon miniform.
Below the Shortcuts menu, the Tag cloud web part will be displayed. After clicking a tag in the web part, users will be redirected to the /Blogs/Blog-posts page, where a list of blog posts tagged with the clicked tag will be displayed. Click the Add web part (![]() ) icon again, choose the Tagging & categories -> Tag cloud web part and click OK. In the web part properties window, set the following properties:
) icon again, choose the Tagging & categories -> Tag cloud web part and click OK. In the web part properties window, set the following properties:
•Tag group name: Blogs
•Document list URL: /Blogs/Blog-posts
•Show for document types: CMS.Blog;CMS.MenuItem
•Web part container: Community Site - Orange Box
•Web part container title: Tag cloud
Click OK.
Below the Tag cloud, we will place an info-box displaying links to 3 latest blogs on the site. This will be achieved using the Repeater web part. Click the Add web part (![]() ) icon again, choose the Listings and viewers -> Repeater web part and click OK. In the web part properties window, set the following properties:
) icon again, choose the Listings and viewers -> Repeater web part and click OK. In the web part properties window, set the following properties:
•Web part control ID: rptBlogList
•Disable view state: enabled
•Show for document types: CMS.MenuItem
•Path: ./%
•Document types: CMS.Blog
•Select top N documents: 3
•Transformation: Community.Transformations.BlogsListRight
•Cache dependencies: nodes|{%CurrentSite.SiteName|(tolower)%}|cms.blog|all
•Web part container: Community Site - Gray Box
•Web part container title: Recent blogs
•Content after: <a href="~/Blogs/Blog-list.aspx" title="All blogs" class="viewAllBlogs">View all blogs</a>
Click OK.
Next on is another similar info box. This one will be displaying latest blog comments. Click the Add web part (![]() ) icon again, choose the Blogs -> Blogs comments viewer web part and click OK. In the web part properties window, set the following properties:
) icon again, choose the Blogs -> Blogs comments viewer web part and click OK. In the web part properties window, set the following properties:
•Transformation name: Community.Transformations.BlogComments
•Selected columns: CommentPostDocumentID,CommentDate,CommentUserName,CommentText
•Hide if no record found: disabled
•No record found text: There are currently no comments.
•Web part container: Community Site - Gray Box
•Web part container title: Latest blog comments
Click OK.
The last web part in the right column will be the Posts archive web part. This web part will be displaying links to the latest blog months. The web part will not be displayed on this page, but only when a blog, blog month or blog post is displayed. Click the Add web part (![]() ) icon again, choose the Blogs -> Post archive web part and click OK. In the web part properties window, set the following properties:
) icon again, choose the Blogs -> Post archive web part and click OK. In the web part properties window, set the following properties:
•Show for document types: cms.blog;cms.blogmonth;cms.blogpost
•Hide if no record found: disabled
•No record found text: No data in archive.
•Web part container: Community Site - Gray Box
•Web part container title: Post archive
Click OK.
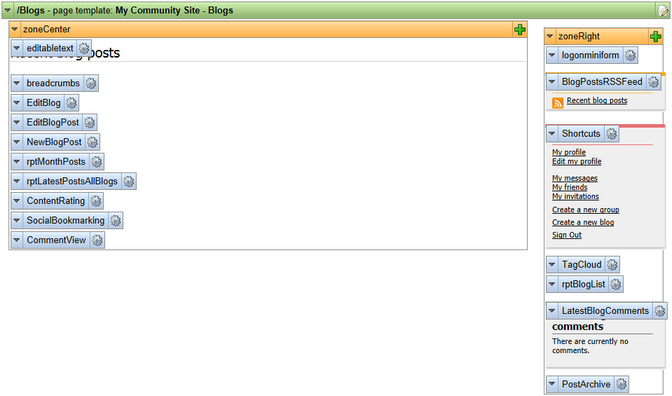
The zoneLeft web part zone is finished. You can see the desired appearance in the screenshot below. Notice that some of the web parts are not displaying any content yet. This is because there is no content to be displayed yet, but when the content is added, all the web parts should work fine. You will see later on in this guide.
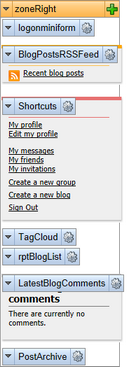
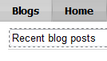
We will move to the zoneCenter web part zone now. First, let's enter the heading text. Switch to the Page tab and enter Recent blog posts into the text box representing the web part. Click Save.
The heading that we've just added will be displayed only on the title page. When a content of a blog is displayed, the heading will be replaced by breadcrumbs of the same size. These breadcrumbs will be clickable and will indicate the current position in the blogs hierarchy. Click the Add web part (![]() ) icon again, choose the Navigation -> Breadcrumbs web part and click OK. In the web part properties window, set the following properties:
) icon again, choose the Navigation -> Breadcrumbs web part and click OK. In the web part properties window, set the following properties:
•Show for document types: CMS.BlogMonth;CMS.BlogPost;CMS.Blog
•Starting path: /Blogs
•Document types: CMS.Blog;CMS.BlogMonth;CMS.MenuItem
•Content before: <div class="blogsTopBreadcrumbs">
•Content after: </div>
Click OK.
Now we have the heading ready, so let's get to the three web parts enabling users to edit blog properties, create blog posts and edit blog posts directly on the live site. As mentioned above, this functionality will be achieved using the User contributions module web parts.
The first one will be used for blogs editing. Click the Add web part (![]() ) icon again, choose the User contributions -> Edit contribution web part and click OK. In the web part properties window, set the following properties:
) icon again, choose the User contributions -> Edit contribution web part and click OK. In the web part properties window, set the following properties:
•Web part control ID: EditBlog
•Show for document types: CMS.Blog
•Alternative form name: CMS.Blog.EditBlog
•Edit button label: Edit blog
•Allow delete: disabled
•Content before: <div class="EditPanel">
•Content after: </div>
Click OK.
The second of the User contributions web parts will be used to enable users edit blog posts. Click the Add web part (![]() ) icon again, choose the User contributions -> Edit contribution web part and click OK. In the web part properties window, set the following properties:
) icon again, choose the User contributions -> Edit contribution web part and click OK. In the web part properties window, set the following properties:
•Web part control ID: EditBlogPost
•Show for document types: CMS.BlogPost
•Alternative form name: CMS.BlogPost.EditBlogPost
•Content before: <div class="EditPanel">
•Content after: </div>
Click OK.
The last of the three User contributions web parts will enable adding of new blog posts. Click the Add web part (![]() ) icon again, choose the User contributions -> Contributions list web part and click OK. In the web part properties window, set the following properties:
) icon again, choose the User contributions -> Contributions list web part and click OK. In the web part properties window, set the following properties:
•Web part control ID: NewBlogPost
•Show for document types: CMS.Blog
•Path for new documents: "." (do not include the parentheses, these are only indicating that you should enter the dot only)
•Allowed new document types: CMS.BlogPost
•Alternative form name: CMS.BlogPost.EditBlogPost
•Display list of documents: disabled
•New item button label: New blog post
•List button label: My blog posts
•Allow delete: disabled
•Content before: <div class="EditPanel">
•Content after: </div>
Click OK.
Now we will add two repeaters with similar settings. The first repeater will be displayed only on Blog month documents and will display a list of all blog posts in the month, paged by 5 posts. Click the Add web part (![]() ) icon again, choose the Listings and viewers -> Repeater web part and click OK. In the web part properties window, set the following properties:
) icon again, choose the Listings and viewers -> Repeater web part and click OK. In the web part properties window, set the following properties:
•Web part control ID: rptMonthPosts
•Show for document types: cms.blogmonth
•Path: ./%
•Document types: CMS.BlogPost
•Transformation: Community.Transformations.BlogsAllBlogsPosts
•Selected item transformation: Community.Transformations.BlogPostDetail
•Enable paging: enabled
•Page size: 5
•Cache dependencies: nodes|{%CurrentSite.SiteName|(tolower)%}|cms.blogpost|all
Click OK.
The second repeater will display a list of 5 latest blog posts on the Blogs title page (the page that you are creating now) and on a particular blog's title page. The repeater will also be used for displaying particular blog posts. Click the Add web part (![]() ) icon again, choose the Listings and viewers -> Repeater web part and click OK. In the web part properties window, set the following properties:
) icon again, choose the Listings and viewers -> Repeater web part and click OK. In the web part properties window, set the following properties:
•Web part control ID: rptLatestPostsAllBlogs
•Disable view state: enabled
•Show for document types: CMS.Blog;CMS.BlogPost;CMS.MenuItem
•Path: ./%
•Document types: cms.blogpost
•Order by expression: BlogPostDate DESC
•Select top N documents: 5
•Transformation: Community.Transformations.BlogsAllBlogsPosts
•Selected item transformation: Community.Transformations.BlogPostDetail
•Cache dependencies: nodes|{%CurrentSite.SiteName|(tolower)%}|cms.blogpost|all
Click OK.
Three web parts remaining. The next one will be the Content rating web part. It will be displayed only for blog posts and will enable users to rate the content of the blog posts. Click the Add web part (![]() ) icon again, choose the Content rating -> Content rating web part and click OK. In the web part properties window, set the following properties:
) icon again, choose the Content rating -> Content rating web part and click OK. In the web part properties window, set the following properties:
•Show for document types: CMS.BlogPost
•Content before: <div class="blogContentRating">
•Content after: </div><br />
Click OK.
The Social bookmarking web part will be placed below the Content rating web part and will enable users to bookmark blog posts via a large number of social bookmarking services. Click the Add web part (![]() ) icon again, choose the Community services -> Social bookmarking web part and click OK. In the web part properties window, set the following properties:
) icon again, choose the Community services -> Social bookmarking web part and click OK. In the web part properties window, set the following properties:
•Show for document types: CMS.BlogPost
•Bookmarking services: enable the check-boxes for all social bookmarking services that you want to be available
•Content after: <br /><br />
Click OK.
The last web part on the page will also be displayed only for blog posts. It is the Comments view web part, enabling users to post blog comments and displaying the comments. Click the Add web part (![]() ) icon again, choose the Blogs -> Comment view web part and click OK. In the web part properties window, set the following properties:
) icon again, choose the Blogs -> Comment view web part and click OK. In the web part properties window, set the following properties:
•Show for document types: CMS.BlogPost
•Check permissions: disabled
•Comment separator: <div class="PostCommentSeparatorLine"> </div>
•Show edit button: enabled
•Enable user pictures: enabled
•User picture width: 66
•User picture height: 66
•Content before: <div class="blogComments">
•Content after: </div>
Click OK.
In the screenshot below, you can see the desired appearance of the page in Design tab. As mentioned above, no content is displayed as there is no content (no blogs, no posts, ...) on the site yet. However, as the site gets populated with content, all web parts should be fully functional.